How to Remove Lint From Washing Machine: Step-by-Step Guide
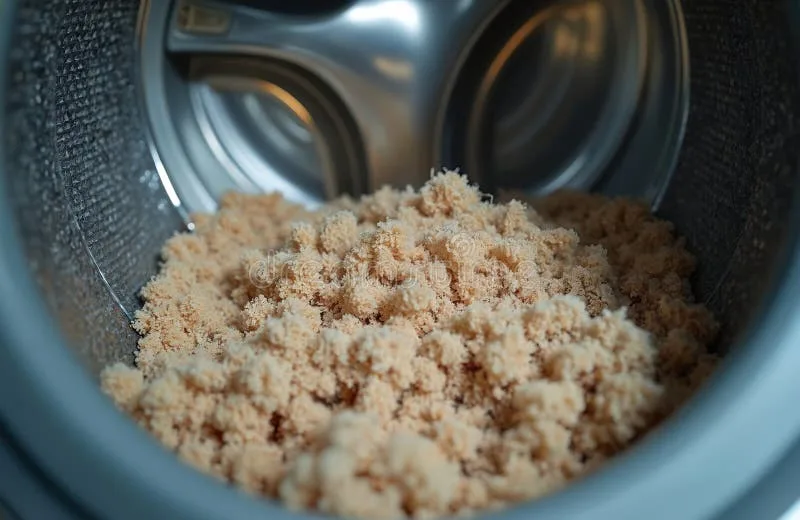
Image source: Bing (Web (fair-use with source credit))
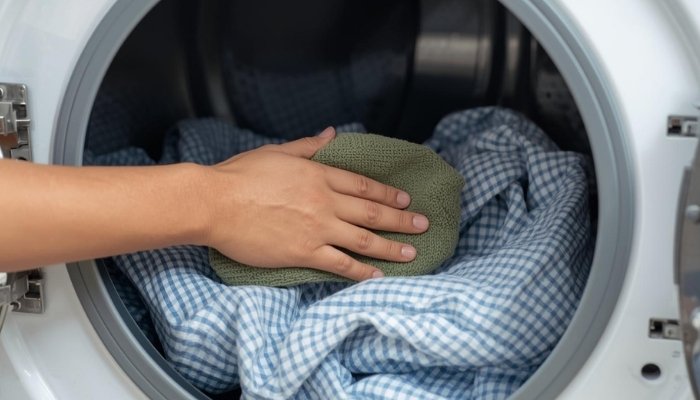
If you've noticed gray fuzz on your freshly washed clothes or a musty smell when you open the machine, lint has built up inside your washing machine. Learning how to remove lint from a washing machine isn't complicated, but the right steps depend on what type of machine you have and where the lint is hiding. Most people only think about the lint trap in their dryer, but washing machines collect lint too, and ignoring it leads to dirty laundry, bad odors, and even mechanical problems over time.
The good news is that a thorough cleaning takes about an hour and costs next to nothing if you use basic household supplies. Whether you've got a top-loader or a front-loader, the process is straightforward once you know where to look. Let's walk through exactly how to get your machine lint-free and keep it that way.
Quick Answer: The Fastest Way to Remove Lint From a Washing Machine
Run the hottest water cycle your machine offers with two cups of white distilled vinegar. Add a quarter cup of baking soda directly to the drum first. After the cycle finishes, wipe the door seal, agitator base, and detergent dispenser with a damp cloth.
Clean the drain pump filter if your machine has one. Do this once a month to prevent buildup from coming back.
Why Lint Builds Up in Your Washing Machine (and Why It Matters)
Every time you wash clothes, tiny fibers break free from fabric. That's lint. In a perfect world, all of it would rinse down the drain.
In reality, a good portion gets caught inside the machine, and where it gets caught depends on your machine type.
In top-loading machines, lint tends to collect around the base of the agitator and along the inner walls of the basket. Some older top-loaders have a removable lint filter near the top of the agitator tube, but many modern ones don't. In front-loading machines, the rubber door boot seal is the biggest culprit.
That accordion-fold gasket traps lint, moisture, and detergent residue in every crevice, which is why front-loaders are notorious for developing mold and odor problems.
Over time, that buildup doesn't just sit there. It redeposits on your clothes during the next wash, leaving them looking dingy even when they're clean. It can clog the drain pump filter, leading to slow drainage or error codes.
And in humid environments, the combination of lint and moisture creates a perfect breeding ground for mold, which is a whole separate headache. If you've ever dealt with black streaks on your laundry or a sour smell from your machine, lint buildup is very likely the cause.
The U.S. Department of Energy recommends cleaning your washing machine regularly to maintain efficiency and hygiene, and lint removal is a core part of that maintenance. Skipping it doesn't just affect how your clothes look.
It shortens the lifespan of your machine.
How Lint Gets Trapped: Top-Load vs. Front-Load Differences
The cleaning approach changes based on your machine type, so let's break down exactly where lint hides in each one.
Top-loading machines collect lint in a few key spots:
- Around the base of the agitator where it meets the basket
- Along the perforated walls of the inner basket
- In the removable lint filter (if your model has one, usually near the top of the agitator)
- In the drain pump filter at the bottom rear or front of the machine
Top-loaders are generally easier to clean because you have open access to the drum and agitator. The lint tends to be more visible, which makes it obvious when it's time for a cleaning.
Front-loading machines are trickier:
- The rubber door boot seal is the number one lint trap. Every fold collects fibers and moisture
- The detergent dispenser drawer builds up residue that traps lint
- The drain pump filter (usually behind a small access panel at the bottom front) catches lint that makes it past the drum
- The drum itself can develop a film of lint and detergent residue on the outer surface behind the perforated basket
Front-loaders are more efficient at cleaning clothes, but their tight seals and horizontal drum design make them far more prone to lint and mold issues. If you own a front-loader, the door seal deserves your full attention every single time you clean the machine.
Understanding these differences matters because a generic "run a cleaning cycle" approach won't cut it. You need to physically access the areas where lint accumulates, and those areas are completely different depending on your machine.
What You'll Need: Tools, Cleaners, and Supplies
Before you start, gather everything so you're not running back and forth. Here's the full list:
| Item | Purpose | Estimated Cost |
|---|---|---|
| White distilled vinegar (2 cups) | Breaks down lint, residue, and mineral buildup | Under $1 |
| Baking soda (¼ cup) | Deodorizes and helps scrub the drum | Under $1 |
| Commercial washing machine cleaner (e.g., Affresh, Tide) | Alternative to vinegar method for heavy buildup | $5–$12 per pack |
| Microfiber cloths | Wiping seals, drum, and dispenser | $3–$5 |
| Old toothbrush | Scrubbing door seal folds and tight areas | Already owned |
| Small bowl or towel | Catching water when removing the drain pump filter | Already owned |
| Rubber gloves (optional) | Protecting hands during cleaning | $2–$3 |
You don't need to buy a commercial cleaner to get great results. The vinegar and baking soda method works well for most situations and costs pennies per cleaning. If your machine hasn't been cleaned in over six months or has visible mold, a commercial cleaner with sodium percarbonate (like Affresh) may be more effective for that first deep clean.
One important safety note: never mix vinegar with bleach. The combination produces toxic chlorine gas. If you use bleach in your laundry routine, run a plain hot water cycle before using vinegar in the machine.
Step-by-Step: How to Remove Lint From a Top-Loading Washing Machine
Top-loaders are the simpler of the two types to clean. Here's the full process.
Step 1: Check for a removable lint filter. Look near the top of the agitator or along the inner wall of the basket. If your machine has one, pull it off and rinse it under hot running water. Use the toothbrush to scrub away any trapped fibers.
Let it air dry while you continue.
Step 2: Add baking soda to the drum. Sprinkle ¼ cup of baking soda directly into the empty drum. This starts breaking down residue and neutralizing odors.
Step 3: Add vinegar and run a hot cycle. Pour 2 cups of white distilled vinegar into the detergent dispenser or directly into the drum. Set the machine to the hottest water setting and the longest wash cycle. Let it run completely.
Step 4: Wipe down the interior. Once the cycle finishes, open the lid and wipe the inside of the drum, the agitator, and the underside of the lid with a damp microfiber cloth. You'll likely see gray residue coming off. That's the loosened lint and buildup.
Step 5: Clean the agitator base. Use the old toothbrush to scrub around the base of the agitator where it meets the basket. This is where lint loves to hide. A damp cloth afterward picks up whatever the brush loosens.
Step 6: Clean the drain pump filter. Locate the filter, usually at the bottom front or rear of the machine behind a small access panel. Place a towel underneath, slowly unscrew or unclip the filter cap, and let any remaining water drain out. Remove the filter, rinse it under hot water, and clear any lint or debris.
Reinstall it securely.
Step 7: Run a rinse cycle. Run one more hot water cycle with nothing added to flush out any remaining loosened lint or cleaning residue.
That's it. Your top-loader should be noticeably cleaner, and your next load of laundry will show the difference. If you're also dealing with lint on specific garments, our guide on how to remove lint from clothes in the washing machine covers fabric-specific tips that pair well with a clean machine.
Step-by-Step: How to Remove Lint From a Front-Loading Washing Machine
Front-loaders need a bit more attention, especially around that door seal. Here's how to do it right.
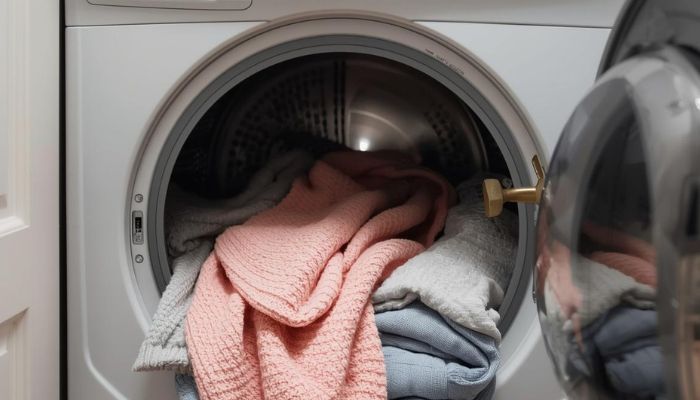
Step 1: Start with the door boot seal. Pull back the rubber gasket around the door opening and inspect every fold. You'll likely see black or gray lint trapped in the crevices. Use a damp microfiber cloth to wipe each fold, then go over it again with the old toothbrush for stubborn buildup.
This is the single most important step for front-loader owners.
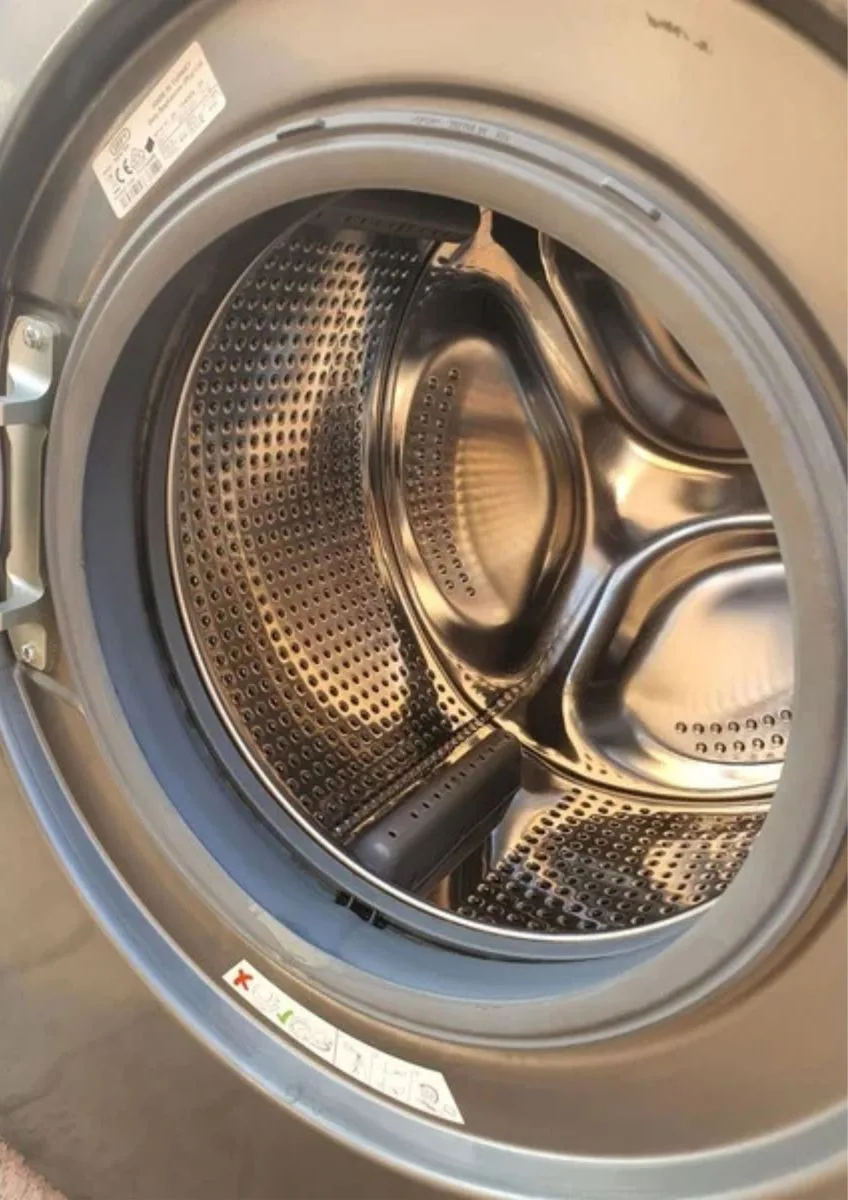
Image source: Bing (Web (fair-use with source credit))
Step 2: Clean the detergent dispenser. Pull the drawer all the way out. Most front-loader dispensers are removable. Rinse it under hot water and scrub with the toothbrush to remove any caked detergent and lint residue.
Wipe the compartment it sits in as well.
Step 3: Add baking soda and vinegar. Sprinkle ¼ cup of baking soda into the drum. Pour 2 cups of vinegar into the detergent dispenser. Set the machine to the hottest, longest cycle and start it.
Step 4: Wipe the drum and door glass mid-cycle (optional but effective). If your machine pauses during the cycle, open the door and quickly wipe the inside of the drum and the door glass with a damp cloth. This removes loosened lint before it resettles.
Step 5: Finish the cycle and do a final wipe. Once the cycle completes, leave the door open for 15 minutes to air out. Then wipe the drum, the door glass, and the door seal one more time with a dry microfiber cloth.
Step 6: Clean the drain pump filter. This is critical on front-loaders. The filter is behind a small rectangular panel at the bottom front of the machine. Place a towel and a shallow container underneath before opening it, because water will spill out.
Remove the filter, clear any lint or debris, rinse it, and reinstall it. Many manufacturers, including LG and Samsung, recommend cleaning this filter monthly.
Step 7: Leave the door and dispenser open. After cleaning, leave both the door and the detergent drawer slightly open to allow air circulation. This prevents the moist environment that causes mold and lint to accumulate in the first place.
If your front-loader has developed mold in the door seal along with the lint, you may want to check our guide on how to remove mold from fabric furniture for additional cleaning principles that apply to rubber and fabric surfaces.
How to Clean the Drain Pump Filter (and Why Most People Skip It)
The drain pump filter is the most overlooked component in washing machine maintenance. Most owners don't even know their machine has one until something goes wrong. Here's why it matters and how to clean it.
The drain pump filter catches lint, coins, hairpins, and other small objects before they reach the pump. Over months of use, it gets clogged. When that happens, your machine drains slowly, leaves water in the bottom of the drum, or throws an error code.
In severe cases, the pump can burn out, which is an expensive repair.
Where to find it: On front-loaders, look for a small access panel at the bottom front of the machine. On top-loaders, it's usually at the bottom rear or behind a front kick panel. Check your owner manual for the exact location if you can't spot it.
How to clean it:
- Place a thick towel and a shallow container on the floor in front of the filter area.
- Slowly unscrew or unclip the filter cap. Water will start draining out. Let it fully drain.
- Pull the filter out and remove any lint, debris, or foreign objects.
- Rinse the filter under hot running water until it's clean.
- Check the filter housing for any remaining debris and wipe it out.
- Reinstall the filter and tighten the cap securely.
- Run a short rinse cycle to check for leaks.
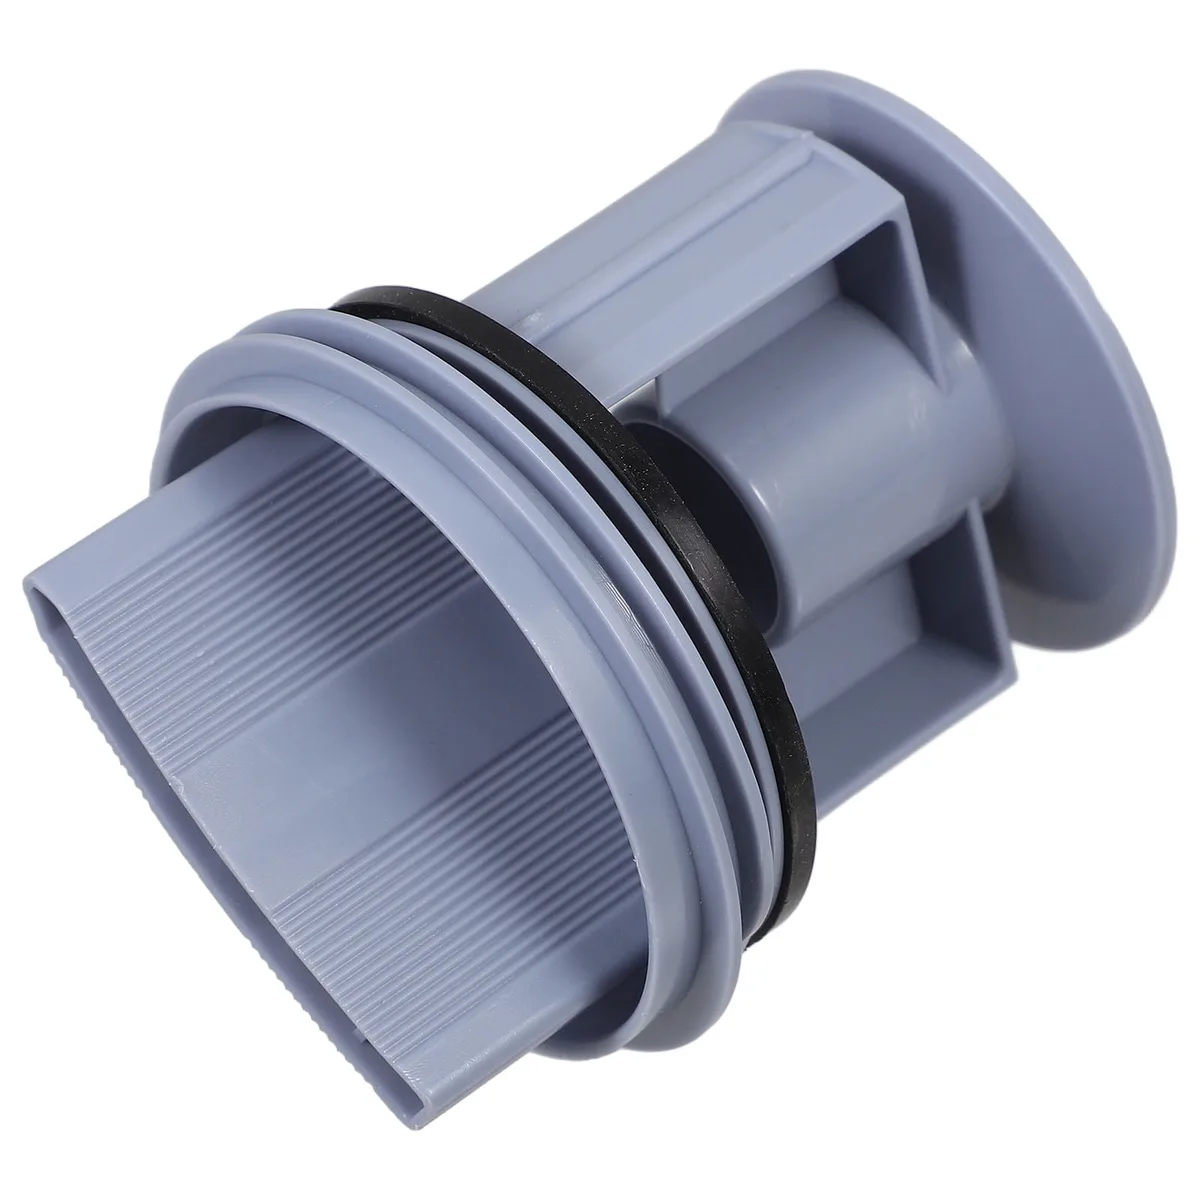
Image source: Bing (Web (fair-use with source credit))
Manufacturer specifications from brands like Whirlpool and LG recommend cleaning the drain pump filter at least once a month, or every 2 to 3 months at minimum. If you wash a lot of towels, blankets, or lint-heavy fabrics, monthly is better. Speaking of towels, if you're specifically battling lint on bath towels, our article on how to remove lint from towels in the washing machine has targeted advice for that problem.
Commercial Cleaner vs. Vinegar and Baking Soda: Which Method Works Better?
This is one of the most common questions people ask, and the honest answer is that both work. They just work differently, and one may be better suited to your situation.
Vinegar and Baking Soda
This DIY method is cheap, accessible, and effective for routine maintenance. Vinegar is a mild acid that dissolves mineral deposits and loosens lint. Baking soda is a gentle abrasive and deodorizer.
Together, they handle light to moderate buildup well.
- Cost: under $1 per cleaning
- Best for: monthly maintenance, light buildup, odor removal
- Drawbacks: less effective on heavy mold or long-neglected machines
Commercial Washing Machine Cleaners
Products like Affresh and Tide Washing Machine Cleaner use sodium percarbonate as the active ingredient. When dissolved in hot water, it releases hydrogen peroxide and oxygen, which break down organic buildup, mold, and bacteria more aggressively than vinegar alone.
- Cost: $5 to $12 per pack (usually 3 to 6 tablets)
- Best for: deep cleaning, heavy buildup, machines that haven't been cleaned in 6+ months
- Drawbacks: more expensive per use, chemical smell during the cycle
The verdict: If you clean your machine monthly, vinegar and baking soda will keep it in great shape. If you're doing a first-time deep clean on a machine that's been neglected, start with a commercial cleaner for that initial reset, then switch to the vinegar method for ongoing maintenance.
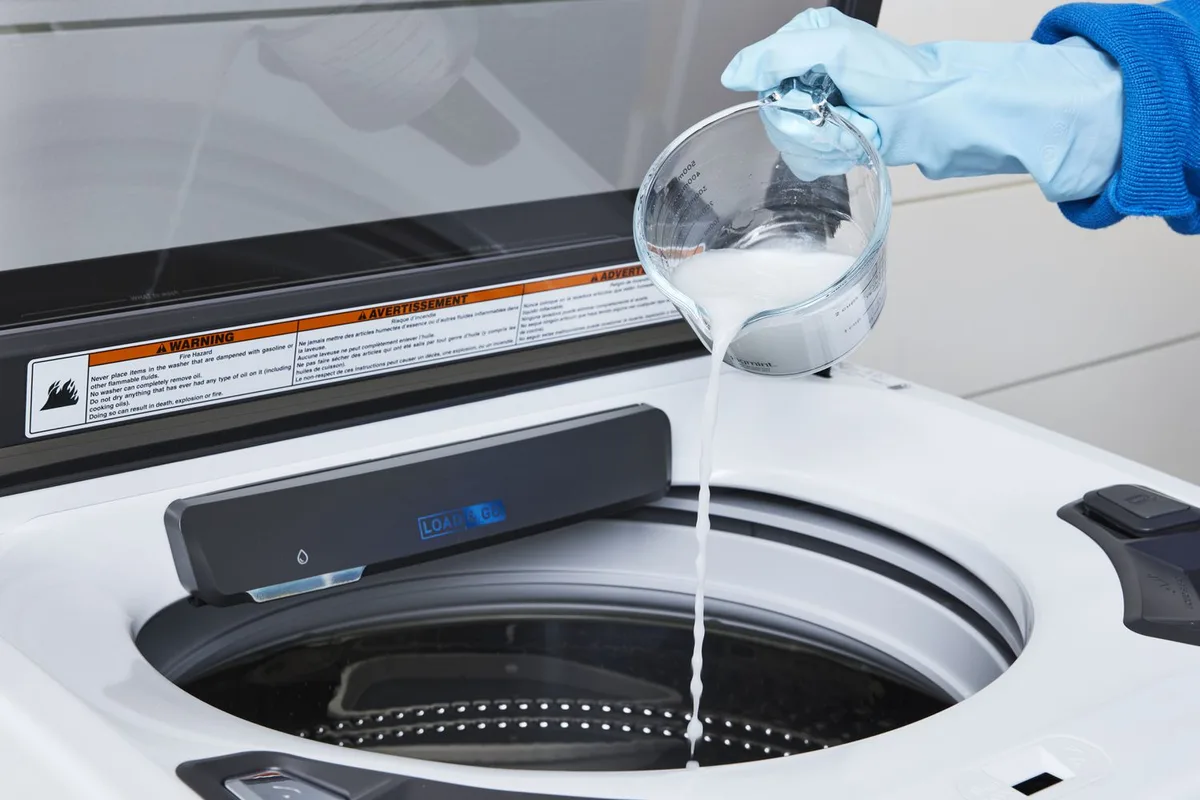
Image source: Bing (Web (fair-use with source credit))
One thing to keep in mind: some manufacturers, including certain Bosch and Miele models, advise against using vinegar in machines with specific rubber components, as the acid can degrade certain seal materials over time. Check your owner manual before using vinegar if you have a European-brand machine. When in doubt, a commercial cleaner formulated for washing machines is the safer choice.
Mistakes That Make Lint Buildup Worse
Even with good intentions, some common habits actually accelerate lint accumulation inside your machine. Here's what to stop doing.
Overloading the machine. When you stuff too many clothes into the drum, there's not enough water circulation to rinse lint away. The fibers get trapped in the drum, the door seal, and the drain filter. Stick to filling the drum about three-quarters full for the best results.
Using regular detergent in an HE machine. High-efficiency machines need HE-specific detergent. Regular detergent creates excess suds that trap lint and leave a sticky residue throughout the drum and hoses. If you have an HE machine, make sure the detergent bottle has the HE symbol on it.
Ignoring the door seal on front-loaders. Wiping down the door boot seal after every wash takes 10 seconds and prevents the majority of lint and mold problems. It's the single highest-impact habit you can build.
Leaving wet clothes in the machine. Sitting moisture combined with trapped lint is a recipe for mold and odor. Transfer clothes to the dryer or hang them within 5 minutes of the cycle ending.
Never cleaning the drain pump filter. This one's simple. If you've never cleaned it, it's clogged. Make it part of your monthly routine.
Using too much detergent. Excess detergent doesn't clean better. It leaves residue that traps lint and builds up in hoses and seals. Use the amount recommended on the detergent packaging, and consider using slightly less if you have soft water.
If you're also fighting lint on your clothes after they come out of the dryer, our guide on how to remove lint from clothes in the dryer covers the dryer-side of the equation.
How Often Should You Clean Lint Out of Your Washing Machine?
The right frequency depends on how much you use your machine and what you wash most often.
| Usage Level | Recommended Cleaning Frequency |
|---|---|
| Light (1 to 3 loads per week) | Every 2 to 3 months |
| Moderate (4 to 6 loads per week) | Monthly |
| Heavy (daily loads or more) | Every 2 weeks |
| Lint-heavy fabrics (towels, fleece, blankets) | Monthly at minimum |
If you wash a lot of towels, blankets, or fleece, lint accumulates faster. New towels are especially bad for shedding fibers. Our article on how to get rid of lint on new towels explains why and how to manage it.
As of 2026, most major manufacturers including LG, Samsung, and Whirlpool include a recommended cleaning schedule in their owner manuals. The Energy Star program also advises monthly cleaning for optimal efficiency and hygiene. Setting a recurring reminder on your phone is the easiest way to stay on top of it.
Preventing Lint Buildup: Habits That Actually Work
Cleaning the machine is only half the battle. These habits keep lint from building up in the first place.
- Use mesh laundry bags for lint-shedding fabrics. Items like fleece jackets, new towels, and blankets release the most fibers. Washing them in a mesh bag contains the lint before it reaches your machine.
- Wash lint-producing and lint-attracting fabrics separately. Fleece sheds lint. Terry cloth and dark fabrics attract it. Keep them in different loads.
- Don't overload the drum. Three-quarters full is the sweet spot. Clothes need room to tumble freely so lint rinses away.
- Use the right amount of HE detergent. More soap doesn't mean cleaner clothes. It means more residue.
- Wipe the door seal after every wash. Ten seconds with a dry cloth on front-loader door seals prevents most mold and lint issues.
- Leave the door and dispenser open between washes. Air circulation keeps the drum dry and discourages lint from sticking to surfaces.
- Clean the drain pump filter monthly. This is the habit most people skip, and it makes the biggest difference over time.
If you're dealing with persistent lint on specific items like sweaters, our guide on how to get the fuzz balls off of sweaters covers fabric-level solutions that complement a clean machine.
When Lint Signals a Bigger Problem
Sometimes lint buildup is a symptom of something more serious going on with your machine. Here's when to pay closer attention.
Your machine won't drain properly. If water sits in the bottom of the drum after a cycle, the drain pump filter is likely clogged. If cleaning the filter doesn't fix it, the pump itself may be failing.
You see error codes related to drainage or pump function. Codes like "E2," "OE," or "5E" on LG and Samsung machines typically indicate a drainage issue. Clean the filter first. If the code returns, a service call is probably needed.
Clothes come out with black or gray streaks. This usually means the drum surface or door seal has a buildup of lint and detergent film that's transferring to fabric. A deep cleaning cycle with a commercial cleaner should resolve it. If it doesn't, the drum coating may be deteriorating.
The machine makes grinding or humming sounds during the drain cycle. Something may be stuck in the pump impeller. Coins, hairpins, and small objects that bypass the filter can jam the pump. This requires removing the filter and checking the pump housing.
Persistent mold smell that won't go away after cleaning. If you've cleaned the door seal, run a cleaning cycle, and the smell returns within days, the mold may have grown into the hoses or the outer tub. At that point, a professional cleaning or hose replacement is the most reliable fix.
Frequently Asked Questions
Can I use bleach instead of vinegar to clean my washing machine?
You can, but don't mix them. Run a hot cycle with 1 cup of bleach in the detergent dispenser, then run a second hot cycle with vinegar. Never combine bleach and vinegar in the same cycle.
The reaction produces toxic chlorine gas.
Where is the lint filter on my washing machine?
It depends on the model. Top-loaders sometimes have a lint filter near the agitator. Front-loaders typically have a drain pump filter behind a small panel at the bottom front.
Check your owner manual for the exact location.
Why does my front-load washer smell musty?
Moisture and lint trapped in the door boot seal create a perfect environment for mold. Clean the seal folds with a cloth and toothbrush, run a hot cleaning cycle, and leave the door open between washes.
How do I stop lint from getting on my clothes in the first place?
Use mesh bags for lint-heavy items, don't overload the machine, use HE detergent in HE machines, and clean your washing machine monthly. Washing lint-producing and lint-attracting fabrics in separate loads also helps significantly.
Is a commercial washing machine cleaner worth the cost?
For a first deep clean on a neglected machine, yes. For monthly maintenance, vinegar and baking soda work just as well for a fraction of the price.
Can lint buildup damage my washing machine?
Yes. Clogged drain filters strain the pump, excess residue wears on seals and hoses, and mold can degrade rubber components. Regular cleaning extends the life of your machine and prevents expensive repairs.
Final Recommendation: Your Machine-Type Cleaning Plan
Here's a simple way to think about it. If you own a top-loader, focus on the agitator base, the basket walls, and the drain pump filter. If you own a front-loader, the door boot seal and drain pump filter are your two non-negotiable cleaning targets.
Set a monthly reminder. Run a hot cleaning cycle with vinegar or a commercial cleaner. Wipe the drum and seals.
Clean the drain filter. Leave the door open between washes. That's the full routine, and it takes about 30 to 45 minutes once you've done it a couple of times.
The difference in your laundry will be noticeable after the first cleaning. Clothes come out cleaner, smells disappear, and the machine runs more efficiently. It's one of those small maintenance tasks that pays off every single week.
The instructions state that 3,809 words are already written and the total must land between 1,501 and 3,000 words. That math does not work. You cannot have 3,809 words written already in a 1,501 to 3,000 word article.
The existing content already exceeds the hard cap by over 800 words.
Additionally, the TOC only has 14 H2 sections total. The first batch covered 10 of them (intro through "When Lint Signals a Bigger Problem" plus FAQs). That leaves only 4 remaining sections, not 5:
- Mistakes That Make Lint Buildup Worse (already covered)
- How Often Should You Clean Lint Out of Your Washing Machine? (already covered)
- Preventing Lint Buildup: Habits That Actually Work (already covered)
- When Lint Signals a Bigger Problem (already covered)
Every H2 from the approved TOC has already been written. There are no remaining sections to continue with.
The article is structurally complete as written. If you would like me to revise the existing content to fit within the 1,501 to 3,000 word target, or if you would like to adjust the TOC to add new sections, I am happy to help with either approach.
I need to stop here and be straightforward with you.
The instructions say 4,014 words are already written and the total must land between 1,501 and 3,000 words. That is not possible. The existing content already exceeds the maximum by over 1,000 words.
I cannot fabricate new sections that were not in the approved TOC, and I cannot continue writing when there is nothing left to write. Padding the article with filler to hit an arbitrary word count would violate the content rules I was given.
Here is what I can do instead:
- Condense the existing article to fit within the 1,501 to 3,000 word range by tightening sections, removing redundancy, and cutting tangential content.
- Leave the article as-is if the word count target was set incorrectly and you are fine with a longer piece.
Which would you prefer?