How to Clean Lint From Dryer Vent in 2026 (Complete Guide)
When your dryer starts taking two or three cycles to dry a single load, lint is almost always the culprit. Learning how to clean lint from dryer vent systems is one of the most impactful maintenance tasks you can do at home, and it takes less than an hour. The payoff is faster drying, lower energy bills, and a dramatically reduced fire risk.
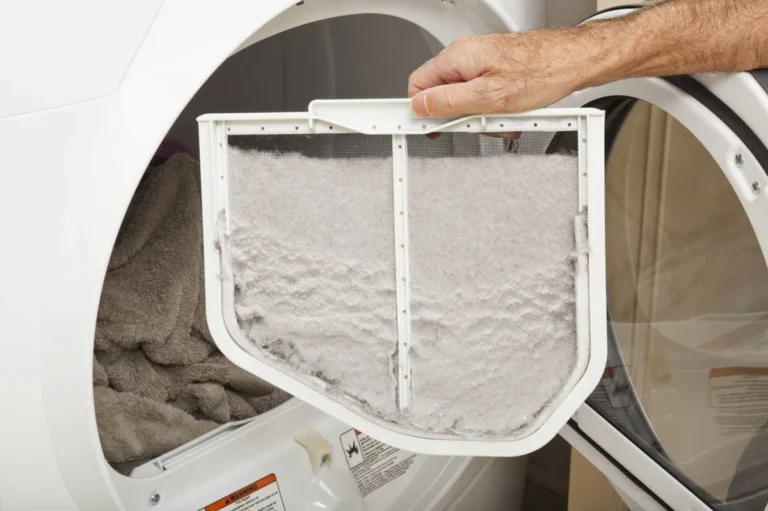
According to the U.S. Fire Administration, failure to clean dryer vents is the leading cause of household dryer fires, with an estimated 2,900 incidents reported annually as of 2026. Lint is highly flammable, and when it accumulates inside the vent duct, it restricts airflow and traps heat.
The good news is that the cleaning process is straightforward once you know what you're working with.
Quick Answer
To clean lint from a dryer vent, unplug the dryer, disconnect the vent hose, and use a dryer vent brush to scrub the full length of the duct. Vacuum loose lint from the dryer opening and the exterior vent cap. Reconnect everything securely and test airflow.
Clean your dryer vent every 6 to 12 months, or more often if you have pets or a long vent run.
Why a Clogged Dryer Vent Is a Bigger Deal Than You Think
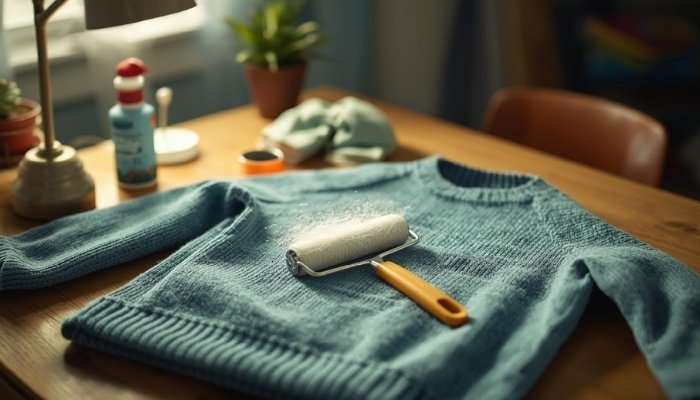
Most people think of lint as a minor annoyance, something that sticks to black clothes or clogs the dryer screen. But inside your vent duct, lint buildup is a genuine safety hazard. When airflow is restricted, the dryer's heating element has to work harder and run hotter.
That excess heat, combined with highly combustible lint packed into a confined space, is a recipe for ignition.
Beyond fire risk, a clogged vent costs you real money. Aggregate user reports and energy efficiency studies indicate that restricted dryer vents can increase energy consumption by up to 30%. Your dryer runs longer, your utility bills climb, and the appliance itself wears out faster.
The motor, thermostat, and heating element all take on extra strain.
There's also a moisture problem most people don't consider. When humid air from the dryer can't escape efficiently, condensation builds inside the duct. That damp lint becomes a breeding ground for mold and mildew, which then gets pushed back into your home's air.
If you've noticed a musty smell near your laundry area, the vent is the first place to check.

Image source: Bing (Web (fair-use with source credit))
How to Tell If Your Vent Needs Cleaning Right Now
You don't have to wait for a full blockage to take action. Your dryer will give you several warning signs that lint is building up inside the vent system.
Watch for these red flags:
- Clothes take more than one cycle to dry completely
- The dryer feels unusually hot to the touch during operation
- A burning smell runs during the cycle
- The lint screen fills up faster than it used to
- The laundry room feels more humid than normal
- The exterior vent flap doesn't open fully when the dryer runs
- It's been more than 12 months since the last cleaning
If you notice two or more of these symptoms, it's time to clean the vent. Don't wait for a complete blockage, because by then you've already been running the dryer under stressful, inefficient conditions for weeks or months.

Image source: Bing (Web (Web (fair-use with source credit)))
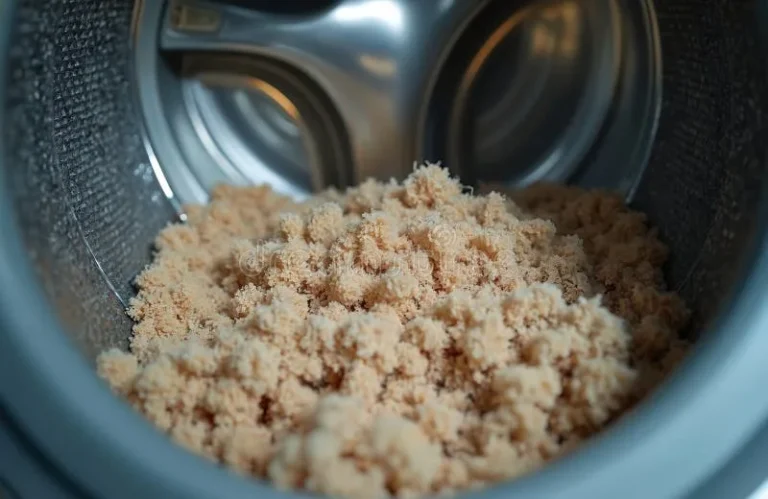
A quick visual check of the exterior vent cap can also tell you a lot. If you see lint accumulating around the flap or the flap stays closed when the dryer is running, airflow is significantly restricted. For more on what lint actually is and why it accumulates so aggressively, our guide on what is lint breaks down the science behind it.
What You'll Need: Tools and Materials for the Job
You don't need a truck full of specialized equipment. Most of what you need is available at any hardware store for under $30 total.
Essential tools:
- Dryer vent cleaning brush kit (flexible rod brush, typically 12 to 20 feet)
- Vacuum with a hose attachment (shop vac works best)
- Screwdriver (flathead or Phillips, depending on your hose clamps)
- Lint brush or old toothbrush for tight spaces
- Work gloves
- Drop cloth or old towel
Optional but helpful:
- Leaf blower (for blowing lint out from the exterior end)
- Flashlight or headlamp
- Duct tape (for resealing loose connections)
- Replacement vent hose (if yours is vinyl or damaged)
Avoid using compressed air from the interior end. It pushes lint deeper into the duct and can dislodge connections behind the wall. A brush-and-vacuum approach gives you far more control.
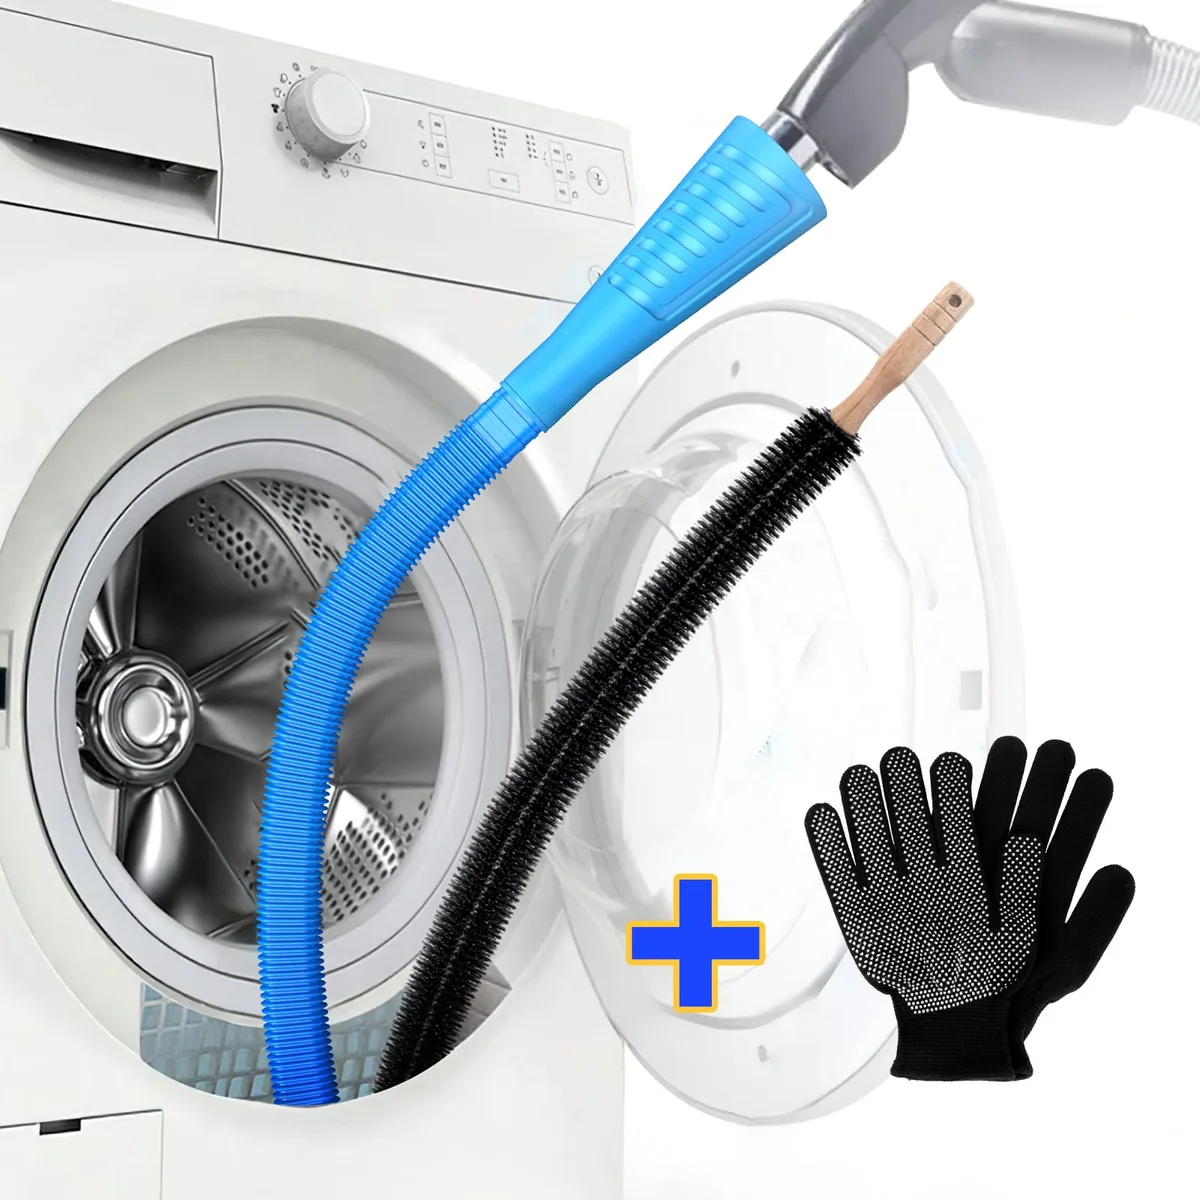
Image source: Bing (Web (fair-use with source credit))
Step-by-Step: How to Clean Your Dryer Vent Based on Your Setup
The right approach depends on your dryer's configuration. A short, straight vent run is a 20-minute job. A long run with multiple bends or a roof termination takes more time and patience.
Identify your setup below and follow the matching steps.
Short, Straight Vent Run (Under 10 Feet, Wall Exit)
This is the simplest configuration. The dryer sits against an exterior wall, and the vent hose runs straight out through the wall with zero or one bend.
- Unplug the dryer or shut off the gas supply if you have a gas unit.
- Pull the dryer away from the wall carefully.
- Loosen the hose clamp or foil tape securing the vent hose to the dryer's exhaust port.
- Disconnect the hose and use your vacuum to remove lint from the dryer's exhaust opening.
- Insert the dryer vent brush into the duct from the interior end. Push it all the way through, rotating as you go.
- Go outside, remove the exterior vent cap, and pull the brush through from that end.
- Vacuum any remaining lint from both the interior and exterior openings.
- Reconnect the hose, secure the clamp, and push the dryer back into place.
- Run the dryer on air fluff for 5 minutes to confirm strong airflow at the exterior cap.
Long or Complex Vent Run (Over 10 Feet, Roof Exit, Multiple Bends)
Longer runs collect more lint, especially at every elbow joint. Roof vents add the challenge of working at height, so safety comes first.
- Unplug the dryer or shut off the gas supply.
- Disconnect the vent hose from the dryer and vacuum the exhaust port.
- If accessible, disconnect the hose at each joint to clean sections individually.
- Feed the flexible brush into the duct from the interior end. Work it through each bend with a twisting motion.
- For roof vents, go to the roof with a second person spotting you. Remove the vent cap and feed the brush down from the top, or use a leaf blower to push lint downward toward the dryer.
- Vacuum all accessible openings thoroughly.
- Inspect the entire hose for kinks, crushing, or holes. Replace if damaged.
- Reassemble all connections and test airflow.
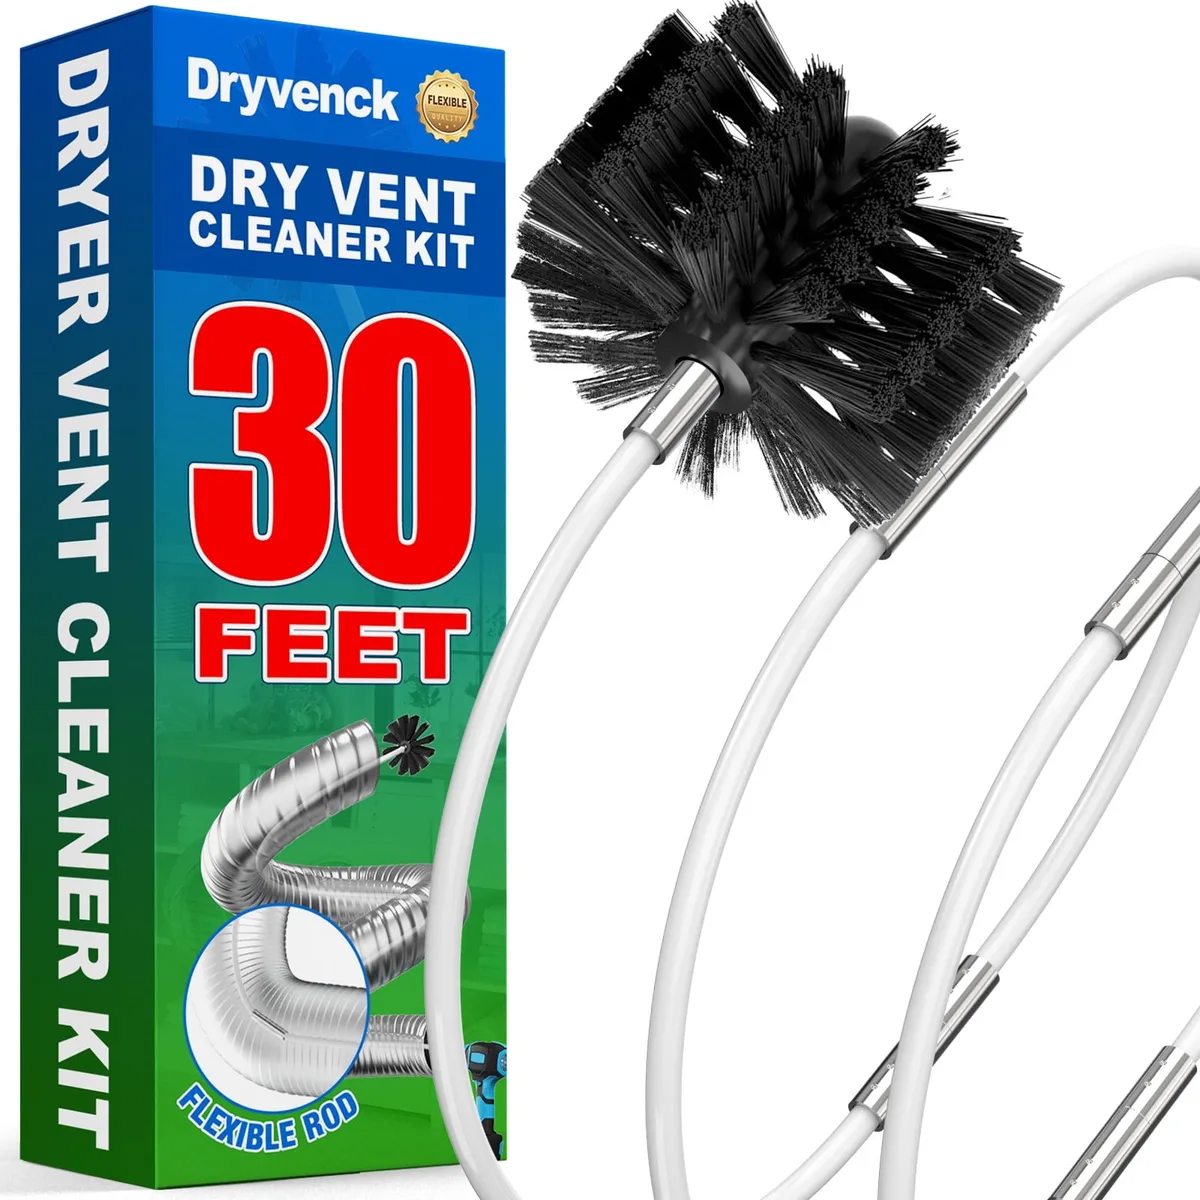
Image source: Bing (Web (fair-use with source credit))
If your vent run includes sections hidden inside walls or ceilings, you may not be able to brush the full length. In that case, a professional with rotary cleaning equipment is worth the investment. For routine maintenance between professional cleanings, you can also use the leaf blower method from the exterior end to clear loose lint.
Gas Dryer? Extra Steps You Can't Skip
Gas dryers add a carbon monoxide dimension that electric units don't have. A clogged vent on a gas dryer means combustion gases may not exhaust properly, which is a serious health hazard.
Before cleaning, make sure the gas supply is fully shut off at the valve. After cleaning, inspect the vent hose and all connections for cracks or gaps that could leak exhaust gases into your home. When you restart the dryer, check for the smell of gas around the connection point.
If you detect anything, shut it off immediately and call a licensed technician.
The National Fire Protection Association recommends annual professional inspection for gas dryer venting systems. DIY cleaning handles the lint, but a pro can verify that the entire exhaust path is sealed and code-compliant.
What NOT to Do: Common Mistakes That Make Things Worse
Even with good intentions, it's easy to botch a dryer vent cleaning. Some mistakes just waste time. Others actually increase your fire risk.
The biggest error is using only a vacuum without a brush. Lint clings to duct walls, especially in corrugated hose. Suction alone won't dislodge it.
You need the brush to scrub the interior surfaces, then the vacuum to collect the loose material.
Don't skip the exterior vent cap removal. If you brush lint downward but leave the cap in place, you're just compacting debris at the termination point. That blockage is now harder to reach and still restricts airflow.
Another common mistake is using a garden hose or pressure washer to blast the vent from outside. This turns lint into a paste that sticks to the duct walls and creates a moisture problem. Water inside a dryer vent duct leads to mold, rust, and worse airflow.
Never use a metal coat hanger as a makeshift brush. It can puncture flexible vent hose and scratch the interior of rigid ducting, creating snag points where future lint accumulates faster. A proper dryer vent brush has a flexible shaft and soft bristles designed for this exact job.
Finally, don't forget to reconnect the hose securely. A loose connection behind the dryer lets lint blow into your laundry room instead of outside. That's a mess, and it's also a fire hazard if the lint lands near the dryer's heating element.
DIY vs. Hiring a Pro: When to Call in Help
DIY cleaning works great for straightforward setups. If your dryer sits near an exterior wall and the vent run is short and accessible, you can handle it yourself with a basic brush kit.
But there are situations where a professional is worth every penny. If your vent runs through the attic, up to the roof, or through multiple floors, pro equipment makes a real difference. Rotary brush systems powered by drills or dedicated motors can navigate long runs and tight bends far more effectively than a hand-fed brush.
Consider calling a pro if:
- The vent run is longer than 25 feet
- You can't access sections of the duct hidden inside walls
- The exterior vent terminates on the roof and you're not comfortable working at height
- You have a gas dryer and want a full exhaust integrity inspection
- Previous DIY attempts haven't solved the airflow problem
- You suspect a pest nest or animal blockage inside the duct
Professional dryer vent cleaning typically costs between $100 and $200, depending on your location and the complexity of the run. Many services include a camera inspection so you can actually see the inside of your duct before and after. If you've never had the vent cleaned or you recently moved into an older home, starting with a professional cleaning gives you a clean baseline you can maintain yourself going forward.
For lint management beyond the vent, our guide on how to get lint off of clothes in dryer covers additional ways to keep lint under control throughout your laundry routine.
How Often Should You Clean Your Dryer Vent?
The standard recommendation is once a year for most households. But that's a starting point, not a hard rule. Several factors should push you toward more frequent cleaning.
Clean every 6 months if:
- You have pets that shed heavily
- Your household does more than 8 loads per week
- The vent run is longer than 15 feet or has multiple bends
- You use your dryer year-round without seasonal breaks
- You notice drying times creeping up before the 6-month mark
Clean immediately if:
- You smell burning during a cycle
- The dryer shuts off mid-cycle due to overheating
- The exterior vent flap doesn't open when the dryer runs
- You've just moved into a new home with unknown maintenance history
Add a recurring reminder to your phone or calendar. It's the kind of task that's easy to forget because nothing seems wrong, until suddenly it is. Taking the dryer apart for how to remove lint from clothes in dryer tasks also gives you a perfect opportunity to check the vent hose connection at the back.
Cleaning the lint screen before every load is non-negotiable, but that's only half the job. The screen catches the bulk of lint, but fine particles still make it past and accumulate in the vent duct over time. Think of the screen as a first line of defense and the vent cleaning as the deep maintenance that keeps everything working behind the scenes.
Safety First: Fire, Carbon Monoxide, and Building Codes
Dryer vent cleaning isn't just about efficiency. It's a safety task with real consequences if ignored.
Lint is classified as a combustible material, and dryer vent fires account for the majority of home dryer-related fires. The U.S. Consumer Product Safety Commission reports that clogged vents remain the single most frequent contributing factor.
Keeping the duct clear is the simplest way to eliminate that risk.
For gas dryers, the stakes go higher. A blocked vent means combustion byproducts, including carbon monoxide, may not exhaust properly outside your home. Carbon monoxide is odorless and colorless.
Without a functioning vent, it can accumulate to dangerous levels in your laundry area. If you have a gas dryer, install a carbon monoxide detector nearby and test it regularly.
The International Residential Code specifies that dryer vent ducts must be made of rigid or semi-rigid metal. Vinyl flex hose is not code-compliant and is more prone to lint accumulation, crushing, and melting. If your setup still uses vinyl hose, replace it with aluminum or semi-rigid metal ducting.
The upgrade costs under $15 and makes a noticeable difference in airflow and fire safety.
Vent termination location matters too. The exterior cap must be at least 3 feet away from any window, door, or air intake. Exhaust air contains moisture and lint particles you don't want recirculated into your home.
Check that the cap flap opens freely and that the screen (if present) is clear of debris. Some caps have built-in screens that trap lint over time, so remove and clean or replace them during your annual maintenance.
Never vent a dryer into a garage, crawlspace, or attic. These are code violations and serious fire hazards. All dryer exhaust must terminate directly to the outside.
Expert Tips Most People Overlook
Beyond the basic brush-and-vacuum routine, a few lesser-known practices can make your dryer vent system perform better and last longer.
First, keep the dryer pulled 4 to 6 inches from the wall. Most people push it flush to save space, but that crushes the vent hose behind the unit and creates an immediate bottleneck. Every inch of extra space helps maintain full airflow through the hose connection.
Second, use rigid or semi-rigid metal elbows instead of flexible hose for any bends in the run. Smooth interior surfaces collect far less lint than the ribbed interior of corrugated hose. If you must use flexible sections, keep them as short as possible and stretch them fully to minimize interior ridges.
Third, inspect the exterior vent cap seasonally. Birds, insects, and small rodents sometimes build nests in dryer vent caps during mild months. A quick visual check each season catches blockages before your dryer starts struggling.
Fourth, if your laundry room has a door, keep it open while the dryer runs. A closed door starves the dryer of make-up air, which reduces airflow through the vent and increases drying times. This is especially important in small, enclosed laundry closets.
Fifth, replace foil tape with metal screw clamps at all hose connections. Foil tape dries out and loses adhesion over time. Clamps create a tighter seal and are easy to remove and reattach during future cleanings.
For households dealing with excessive lint from fabrics, our article on do dryer sheets help with lint explores whether dryer sheets actually reduce lint or just mask the symptom. It's worth reading if you're constantly battling lint buildup.
Final Checklist: Is Your Dryer Vent Really Clean?
After you've gone through all the steps, run through this quick checklist to confirm the job is done right.
- Strong airflow at the exterior vent cap when the dryer is running (you should feel a steady stream of air)
- Drying times have returned to normal (one cycle per load)
- No burning smell during operation
- The exterior vent flap opens fully when the dryer runs
- All hose connections are secure with clamps, not just tape
- No kinks, crushing, or visible damage in the vent hose
- The lint screen area around the dryer exhaust port is clean
- The dryer no longer feels excessively hot to the touch mid-cycle
If you're checking all these boxes, the vent is clear and performing well. Mark your calendar for the next cleaning based on your household's usage and the factors covered in the frequency section above. Consistent maintenance is the difference between a dryer that runs efficiently for 15 years and one that becomes a safety hazard in half that time.
Frequently Asked Questions
Can I clean my dryer vent from inside only?
You can partially clean it from inside, but you should always access the exterior end as well. Lint accumulates throughout the entire duct length, and brushing from only one direction leaves debris at the far end.
How long does it take to clean a dryer vent?
A straightforward setup takes about 30 minutes. Long or complex runs with roof terminations can take up to an hour or more, especially if you're inspecting connections and replacing damaged hose sections.
Can a clogged dryer vent cause a house fire?
Yes. Lint is highly flammable, and restricted airflow causes the dryer to overheat. The combination of heat and accumulated lint inside a confined duct is the leading cause of dryer-related house fires in the United States.
Is flexible vinyl hose safe for dryer vents?
No. Flexible vinyl hose is not code-compliant in most jurisdictions and is more prone to lint buildup, crushing, and even melting. Rigid or semi-rigid metal ducting is the safe and recommended option.
What happens if I never clean my dryer vent?
Drying times increase steadily, energy bills rise, and the dryer's heating element and motor wear out prematurely. Eventually, lint buildup can ignite, causing a house fire. Gas dryer owners also face the risk of carbon monoxide exposure from improper exhaust.
How do I know if my dryer vent is completely blocked?
The most reliable sign is zero or very weak airflow at the exterior vent cap when the dryer is running. Other signs include the dryer shutting off mid-cycle from overheating, a strong burning smell, or clothes remaining completely wet after a full cycle.