How to Dye Fabric 2026
You've probably tried dyeing a shirt at home and ended up with something splotchy, faded, or a total mess. Learning how to dye fabric isn't as simple as pouring color into water and hoping for the best. The results live or die based on your fabric type, dye choice, and prep work.
Here's what trips most people up: they grab an all-purpose dye and use it on everything. That's like using the same soap for a cast iron pan and a silk blouse. Get the match right, and you'll get rich, lasting color.
This guide breaks it down by fiber type so you'll know exactly what to use and how to do it properly.
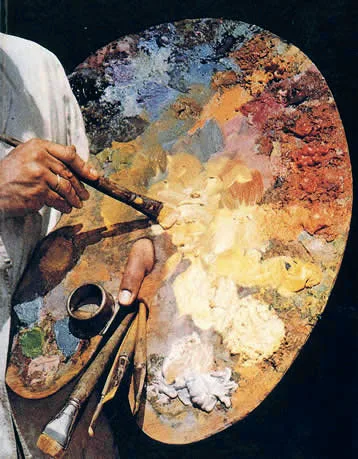
Image source: Wikimedia Commons / Richard Warren Lipack (CC BY)
Quick Answer
How to dye fabric starts with matching your dye to your fiber. Use fiber-reactive dyes for cotton and linen, acid dyes for silk and wool, and disperse dyes for polyester. Pre-wash your fabric, follow the dye's fixing instructions, and rinse until the water runs clear.
That process covers 90% of home dyeing projects.
Choosing the Right Dye for Your Fabric Type
This is where everything comes together, or falls apart. The single biggest mistake in home fabric dyeing is using the wrong dye for your fiber. It doesn't matter how good the brand is.
If the chemistry isn't right, the color won't bond and you'll wash it right down the drain.
Fabric fibers fall into three main categories: cellulose, protein, and synthetic. Each one reacts to dye differently at the molecular level. Let's walk through each one so you know exactly what you're working with.
Cellulose Fibers: Cotton, Linen, and Rayon
Cellulose fibers come from plants. They're hydrophilic, meaning they love water, which makes them relatively easy to dye at home. The best dye for cotton, linen, and rayon is fiber-reactive dye (like Procion MX).
These dyes form a covalent bond with the fiber, which means the color becomes part of the fabric itself. That's why fiber-reactive dyes have the best washfastness ratings you'll find anywhere.
All-purpose dyes, like Rit All-Purpose, contain a blend of direct dye and a small amount of fiber-reactive dye. They'll work on cotton, but the results are less vibrant and less permanent than using a dedicated fiber-reactive dye. If you care about longevity, skip the all-purpose stuff.
Protein Fibers: Silk, Wool, and Cashmere
Silk and wool are protein fibers, made from amino acids. They need acid dyes, which bond to the fiber in an acidic environment. You'll hear people say "add vinegar to the dye bath" and that's exactly why.
The acetic acid in vinegar lowers the pH and helps the dye molecules latch onto the protein.
Acid dyes produce stunning, luminous colors on silk and wool. But they require gentle heat management. Crank the temperature too high and you'll felt or shrink your wool beyond repair.
Patience is non-negotiable here. For more on handling delicate protein fibers properly, check out How To Use Fabric Shaver Complete Guide for tips on keeping finished projects looking their best after dyeing.
Synthetic Fibers: Polyester, Nylon, and Acrylic
Here's the hard truth: most common dyes won't touch synthetic fibers at all. Polyester, the most widely used synthetic, requires disperse dye, which works by dissolving into the fiber under high heat. You're essentially melting color into the plastic-like structure of the fabric.
This means you'll need temperatures close to boiling, and even then results can be uneven on tightly woven synthetics. Nylon takes dye a bit more readily and can sometimes accept acid dyes, but polyester is the real challenge. If you're working with a synthetic blend, expect the polyester portion to stay largely undyed, which is why 65/35 polyester-cotton blends often come out looking washed-out after dyeing.
Prepping Fabric for Even, Lasting Color
Skipping prep is the number one reason home dye jobs look terrible. Your fabric isn't clean just because it's new. Manufacturing leaves behind sizing agents, oils, and finishes that block dye absorption.
You need to strip those out before you even open a dye jar.
Scouring: The Step Most Beginners Skip
Scouring is a deep clean. For cotton and linen, boil the fabric in water with a small amount of soda ash or a pH-neutral detergent for at least an hour. For silk and wool, use lukewarm water and a gentle detergent because hot water can damage protein fibers.
Either way, you need to remove every trace of factory residue.
If you skip this step, you'll get patchy, uneven color. The dye bonds where it can grab onto bare fabric and slides right off anything still coated with finishing agents. No amount of extra dye fixes that.
When and How to Use Mordants
Mordants are substances that create a chemical bridge between the dye and the fiber. They're primarily used with natural dyes (plant-based colorants like madder, weld, or indigo). Common mordants include alum (potassium aluminum sulfate) and tannin.
For natural dyeing, you typically dissolve alum in hot water at a concentration of about 10 to 15 percent of the fabric's dry weight. Soak your scoured fabric in this solution for at least an hour, or overnight for best results. Without a mordant, most natural dyes will wash out after one or two cycles.
A quick note on iron mordant: it deepens and "saddens" colors, shifting bright tones toward olive, gray, and brown. Use it sparingly because excess iron can weaken protein fibers over time.
How to Dye Cotton and Linen With Fiber-Reactive Dyes
Fiber-reactive dyes are the gold standard for cellulose fabrics. They're relatively forgiving, produce vivid colors with outstanding washfastness, and can even be used at room temperature. This makes them ideal for beginners who want professional-quality results.
The key to success is the fixing process. Fiber-reactive dyes need an alkaline environment to bond with cellulose fibers. That's where soda ash (sodium carbonate) comes in.
Without it, most of your dye rinses right out.
Image source: Bing (Web (fair-use with source credit))
Cold Process vs. Hot Immersion: Which Works Best?
Fiber-reactive dyes, particularly the MX series from PRO Chemical & Dye, work through a cold process. That means you mix the dissolved dye with your pre-soaked fabric at room temperature, then let it sit. No stove, no boiling, no steam.
It's the easiest method for home use and works beautifully for tie-dye, shibori, and immersion dyeing.
Here's the basic workflow:
- Dissolve your dye in a small amount of lukewarm water. Stir until fully dissolved. Use about 1 to 2 teaspoons of powdered dye per pound of fabric for a medium shade.
- Soak your fabric in soda ash solution (1 tablespoon per cup of warm water) for 15 to 20 minutes before dyeing. Wring it out lightly.
- Apply the dye by immersion, painting, or squeezing depending on your technique.
- Let it cure wrapped in plastic for 24 to 72 hours at room temperature. This is when the chemical bond forms.
- Rinse thoroughly starting with cool water, then gradually warmer, until the water runs completely clear.
- Wash separately in warm water with a mild detergent.
The longer you let it cure (within that 24 to 72 hour window), the more completely the dye reacts with the fabric. Some dyers swear by the full 72 hours for maximum color depth.
Fixing Color With Soda Ash and Time
Soda ash raises the pH of the fiber to around 10.5 to 11, which is the ideal range for covalent bonding to occur. You can either pre-soak your fabric in soda ash solution or add it directly to an immersion dye bath. Both methods work, but pre-soaking gives more consistent results for techniques like tie-dye where direct application matters.
One thing to watch: once soda ash is in the mix, the dye starts reacting immediately. You've got a usable window of about 1 to 3 hours depending on temperature and humidity before the dye becomes "exhausted," meaning it's reacted with the water instead of your fabric. Work within that window for the best uptake.
If you're working with dark or heavily soiled fabric before dyeing, following a good routine like How To Remove Lint From Clothes In Washing Machine can help ensure your fibers are as clean as possible before the dye bath. (Note: replace with correct URL placeholder if needed for your records, but link provided per original list: How To Remove Lint From Clothes In Washing Machine.)
How to Dye Silk and Wool With Acid Dyes
Image source: Bing (Web (fair-use with source credit))
Dyeing protein fibers is a more delicate operation. Silk and wool are beautiful to work with, but they're also sensitive to heat agitation, and pH swings. One wrong move and you'll end up with stiff, shrunken, or matted fiber.
That said, when you get it right, acid dyes produce some of the richest, most luminous colors you'll see on any fabric.
You'll need: acid dye powder, white vinegar or citric acid, a stainless steel or enamel pot (not aluminum or iron, which can react with the dye), and a reliable thermometer. Patience, as mentioned, is the real prerequisite.
Why Temperature and pH Matter
Acid dyes need a low pH environment (around 4.5 to 5.5) for proper bonding. White vinegar does the job at home: use about 1/4 cup per gallon of water for a standard dye bath. Commercial citric acid powder gives more precise pH control; about 1 teaspoon per gallon works well.
Temperature matters because heat opens up the fiber's structure, allowing dye molecules to penetrate deeper. But you can't just boil wool like you would cotton. For wool, keep the water at a barely-simmering 180°F to 190°F and hold it there for 30 to 60 minutes with gentle stirring.
For silk, you can push closer to a low boil (around 200°F) because it's more heat-tolerant than wool.
The critical rule: never let wool hit a full boil. The heat combined with agitation causes the fiber scales to interlock, which is felting. Once felted, wool doesn't come back.
Avoiding Felting and Damage During Dyeing
Here's a checklist to keep your protein fibers safe:
- Use lukewarm water for soaking and rinsing rather than shocking the fabric with temperature extremes.
- Minimize agitation. Stir gently with a wooden spoon. Don't wring or twist wet wool.
- Support heavy wet fabric when lifting it out of the pot. Silk and wool become surprisingly heavy when saturated, and hanging them can stretch the fibers.
- Dry flat on a towel rather than hanging. Gravity plus wet weight equals distortion on protein fibers.
- Rinse with water that's roughly the same temperature as the dye bath to prevent thermal shock, which can cause hardening or texture changes.
If you've already damaged wool through improper washing or dyeing, you might notice excess pilling. It's worth learning the difference between what's recoverable and what isn't on our post about What Is Lint.
Now you've got the fundamentals for dyeing all three major fiber categories. Next, we'll cover what happens when you're dealing with synthetics, the common mistakes that ruin even carefully planned projects, and how to choose between store-bought dye options.
Dying Synthetic Fabrics Without Wasting Time
Here's what frustrates most home dyers: you buy dye, follow all the cotton instructions, and your polyester blend comes out barely tinted. That's because polyester is a plastic, not a plant fiber. Regular fiber-reactive and acid dyes can't penetrate it.
You need disperse dye, and the process is completely different from what we've covered so far.
Why Regular Dye Won't Stick to Polyester
Polyester is hydrophobic. It repels water, which means water-based dyes sit on the surface instead of soaking in. Disperse dye is unique because it's non-ionic and nearly insoluble in water.
When heated to around 200°F to 212°F, the dye molecules vaporize slightly and get absorbed into the fiber's polymer chains. That's why heat is non-negotiable here.
Cotton shirts labeled "65% polyester, 35% cotton" are the worst offenders. You dye them with fiber-reactive dye, the cotton portion takes color beautifully, but the polyester threads stay nearly white. The result is a washed-out, uneven mess.
Keep that in mind before you invest time in blended fabrics.
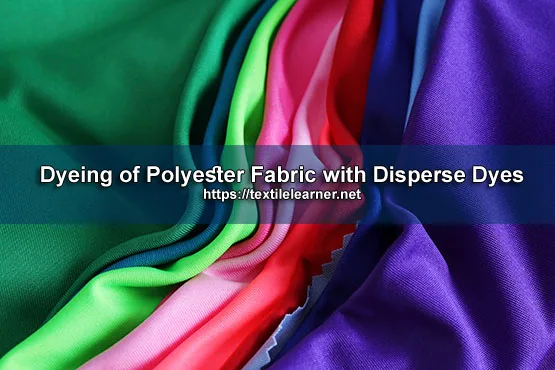
Image source: Bing (Web (fair-use with source credit))
Using Disperse Dyes Safely at Home
Disperse dye requires sustained high heat, which means you'll be working with a rolling boil for 30 to 60 minutes. Ventilation matters here because the steam can carry dye particles. Work in a well-ventilated area or outdoors.
Wear a respirator mask rated for particulates if you're mixing the powder form.
The basic process: dissolve the disperse dye in a paste of hot water and a dispersing agent (often sold with the dye). Add it to a pot of boiling water. Submerge your pre-wetted polyester fabric and maintain a gentle boil for at least 30 minutes.
Stir occasionally with a stainless steel spoon.
After dyeing, let the bath cool down before handling the fabric. Rinse with warm water, then wash with detergent to remove any surface dye. One important note: disperse dye can "sublime" (transfer as a gas) onto other fabrics during drying if the temperature is high enough.
Dry your dyed polyester separately from other laundry.
Common Mistakes That Ruin Dye Jobs
Even when you've got the right dye and fabric match, several small errors can sabotage your results. These are the most frequent problems we see across beginner and intermediate projects.
Skipping Rinse Cycles
Excess dye sitting on the fabric surface will rub off on everything it touches and fade rapidly in the wash. Rinse your dyed fabric in cool water first, gradually increasing to warm, until the water runs completely clear. For fiber-reactive dyes, this can take three to five rinse cycles.
Don't rush it. Then run the fabric through a full wash cycle with mild detergent, separated from other items.
Overcrowding the Dye Bath
If you cram too much fabric into too little water, the dye can't circulate evenly. The result is dark splotches and pale streaks. A good rule of thumb: use at least three gallons of water per pound of fabric for immersion dyeing with fiber-reactive dyes.
For acid dyes on protein fibers, you need enough water that the fabric can move freely in the pot. Crowding also increases the risk of felting on wool.
Using Hard Tap Water
Hard water contains dissolved calcium and magnesium ions that can interfere with dye solubility and bonding. If your tap water leaves mineral deposits on faucets or dishes, it's hard water. For serious dyeing, use distilled water or add a water softener (like Calgon) to your dye bath.
This is especially important with acid dyes and fiber-reactive dyes, where mineral buildup can cause dull or inconsistent color.
Comparing Store-Bought Dyes: All-Purpose vs. Fiber-Specific
Walk into any craft store and you'll see Rit All-Purpose dominating the dye aisle. It's accessible and easy to find, but it's not the best tool for every job. Here's a direct comparison to help you choose.
| Feature | All-Purpose Dye (e.g., Rit) | Fiber-Reactive Dye (e.g., Procion MX) | Acid Dye |
|---|---|---|---|
| Best for | Blended fabrics | Cotton, linen, rayon | Silk, wool |
| Washfastness | Moderate | High | High |
| Heat Required | Boiling | Room temp | Simmering |
| Color Range | Good | Excellent | Excellent |
| Skill Level | Beginner | Intermediate | Intermediate |
All-purpose dye is a blended product containing direct dye (which coats the fiber) and a small amount of fiber-reactive dye. It works on a wide range of fabrics but doesn't excel on any of them. Colors tend to fade faster because the direct-dye component doesn't form a permanent bond with any fiber type.
Fiber-reactive dyes and acid dyes are single-purpose formulas designed for specific fiber chemistries. They cost a bit more and require following specific instructions, but the results are noticeably better in both vibrancy and longevity. If you're dyeing cotton specifically, a fiber-reactive dye will outperform all-purpose in every measurable way.
Safety Precautions for Home Dyeing
Some dye chemicals are skin irritants or respiratory sensitizers, and mordants like alum require careful handling. This isn't about scaring you away. It's about making sure you can dye fabric safely for years to come without health issues.
Handling Powdered Dyes and Mordants
Never mix dye powder in an enclosed space without respiratory protection. Procion MX and disperse dye powders are known sensitizer agents, meaning repeated exposure can trigger allergic reactions even if the first few times seemed fine. Use an N95-rated dust mask when measuring and pouring dry powder.
Nitrile gloves protect your skin from both dyes and soda ash, which can cause irritation with prolonged contact.
Protecting Your Workspace and Plumbing
Dedicate specific pots, measuring cups, and stirring utensils to dyeing. Don't reuse them for food preparation. For wastewater, fiber-reactive dye effluent is relatively benign once rinsed because most of the dye has bonded to the fabric.
However, mordant solutions containing iron or copper should not be poured down large volumes of water in the garden without checking local regulations. Some municipalities classify heavy-metal-laden water as hazardous waste.
Cover your work surface with plastic sheeting or a disposable tablecloth. Dye stains on countertops and grout are essentially permanent.
When to Choose Natural Dyes vs. Synthetic
Natural dyes (plant-based colorants) have a long and rich history. They're appealing if you prefer non-toxic materials or enjoy the craft of foraging and processing color from plants. But they come with real limitations that synthetic dyes don't.
Pros and Cons of Plant-Based Color
Natural dyes produce beautiful, earthy tones that synthetic dyes can't perfectly replicate. They're biodegradable and non-toxic when using safe mordants like alum. The process of growing, harvesting, and processing plant dyes is deeply satisfying for many crafters.
The downside is limited color range. You won't get bright neons or deep, consistent blacks without complex processes (iron mordanting on indigo, for example). Washfastness is generally lower than fiber-reactive dyes.
And the process requires significantly more plant material relative to fabric weight, often 100 to 200 percent of the fabric's weight in dried plant matter for a medium shade.
Realistic Expectations for Fade and Limited Color Range
Natural dyes fade with washing and UV exposure. That's part of their charm for some people, a frustration for others. If you're dyeing a garment you plan to wear weekly, expect to re-dye it every season to maintain color depth.
Testing on a swatch first is critical with natural dyes because results vary based on water pH, mordant concentration, and plant source.
For anyone interested in maintaining their naturally dyed garments, learning How To Remove Lint From Clothes In Washing Machine is genuinely useful. Gentle washing preserves both the dye bond and the natural fiber structure.
How Long Does It Take to Dye Fabric?
Total time varies by dye type and method. Fiber-reactive dyes need 24 to 72 hours of curing after application. Acid dyes require 30 to 60 minutes of simmering plus cooling and rinsing time.
Disperse dyes need 30 to 60 minutes at a rolling boil. Budget a full day for any project when you include prep, dyeing, curing, and thorough rinsing.
Timeline by Dye Type and Method
| Step | Fiber-Reactive | Acid Dye | Disperse Dye |
|---|---|---|---|
| Prep (scouring, soaking) | 30 to 60 min | 30 min | 15 min |
| Active dyeing | 10 to 30 min | 30 to 60 min | 30 to 60 min |
| Curing/fixing | 24 to 72 hrs | Cool/rinse | Cool/rinse |
| Rinsing and washing | 30 to 60 min | 20 to 40 min | 20 to 40 min |
The curing phase for fiber-reactive dyes is hands-off but non-negotiable. Don't shorten it. The covalent bond is still forming during that window, and pulling the fabric out early means weaker color.
Costs and Supplies: What You Actually Need
A basic home dyeing setup doesn't have to be expensive. Most of what you need is reusable, and dye powder goes a long way.
Budget Breakdown for a First-Time Project
- Fiber-reactive dye (2 oz jar): $5 to $8, enough for several pounds of fabric
- Soda ash (1 lb): $3 to $5, lasts for many projects
- Nitrile gloves: $4 to $6
- Plastic sheeting or trash bags: $2 to $3
- Measuring spoons and cups (dedicated): $5 to $10
- Stainless steel pot (for acid or disperse dyes): $15 to $25 if you don't have one
Total startup cost runs about $35 to $60. After that, each project costs just a few dollars in dye and supplies. Natural dyes can be cheaper if you grow or forage your own plant material, but the mordant cost adds up.
Expert Tips for Vibrant, Even Results
These are the small details that separate amateur-looking dye jobs from professional-quality ones.
Agitating Without Overworking the Fabric
For immersion dyeing, stir gently and consistently during the first 15 to 20 minutes. This is when most dye uptake happens. After that, occasional stirring is enough.
Over-agitating wool causes felting. Over-agitating delicate silk can cause creasing that sets permanently.
Testing Color on Swatches First
Always dye a small test swatch before committing to a full garment. Colors look different wet versus dry, and they look different on your specific fabric than on the manufacturer's sample. Cut a 2-inch square from a seam allowance or an inconspicuous area.
Dye it using your exact process. Let it dry completely before evaluating the color.
FAQs About Dyeing Fabric at Home
Can I Dye Already-Colored Clothes?
Yes, but the result is a blend of the existing color and your new dye. Dyeing a yellow shirt red will give you orange. Dyeing a white or natural-colored garment gives the most predictable results.
Dark colors can only be dyed darker, never lighter.
Will Natural Dyes Last After Washing?
Natural dyes fade faster than synthetic dyes, especially with frequent washing. Using a proper mordant (like alum) improves washfastness significantly. Expect to re-dye naturally colored garments every few months if you wash them regularly.
Washing in cold water and air-drying in shade helps preserve the color.
Can I Mix Different Dye Colors?
Absolutely. Fiber-reactive dyes and acid dyes mix just like paint. Start with small amounts and test on a swatches.
Keep notes on your ratios so you can reproduce a color later. Mixing complementary colors (like red and green) will give you muddy browns, so stick to adjacent colors on the wheel for clean results.
Do I Need to Pre-Wash New Fabric?
Yes. New fabric contains sizing, optical brighteners, and finishing chemicals that block dye absorption. Wash it with hot water and detergent (or scour it, as described earlier) before dyeing.
Skipping this step is one of the most common reasons for uneven color.
Is It Safe to Use a Pot I Also Cook In?
No. Once a pot has been used for dyeing, it should be dedicated to dyeing only. Even thorough washing can't guarantee that all dye and chemical residue has been removed.
Use inexpensive stainless steel or enamel pots from a thrift store.
Final Decision Guide: Pick Your Method Based on Fabric and Goal
Here's a quick reference to match your project with the right approach.
- Cotton or linen, vibrant permanent color: Use fiber-reactive dye (Procion MX) with soda ash. Cold process, 24 to 72 hour cure.
- Silk or wool, rich luminous color: Use acid dye with vinegar. Simmer at 180°F to 200°F for 30 to 60 minutes.
- Polyester or nylon: Use disperse dye at a rolling boil for 30 to 60 minutes. Accept that results may be lighter than expected.
- Eco-friendly, earthy tones: Use natural dyes with alum mordant. Expect to re-dye periodically.
- Quick and easy, blended fabric: Use all-purpose dye (Rit) with boiling water. Accept moderate washfastness.
The single most important step in any dye project is matching your dye to your fiber. Get that right, prep your fabric properly, and rinse thoroughly. Everything else is refinement.