How to Cross Stitch on Clothes in 2026 (Everything You Need)
Learning how to cross stitch on clothes is trickier than working on a blank piece of aida cloth. The fabric moves, it stretches, and you can't just toss it in a hoop the same way. But it's absolutely doable once you understand the prep work.
The biggest difference is stabilizer. On aida, the fabric is stiff enough to hold its shape. On clothing, you need a stabilizer to keep the stitches from pulling the fabric.
DMC recommends using a 2-strand thread on 14-count fabric, and that same logic applies when you're working on a garment with a tight weave. Let's walk through everything you need to get started.
Quick Answer
You can cross stitch on clothes by attaching a stabilizer to the garment first. Transfer your pattern using waste canvas or a water-soluble pen. Stitch with a tapestry needle and 2 to 3 strands of embroidery floss.
Remove the stabilizer carefully when you're done. Always pre-wash the garment to prevent puckering later.
Why Cross-Stitching on Clothes Is Different (and Harder) Than on Aida
Cross stitch on aida cloth is the version most people learn first. The fabric is stiff, the holes are obvious, and you don't have to worry about stretch or washing. Clothes throw all of that out the window.
Here's what changes when you move to garments:
- Fabric stretch. T-shirts, hoodies, and most knit clothing stretch when you stitch on them. That pulls your stitches out of shape.
- No visible grid. Unlike aida, you can't see where each stitch goes. You need a transfer method.
- Washing and wear. Your finished stitches need to survive the washing machine, not just sit in a frame.
- Placement matters. Stitch in the wrong spot on a shirt and the design sits under your arm or off-center.
The good news is that the actual stitch technique doesn't change. You're still making the same X-shaped crosses. The difference is everything around the stitch: the prep, the stabilizer, and how you handle the garment while working.
What You Actually Need: Tools, Materials, and Supplies
You don't need a lot of specialized gear. Most of what you'd use for regular cross stitch works fine. But a few items make garment stitching much easier.
Here's a breakdown of what to gather before you start:
| Item | What It Does | Recommended Spec |
|---|---|---|
| Embroidery floss | The thread for your stitches | DMC 6-strand, use 2 to 3 strands |
| Tapestry needle | Blunt tip won't snag fabric | Size 24 or 26 |
| Stabilizer | Keeps fabric from puckering | Tear-away or cut-away |
| Waste canvas | Transfers pattern to garment | 14-count, pre-cut sheets |
| Embroidery hoop | Holds fabric taut | 4 to 6 inch for small designs |
| Water-soluble pen | Marks placement on fabric | Light-colored, washers out |
| Small sharp scissors | Trims threads and stabilizer | Embroidery scissors work best |
You'll also want an iron if you're using fusible stabilizer, and a piece of cardboard or a needle minder to keep your needle safe between sessions.
Image source: Bing (Web (fair-use with source credit))
The Stabilizer Decision (This Is Where Most People Go Wrong)
Stabilizer is the single most important supply when cross stitching on clothes. Skip it and your stitches will pucker, pull, and look terrible within a few washes.
Think of stabilizer as a temporary backing. You attach it to the back of your garment fabric, stitch through both layers, then remove what you can when you're done.
Tear-Away Stabilizer
This is the easiest to remove. You just tear it away from the edges of your stitching. It works well on woven fabrics like cotton shirts, denim, and canvas bags.
Best for: Woven, non-stretchy fabrics. Beginners who want a simple removal process.
Cut-Away Stabilizer
This one you trim with scissors rather than tearing. It stays partially behind the stitches permanently, which gives ongoing support. That matters on stretchy knits where the fabric will move during wear.
Best for: T-shirts, hoodies, baby clothes, anything with spandex or stretch.
Wash-Away Stabilizer
This dissolves in water. It's useful when you don't want any stabilizer residue left behind, but it can feel flimsy during stitching. Some stitchers use it in combination with a tear-away layer for extra support.
Best for: Delicate fabrics, projects where you want a clean back.
Image source: Bing (Web (fair-use with source credit))
Waste Canvas vs. Soluble Stabilizer: Which Transfer Method Works Best
You can't just start stitching on a t-shirt without some way to know where each X goes. That's where pattern transfer comes in. The two most common methods for garment cross stitch are waste canvas and water-soluble stabilizer sheets.
Waste Canvas
Waste canvas is a stiff, grid-like material that you baste onto your garment. You stitch through it following the grid as your pattern guide. When you're done, you pull out the canvas threads one by one, leaving only your stitches behind.
It's the most popular method for a reason. The grid gives you exact stitch placement, and it works on any fabric color. The downside is that removing the canvas takes patience.
You use tweezers to pull each thread, and on dark fabrics it can be hard to see what's canvas and what's floss.
Best for: Detailed patterns, dark fabrics, beginners who want clear guidance.
Water-Soluble Stabilizer Sheets
These are thin plastic-like sheets you print or trace your pattern onto. You pin or baste them to the garment, stitch through them, then rinse the garment in warm water to dissolve the sheet.
They're faster to remove than waste canvas. No pulling threads. But they don't provide as rigid a stitching surface, and if your stitches are tight, the stabilizer can be hard to fully dissolve from between them.
Best for: Simple designs, light-colored fabrics, quick projects.
Comparison at a Glance
| Feature | Waste Canvas | Soluble Stabilizer |
|---|---|---|
| Ease of removal | Slow (pull threads) | Fast (rinse in water) |
| Stitching surface | Firm and grid-guided | Slightly flexible |
| Works on dark fabric | Yes | Harder to see through |
| Best for detailed work | Yes | Moderate detail |
| Cost per project | $1 to $3 | $2 to $4 |
Most experienced stitchers on garments reach for waste canvas as their default. It's more reliable across fabric types and gives cleaner results on complex patterns.
Image source: Bing (Web (fair-use with source credit))
How to Cross Stitch on Clothes: Step by Step
Now let's put it all together. Follow these steps and you'll avoid the most common pitfalls.
Step 1: Prep Your Garment and Choose Your Placement
Wash and dry the garment first. This pre-shrinks the fabric so your stitches won't pucker later. Iron it smooth.
Decide where your design goes. For a chest pocket placement, measure from the shoulder seam and center it. For a sleeve design, put the garment on and mark the spot with a pin.
A water-soluble pen works great for marking the center point of your design.
Step 2: Secure the Stabilizer
Cut a piece of stabilizer at least 2 inches larger than your design on all sides. For woven fabrics, hoop the stabilizer and the garment together in your embroidery hoop. For stretchy knits, iron or baste a cut-away stabilizer to the back of the fabric first, then hoop both layers if possible.
The fabric should be taut like a drum. If it's loose, your stitches will pull unevenly.
Step 3: Transfer or Mark Your Pattern
If using waste canvas, baste it to the front of the garment with a contrasting thread. Use a running stitch around the edges and through the center to keep it flat. The grid on the canvas becomes your pattern guide.
Each square on the canvas equals one cross stitch.
If using a soluble stabilizer sheet, trace or print your pattern onto the sheet, then pin it to the garment.
Mark the center of your design on the canvas or sheet. Match it to the center point you marked on the garment. This keeps everything aligned.
Step 4: Start Stitching (The Right Way on Fabric)
Thread your tapestry needle with 2 to 3 strands of embroidery floss. Don't use all 6 strands. That's too bulky for garment stitching and will look chunky.
Start stitching from the back, pulling the needle up at the bottom-left hole of your X and down at the top-right. Then come back up at the bottom-right and go down at the top-left. That's one complete cross stitch.
Work in rows when you can. It keeps tension even and makes it easier to catch mistakes.
A few tips that make a real difference on garments:
- Keep your stitches snug but not tight. Pulling too hard distorts the fabric.
- Stitch in the same direction throughout. All your top stitches should go the same way for a uniform look.
- If you're working near a seam, avoid stitching through multiple layers. It's hard on your needle and your fingers.
- For large designs, roll the garment gently in the hoop rather than trying to hoop the whole thing at once.
Image source: Bing (Web (fair-use with source credit))
Step 5: Remove the Stabilizer and Clean Up
Once your design is complete, it's time to clean up.
For tear-away stabilizer, gently tear away from the edges of the stitching. Use tweezers to grab stubborn bits near the threads.
For cut-away stabilizer, trim close to the stitches with small scissors. Leave a small border of stabilizer behind the stitching, especially on knits. It continues to support the stitches during wear.
For waste canvas, dampen the threads slightly with a spray bottle. This loosens the fibers. Then use tweezers to pull out the horizontal threads first, followed by the vertical ones.
Go slowly. Ripping fast can pull your stitches loose.
If you used a soluble stabilizer, rinse the garment in lukewarm water. Gently rub the dissolved material away from the stitches.
Finally, press the finished design from the back using a pressing cloth. Don't iron directly on the embroidery. The heat can flatten your stitches and dull the floss.
Common Mistakes That Ruin Garment Cross Stitch
Most failures come down to skipping prep or using the wrong materials. Here's what goes wrong most often.
Skipping the stabilizer. This is the number one mistake. Without it, knit fabrics stretch and your stitches pop out of shape. Woven fabrics pucker along the stitch line.
Using too many floss strands. Six strands on a garment looks bulky and sits on top of the fabric instead of lying flat. Stick to 2 or 3 strands for a cleaner finish.
Not pre-washing the garment. If the fabric shrinks after you've stitched, the design warps. Always wash and dry the garment before you start.
Pulling stitches too tight. Tight threads distort the fabric around them. You'll see pulling and dimpling along the stitch line. Keep tension even and gentle.
Hooping too aggressively. Leaving a garment in a hoop for days can create permanent hoop marks on delicate fabrics. Remove the hoop when you're not actively stitching, or pad the hoop edges with a soft cloth.
Stitching through seams or thick layers. Denim seams and hems are tough on needles and fingers. Plan your design placement to avoid these areas.
Cross Stitch on Clothes vs. Other Embroidery Methods
Cross stitch isn't the only way to add embroidery to clothing. Here's how it stacks up against the alternatives.
Cross stitch vs. backstitch. Backstitch creates outlines and fine lines. It's better for text and simple line art. Cross stitch fills areas with color and pattern.
They work well together, many designs use both.
Cross stitch vs. satin stitch. Satin stitch fills small areas with smooth, dense stitches. It's great for monograms and small shapes. Cross stitch is better for larger, geometric designs and repeating patterns.
Hand embroidery vs. machine embroidery. Hand cross stitch is portable, affordable, and works on finished garments. Machine embroidery is faster for production work but requires access to an embroidery machine and digitizing software. For one-off personalization, hand cross stitch wins on cost and convenience.
Cross stitch vs. iron-on patches. Iron-on patches are instant but limited in design choice. Cross stitch gives you full creative control. The tradeoff is time.
A cross stitch design might take 3 to 8 hours. An iron-on takes 5 minutes.
Real Projects: What Works Best on Different Garments
Some garments are easier to work with than others. Here's what to expect with common project types.
Denim Jackets and Jeans
Denim is one of the best fabrics for cross stitch. It's sturdy, doesn't stretch much, and the weave is usually tight enough to hold stitches well. Use a size 24 tapestry needle and a medium-weight tear-away stabilizer.
Back-of-the-jacket placements are popular and forgiving for beginners.
T-Shirts and Knit Tops
Knit fabrics are the hardest to stitch on because of the stretch. Use a cut-away stabilizer and keep your tension loose. Smaller designs work better.
Large designs can sag when the fabric stretches during wear. Pre-wash the shirt twice to minimize shrinkage risk.
Tote Bags and Canvas
Canvas totes are similar to denim in terms of ease. They're stiff enough to hoop without much stabilizer, though a light tear-away still helps. These make great beginner projects because the fabric is forgiving and flat.
Baby Clothes and Onesies
Onesies are small, so keep designs simple and compact. Use a cut-away stabilizer because baby clothes get washed constantly. Make sure all thread ends are secured tightly.
Loose threads on baby clothing are a safety concern.
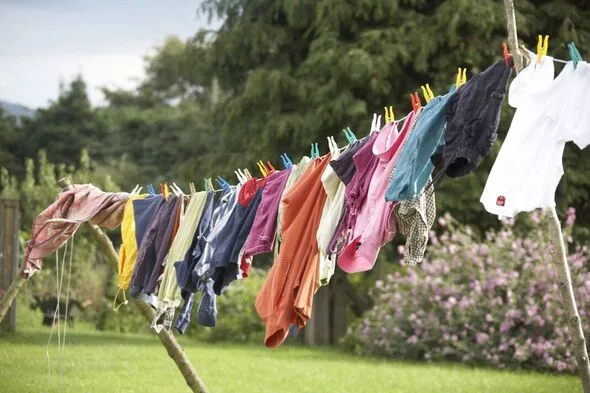
Caring for Cross-Stitched Garments
Your stitching will last longer if you treat it right in the wash.
- Turn the garment inside out before washing. This protects the stitches from friction.
- Use cold water and a gentle cycle. Hot water can cause fading and shrinkage.
- Skip the dryer when possible. Air drying is gentler on embroidery.
- Don't iron directly on the stitches. Use a pressing cloth or iron from the back.
- Store flat if you can. Hanging heavy embroidered garments can cause stretching over time.
DMC embroidery floss is colorfast when properly set, but some cheaper floss brands bleed in the wash. If you're unsure, test a small area with water before committing to a full wash.
Costs, Time, and What to Expect
Cross stitching on clothes is affordable but not free. Here's a realistic breakdown.
A basic starter kit with floss, needles, and a hoop runs about $15 to $25. Stabilizer adds $2 to $5 per project. Waste canvas sheets cost around $1 to $3 each.
Time depends on design complexity. A small monogram might take 1 to 2 hours. A full back-of-jacket design can take 15 to 30 hours spread over several sessions.
The learning curve is gentle. If you can cross stitch on aida, you can cross stitch on clothes. The extra skills are just stabilizer management and pattern transfer.
Most people feel comfortable on garments after their first or second project.
Frequently Asked Questions
Can you cross stitch on any fabric?
You can stitch on most fabrics, but tightly woven cotton, linen, and denim work best. Loosely woven or very stretchy fabrics need more stabilizer and patience. Sheer fabrics are difficult because the stabilizer shows through.
Do you need an embroidery hoop?
A hoop isn't strictly necessary, but it helps a lot. It keeps your tension even and prevents the fabric from bunching. For small designs, a 4-inch hoop works.
For larger designs, you'll reposition the hoop as you work.
How do you keep the back neat?
Using a stabilizer helps keep the back tidy. Weave your thread ends under existing stitches instead of knotting. Trim excess thread as you go rather than leaving it all for the end.
Can you cross stitch on a hoodie?
Yes. Use a cut-away stabilizer because hoodies are usually polyester-spandex blends with significant stretch. Keep your design small and avoid the thick seam areas near the pocket and hood.
What needle size is best for garment cross stitch?
A size 24 tapestry needle works for most garment fabrics. If you're working on a very tight weave like denim, a size 26 or 28 gives easier penetration. The needle should pass through the fabric without forcing it.
How do you remove hoop marks?
Spritz the marked area with water and gently rub with your finger. For stubborn marks on cotton, press with a warm iron while the fabric is still slightly damp. On delicate fabrics, use a steam iron held above the surface rather than pressing directly.