How to Replace RV Awning Fabric (2026) — What Actually Works
There's nothing quite like pulling into a campsite, hitting the awning switch, and watching that fabric roll out. Until it doesn't. Sun damage, wind tears, and mildew can turn your awning into an eyesore, or worse, leave you without shade when you need it most.
Learning how to replace RV awning fabric yourself saves you hundreds of dollars and a trip to the dealer.
The good news is this is a very doable DIY job. Most replacement fabric kits run between $150 and $500 as of 2026, and the whole project takes a couple of hours once you know what you're doing. Let's walk through everything, from figuring out what you need to getting that fresh fabric rolling smooth.
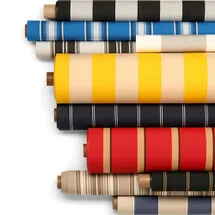
Image source: Bing (Web (fair-use with source credit))
Quick Answer
Replacing RV awning fabric involves measuring your awning, ordering the correct size, removing the old fabric from the roller tube and rail, and installing the new piece. You'll need basic hand tools and a helper. The job typically takes two to four hours.
Always release torsion spring tension carefully before removing any hardware.
Why RV Awning Fabric Needs Replacing (and When It's Time)
RV awning fabric takes a beating. UV exposure breaks down vinyl and acrylic fibers over time. Wind catches loose edges and tears stitching.
Moisture trapped in a rolled-up awning breeds mildew that stains and weakens the material.
Here are the signs it's time for a replacement:
- Visible tears or holes, especially along seams or where the fabric meets the roller tube
- Faded or brittle fabric that cracks when you flex it
- Persistent mildew stains that won't clean out
- Fabric that sags or bunches unevenly when extended
- Water pooling or leaking through the material
Most awning fabric lasts five to ten years depending on material quality and how much sun it gets. If you're in Arizona or Florida, expect the shorter end. If you store your RV under cover or up north, you'll get more life out of it.
Replacing the fabric before it fails completely also protects your roller tube and hardware. A torn flap flapping in the wind can scratch the tube, bend the arms, or damage the torsion spring. If you're also dealing with mold on other outdoor fabrics, our guide on how to remove mold from fabric furniture covers cleaning methods that work on similar materials.
How RV Awning Fabric Attaches — The Anatomy You Need to Understand
Before you touch a single bolt, you need to understand how the whole assembly works. Every RV awning, whether it's a manual crank or a power model, shares the same basic anatomy.
The fabric attaches at two points. One edge slides into a channel on the RV wall rail. The other edge wraps around and fastens to the roller tube.
The roller tube sits between two support arms and contains a torsion spring that provides the retraction force.
Here's a breakdown of the key components:
| Component | What It Does |
|---|---|
| Awning rail | Aluminum channel mounted to the RV wall; one edge of the fabric slides in here via a polycord bead |
| Roller tube | The aluminum tube the fabric wraps around; contains the torsion spring inside |
| Torsion spring | Coiled spring inside the roller tube that creates retraction tension |
| Support arms | Hinged arms that hold the roller tube out and lock it in place |
| End caps | Plastic or metal caps on each end of the roller tube; often hide the stop bolt and spring mechanism |
| Stop bolt | Sets the retraction limit so the spring doesn't overwind |
| Polycord | A round nylon cord sewn into the fabric edges that slides into the rail and tube channels |
The direction the fabric feeds onto the roller tube matters. Some models feed from the front (the side facing away from the RV). Others feed from the back.
Getting this wrong means the fabric rolls up backward and the awning won't retract properly. Check your existing fabric before you remove it. Note which way it wraps.
Image source: Bing (Web (Web (fair-use with source credit)))
Choosing the Right Replacement Fabric: Vinyl vs. Acrylic and Everything Between
Not all awning fabric is created equal. The two main options are vinyl and acrylic, and each has trade-offs.
Vinyl is the most common. It's waterproof, affordable, and comes in tons of colors and patterns. Standard vinyl weighs around 13 ounces per square yard.
Heavy-duty options go up to 16 ounces. Vinyl works great if you need full rain protection. The downside is it can feel stiff, it's prone to cracking in cold weather, and it fades faster than acrylic under intense sun.
Acrylic is breathable, softer, and more UV-resistant. It won't mildew as easily because air passes through it. Acrylic fabric is the upgrade choice for full-timers and anyone in a hot climate.
It costs more, and it's not fully waterproof, water passes through it slowly rather than beading off.
Here's a quick comparison:
| Feature | Vinyl | Acrylic |
|---|---|---|
| Waterproof | Yes | Water-resistant, not fully waterproof |
| Breathability | Low | High |
| UV resistance | Moderate | High |
| Cold-crack resistance | Lower (stiffens below 40°F) | Better flexibility in cold |
| Mildew resistance | Lower | Higher |
| Typical cost | $150 to $350 | $250 to $500+ |
| Best for | Occasional use, budget builds | Full-timers, hot climates |
If you're replacing fabric on a travel trailer you use a few weekends a year, vinyl is perfectly fine. If you live in your RV full-time in Texas or Southern California, acrylic is worth the extra money. For more on how different fabrics behave, our article on what fabric is lint free dives into material properties that also apply to durability and maintenance.
What Size Fabric Do You Actually Need? Measuring the Right Way
This is where most people mess up. Ordering the wrong size fabric means either returning it or living with a poor fit. There are two measurements you need: the width and the projection.
Width is the rail-to-rail measurement. That's the distance between the two ends of the awning rail mounted on your RV wall. Do not measure the old fabric.
Measure the rail itself. The fabric is typically one to two inches narrower than the rail to allow for the polycord and seam allowance.
Projection is how far the awning extends out from the RV. This is determined by your support arm length, not the fabric. Common projections are 8, 10, 12, 14, 16, 18, and 20 feet.
Measure from the center of the roller tube to the RV wall when the awning is fully extended.
Here's how to measure correctly:
- Extend the awning fully and lock the support arms.
- Measure the awning rail from the left end cap to the right end cap. This is your width.
- Measure from the RV wall to the center of the roller tube. This is your projection.
- Write both numbers down and double-check them.
Most replacement fabric listings will ask for the rail-to-rail width and the projection. Some manufacturers, like Dometic and Carefree of Colorado, also list the fabric cut size, which includes extra material for the polycord hems. When in doubt, order based on the awning model number rather than the raw measurements.
You can usually find the model number on a sticker inside the roller tube or on the arm assembly.
Image source: Bing (Web (fair-use with source credit))
Tools, Materials, and Supplies You'll Need
Gather everything before you start. Nothing kills momentum like running to the hardware store mid-project.
Here's what you'll need:
- Replacement fabric kit (correct size for your awning)
- Socket set and wrench set (metric and SAE)
- Phillips and flathead screwdrivers
- Pliers (needle-nose and standard)
- Tape measure
- Rubber mallet
- Safety glasses
- Work gloves
- A second person (seriously, don't try this alone)
- Silicone lubricant spray (for the rail channel)
- Rags and a mild cleaner (to clean the rail before reinstalling)
If your awning uses a pull strap, make sure the replacement fabric includes one or reuse the old strap if it's still in good shape. Some kits come with new polycord. If yours doesn't, check that the old polycord isn't cracked or stretched before reusing it.
A step stool or short ladder helps too. You'll be working at the top of the RV wall, and reaching overhead for extended periods gets old fast.
Step-by-Step: How to Remove Your Old RV Awning Fabric
With your measurements confirmed and the new fabric on order, it's time to take the old stuff off. This is the part where patience matters more than speed. Rushing leads to damaged hardware or, worse, a torsion spring incident.
Start by extending the awning fully. Lock both support arms in place. Have your helper steady the roller tube from below while you work on the hardware.
Never let the tube hang free with the spring under tension.
Here's the removal sequence:
- Locate the end caps on each side of the roller tube. Pop them off with a flathead screwdriver. Some snap on, others are held by a small screw.
- Find the stop bolt. It's usually on the drive side, the side with the crank mechanism or motor. This bolt sets the retraction limit. Note its position before loosening it.
- Release the torsion spring tension slowly. For manual crank models, have your helper support the tube while you unwind the spring according to the manufacturer's instructions. This typically involves turning the tension arm a set number of turns. Dometic and Carefree models differ here, so check your specific manual.
- Once the spring is relaxed, remove the bolts that secure the fabric to the roller tube. Most fabrics are held by a single rail or channel bolted along the tube's length.
- Slide the fabric out of the awning rail on the RV wall. The polycord bead runs the full length of the rail. Pull it free from one end, working the fabric out gradually.
- Remove the fabric from the roller tube channel. Again, work from one end to the other.
Set the old fabric aside. Clean the awning rail channel with a rag and mild cleaner. Dirt and old adhesive in the channel will make the new fabric harder to install.
A light spray of silicone lubricant in the rail helps the new polycord slide in smoothly.
If you're also tackling other RV fabric projects, our guide on how to change RV awning fabric covers additional tips for specific awning brands.
Step-by-Step: How to Install the New Awning Fabric
Now for the satisfying part. Installing the new fabric is basically the reverse of removal, but there are a few details that trip people up.
First, lay the new fabric out on a clean, flat surface. Identify the leading edge, the one that attaches to the roller tube, and the trailing edge, the one that slides into the awning rail. Most replacement fabrics have the polycord already sewn into both edges.
Here's the installation sequence:
- Attach the leading edge of the fabric to the roller tube channel. Start at one end and work across. Make sure the fabric feeds in the correct direction. The print or finished side should face outward when the awning is extended.
- Thread the polycord on the trailing edge into the awning rail. Start at one end of the rail and work the fabric in gradually. A helper on the other end makes this much easier. Don't force it. If the polycord binds, pull it back and apply more silicone lubricant to the rail.
- Once the fabric is seated in both the tube and the rail, center it. Equal fabric overhang on both sides means the awning will roll evenly.
- Roll the fabric onto the tube by hand. Keep it tight and even. Your helper should hold the free end of the fabric while you roll.
- Re-tension the torsion spring. This is the critical step. Follow the manufacturer's winding instructions exactly. Most manual crank awnings require 10 to 16 turns of the tension arm. Too little tension and the awning won't retract. Too much and you'll strain the spring or the arms.
- Reinstall the stop bolt and end caps. Extend and retract the awning a few times to check for smooth operation.
If the fabric bunches or wrinkles on one side, the tension is uneven. Retract it, adjust the fabric position on the tube, and try again. It's normal to do this two or three times on your first attempt.
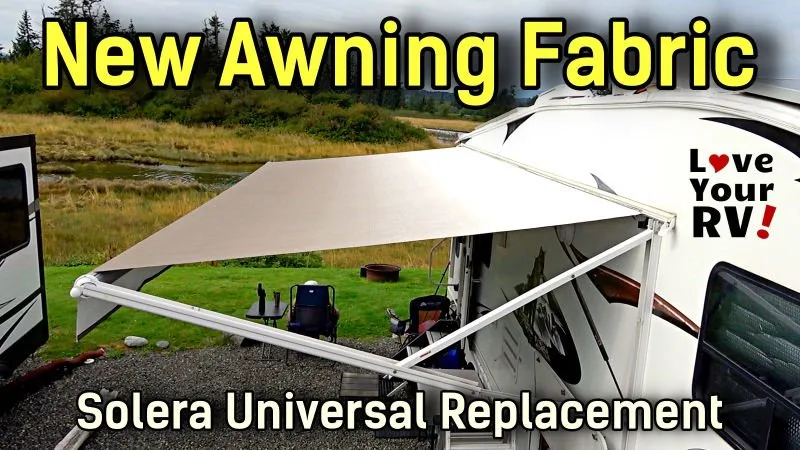
Image source: Bing (Web (fair-use with source credit))
Safety Warnings: The Torsion Spring Is No Joke
Let's be direct about this. The torsion spring inside your roller tube stores enough energy to cause serious injury. There are documented cases of RV owners losing fingers or suffering deep lacerations from uncontrolled spring releases.
This is not a step to get casual about.
Always wear safety glasses and work gloves when handling the spring assembly. Never stand directly in front of the roller tube when releasing or applying tension. Position yourself to the side.
Key safety rules:
- Never remove the stop bolt before the spring tension is fully released.
- Never let go of the tension winding tool while the spring is under load.
- If you're unsure about the winding procedure, stop and consult the manufacturer's documentation or a professional.
- Keep bystanders, especially children, well clear of the work area.
- If the spring looks corroded, bent, or damaged, replace it. Don't reuse a compromised spring.
Dometic and Carefree of Colorado both publish detailed tensioning guides for their awning models. These are freely available on their websites and are worth reading before you start. The procedure varies by model, and guessing is not an option here.
Mistakes That Ruin the Job (and How to Avoid Them)
Even experienced DIYers hit snags with awning fabric replacement. Here are the most common mistakes and how to sidestep them.
Measuring the old fabric instead of the rail. Fabric stretches and shrinks over time. Always measure the rail-to-rail distance on the RV wall, not the fabric itself.
Installing the fabric backward. If the awning retracts with the print facing inward, you've got it backward. Check the feed direction on the old fabric before you remove it. Take a photo for reference.
Skipping the rail cleaning. Old dirt, dried bug residue, and mildew in the rail channel create friction. The new polycord won't slide in cleanly, and you'll end up with a lumpy install. Spend ten minutes cleaning the channel.
It makes a noticeable difference.
Over-tightening the torsion spring. More tension is not better. An overwound spring puts stress on the arms, the tube, and the mounting brackets. Follow the manufacturer's turn count exactly.
Working alone. The roller tube is awkward and heavy. Trying to manage it solo while also threading fabric and tensioning springs is a recipe for dropped hardware, torn fabric, or injury. Get a helper.
Ignoring the stop bolt position. If you don't note where the stop bolt was before disassembly, you'll have to experiment to find the right retraction limit. Mark it with tape before you remove it.
What It Costs: DIY Fabric vs. Professional Replacement
Let's talk numbers. The cost difference between doing it yourself and hiring a shop is significant.
A quality replacement fabric kit runs between $150 and $500 depending on size, material, and brand. Vinyl kits for a standard 16-foot awning typically land around $200 to $300. Acrylic upgrades push that to $350 to $500.
Professional replacement, including labor, runs $400 to $1,000 or more. Shop rates vary by region, and dealer service departments tend to charge more than independent RV repair shops. You're also looking at potential wait times.
During peak season, getting an appointment can take weeks.
Here's a rough cost breakdown:
| Expense | DIY Cost | Professional Cost |
|---|---|---|
| Replacement fabric kit | $150 to $500 | Included in labor |
| Tools (if you don't own them) | $30 to $80 | N/A |
| Labor | Your time, 2 to 4 hours | $200 to $500+ |
| Total | $180 to $580 | $400 to $1,000+ |
The DIY route saves you at least $200 and often much more. The trade-off is your time and the learning curve. If you've never worked on an RV awning before, budget a full afternoon for your first attempt.
It gets faster with experience.
One more thing worth noting. If your awning has other issues, like bent arms or a damaged roller tube, a fabric swap alone won't fix everything. In those cases, a professional assessment might save you from doing the job twice.
When to Replace the Whole Awning Instead of Just the Fabric
Sometimes a new piece of vinyl isn't the answer. If the roller tube is bent, the support arms are cracked, or the torsion spring is shot, you're throwing good fabric at a bad setup.
Here's when to consider a full awning replacement instead:
- The roller tube has a visible bend or dent that causes the fabric to track unevenly
- One or both support arms are bent, corroded, or won't lock properly
- The torsion spring has broken or lost its ability to hold tension after repeated re-tensioning
- The awning motor on a power unit has failed
- Multiple mounting points on the RV wall are pulling free or showing water damage
A complete awning assembly, including fabric, tube, arms, and hardware, runs $500 to $1,500 or more depending on the brand and size. It's a bigger investment, but it also means everything is new and matched. If your awning is more than ten years old and showing multiple issues, the full replacement often makes more financial sense than piecing it back together.
Pro Tips From People Who've Done This More Than Once
A few things that aren't obvious from the instructions but make a real difference on the job.
Take photos at every stage before you disassemble anything. The stop bolt position, the spring orientation, the fabric feed direction. When you're reassembling at hour three with a setting sun, those photos are worth more than any manual.
Label your bolts and hardware as they come out. A muffin tin or egg carton works great for keeping things organized by step. Mixing up bolts from different ends of the tube leads to cross-threading and stripped holes.
If the polycord is stubborn in the rail, a thin flat blade wrapped in a cloth can help work it along without damaging the fabric. Some people use a dab of dish soap as a temporary lubricant, but silicone spray is better because it doesn't attract dirt.
Check the awning pitch after installation. Most awnings should slope slightly away from the RV so water runs off. If the new fabric sits flat or slopes toward the wall, adjust the arm length or the rafter settings before you call the job done.
Frequently Asked Questions
How long does it take to replace RV awning fabric?
For a first-timer, plan on two to four hours. Experienced DIYers can do it in one to two hours. Add extra time if you're cleaning the rail channel or dealing with corroded hardware.
Can I replace RV awning fabric by yourself?
Technically possible but not recommended. The roller tube is heavy and awkward, and you need hands free to thread the polycord and manage the torsion spring. A helper makes the job safer and significantly easier.
How do I know what size fabric to order?
Measure the rail-to-rail width on your RV wall and the projection from the wall to the roller tube center. Order based on those measurements or match the fabric to your awning model number, which is usually on a sticker inside the roller tube or on the arm assembly.
Is vinyl or acrylic fabric better for RV awnings?
Vinyl is waterproof and more affordable, making it a solid choice for occasional use. Acrylic is more breathable, UV-resistant, and mildew-resistant, which makes it the better pick for full-timers and hot climates.
How often should RV awning fabric be replaced?
Most awning fabric lasts five to ten years. Harsh sun, high wind, and frequent use shorten that lifespan. Replace it as soon as you see tears, cracking, or persistent mildew to avoid further damage to the hardware.
What tools do I need to replace RV awning fabric?
You'll need a socket set, screwdrivers, pliers, a tape measure, safety glasses, work gloves, and silicone lubricant. A rubber mallet and a step stool are also helpful. Most importantly, get a second person to help.