How to Sew Stretchy/knit Fabric in 2026 (Step-by-Step Guide)
If you've ever tried sewing a T-shirt or leggings on a regular machine, you already know how fast knit fabric can turn into a headache. Learning how to sew stretchy/knit fabric starts with understanding that this material behaves nothing like woven cotton, and every choice you make, starting with the needle, determines whether your seams hold or fall apart.
Manufacturer guidelines from companies like Schmetz and Brother consistently point to three things that matter most: the needle point type, the stitch pattern, and how you handle the fabric while feeding it through. Get those right, and you'll produce seams that stretch, recover, and look store-bought. Here's exactly how it all fits together.
Image source: Wikimedia Commons / Wikimedia Commons contributor
Quick Answer
Use a ballpoint or stretch needle in size 80/12 for most knit fabrics. Select a zigzag stitch or narrow overlock stitch so the seam stretches with the fabric. Set stitch length to 2.0, 2.5 mm on a standard machine.
Avoid pulling the fabric; let the feed dogs move it. Press with low heat and a press cloth to avoid scorching.
The Biggest Mistakes When Sewing Stretchy Fabric (and Why They Happen)
Most ruined knit projects come down to the same handful of errors, and they're all easy to prevent once you recognize them.
Using a universal or sharp needle. Universal needles have a slightly tapered point designed to pierce woven fibers. On a knit, that point catches and snags the loops of yarn, creating holes that run like laddered tights. This is the single most common cause of damage.
Skipping the test sew. Knit fabrics vary wildly in weight, fiber content, and stretch percentage. A stitch configuration that works perfectly on a cotton jersey at 100 gsm (grams per square meter) may pucker or skip on a polyester-spandex blend at 220 gsm. Testing on a scrap takes five minutes and saves an entire garment.
Stretching the fabric while sewing. When you pull or tug the fabric through the machine, you distort the natural lay of the fibers. Once the seam is finished and the fabric relaxes back, that distortion shows up as puckering or a wavy edge. The feed dogs are designed to move the cloth for you.
Let them do their job.
Wrong stitch selection. A straight stitch on a knit has zero give. The moment the wearer moves, those thread lines snap. It's not a matter of if, it's when.
Incorrect tension. Too much upper tension pulls the bobbin thread to the visible side and creates dimpling. Too much bobbin tension creates loops underneath. Knit fabrics need slightly looser tension than wovens to let the seam flex.
Know Your Knit: Identifying Fabric Type, Stretch Direction, and Grainline
Before you thread a needle, you need to understand what you're working with. Not all knits behave the same way, and the differences matter more than you might think.
The 4 Main Knit Types and How They Behave Under a Needle
Jersey (single knit). This is the standard T-shirt fabric. It has a smooth right side with visible vertical "V" stitches and a purl-textured wrong side. Jersey curls aggressively toward the right side when cut, which throws beginners off.
It has moderate stretch across the grain and minimal stretch along the lengthwise direction. Use a ballpoint needle 80/12.
Rib knit. Those bands on T-shirt necklines and sweatpants cuffs. Rib knits have alternating knit and purl columns, creating vertical ridges. They stretch significantly across the width and recover well.
The ribs can confuse beginners because seamlines need to follow the valleys, not the peaks. Use a ballpoint 80/12 or 90/14 depending on weight.
Interlock knit. A double-knit fabric with jersey faces on both sides. It's more stable than single jersey, doesn't curl as aggressively, and has less stretch overall. Think pajama wear and structured casual tops.
Because of its density, a stretch needle can outperform a plain ballpoint here.
French terry and sweatshirt fleece. Looped on one side, smooth on the other. These are heavier knits that can dull needles quickly. Go up to a 90/14 ballpoint or stretch needle, and expect your tension settings to need adjustment compared to lighter jersey.
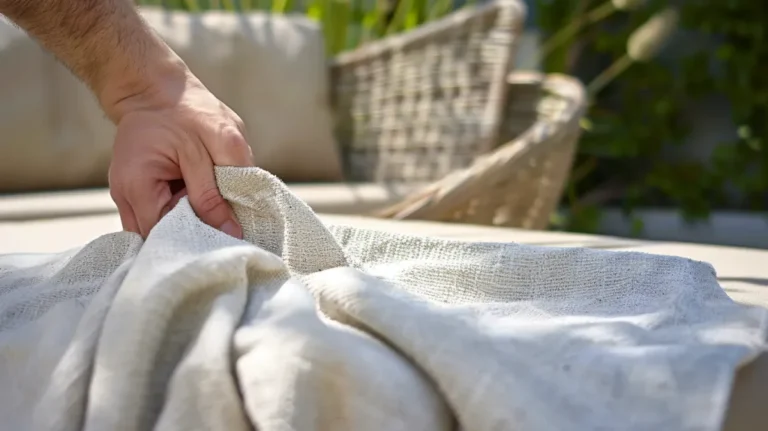
How to Find the Stretch Percentage and Recovery Before You Cut
Hold a 4-inch section of fabric between two hands. Pull it gently across the direction that has the most give. If it doubles to roughly 8 inches, that's 100% stretch.
If it only reaches about 6 inches, that's 50% stretch. Most pattern envelopes specify the minimum stretch required.
Then let go. If the fabric snaps back to nearly its original width within a few seconds, that's good recovery, ideal for leggings and activewear. If it stays stretched out, you'll get baggy knees and sagging seams over time.
Stretch direction runs perpendicular to the selvage edge on most knits, but cheaply cut fabric can be off-grain, meaning the stretch doesn't align where it should. That misalignment is why knowing how to find the grainline on fabric matters even more with knits than with wovens.
Choosing the Right Needle: Ballpoint vs. Stretch vs. Twin Needle
The needle is the single most important decision in this entire process. Everything else matters more if you get the needle point wrong.
Image source: Bing (Web (fair-use with source credit))
Ballpoint Needle — Your Go-To for Most Knits
A ballpoint needle has a rounded tip that pushes between the loops of a knit fabric rather than cutting through them. Think of it as the difference between threading between fence posts versus poking a hole through them.
Per Schmetz's official classification, ballpoints are designated by the orange band on the shaft shaft. They work reliably on jersey, rib, interlock, French terry, and most everyday stretch fabrics.
| Needle Size | Best For | Example Fabrics |
|---|---|---|
| 70/10 | Lightweight knits | Slinky polyester, sheer jersey, lightweight rib |
| 80/12 | Medium-weight knits | Cotton T-shirt jersey, interlock, basic rib |
| 90/14 | Heavy knits | Sweatshirt fleece, French terry, thick scuba knit |
When in doubt, start with 80/12. It handles the broadest range of knit fabrics found in home sewing patterns. Drop to 70/10 only when the 80/12 causes visible needle holes.
Go up to 90/14 on dense or multi-layer seams.
Stretch Needle — When You Need Extra Skip Prevention
A stretch needle looks similar to a ballpoint but has a more deeply rounded tip and a specially designed scarf (the flat area above the eye) that prevents the fabric from pushing down far enough to disrupt the stitch formation. It's engineered specifically for high-stretch fabrics: Lycra, spandex blends, swimwear, and anything with more than 50% stretch.
Designated by the yellow band on Schmetz needles, they come in 75/11 and 90/14 sizes. If you're consistently getting skipped stitches with a ballpoint on a spandex-heavy fabric, the stretch needle is the solution before you change anything else.
They are not the same as ballpoint needles. The distinction matters because a genuine stretch needle's deeper tip geometry fills a gap that a standard ballpoint leaves open on high-elasticity fibers. After all, even a ballpoint can micro-disrupt a tight spandex weave enough to skip.
Watch out for cheap store-brand knockoffs claiming to be stretch needles. If the packaging doesn't mention the scarf modification or the specific needle system (130/705H), you're probably holding a rebranded ballpoint. Stick with Schmetz, Brother, or Singer branded packs sold through authorized dealers.
Twin Needle — Creating a Professional Hem That Actually Stretches
A twin needle mounts two needles on a single shaft and sews two parallel rows of stitching on top while a zigzag forms underneath on the bobbin side. The result is a hem that stretches across the track exactly like the garment fabric does.
The critical sizing is the spacing between the two needles, measured in millimeters:
| Designation | Needle Spacing | Best For |
|---|---|---|
| 2.5/80 | 2.5 mm apart, size 80 | Thin jersey, lightweight hems on T-shirts |
| 4.0/80 | 4.0 mm apart, size 80 | Medium knits, general garment hems |
| 4.0/90 | 4.0 mm apart, size 90 | Heavy knits, double decoration rows |
You need a zigzag throat plate on your machine and enough clearance under the presser foot for two needles. Check your machine manual before purchasing. Using a twin needle on a straight-stitch-only machine will snap the needles and potentially damage the needle bar.
Machine Setup: Stitch Selection, Tension, and Feed Settings That Matter
Once the needle is in, the next layer of decisions determines whether your seams disappear into the garment or stand out as amateur.
Stitch Choices That Work (and Ones to Avoid)
Zigzag stitch. Set width to 2.0, 2.5 mm and length to 2.0, 2.5 mm for a standard jersey seam. This is the minimum viable stretch stitch on a regular sewing machine. A zigzag with a width below 1.5 mm acts almost like a straight stitch and will break under tension.
A width above 4.0 mm eats thread fast and creates a bulky seam allowance.
Lightning bolt stitch (triple zigzag). Some machines label this the "stretch stitch" or "elastic stitch." It sews three tiny stitches in each zigzag direction, creating a seam that stretches and holds its shape better than a standard zigzag. It's excellent for swimwear and elastic insertion. F.
Schmetz GmbH recommends it per its official guidelines for high-stretch applications.
Three-thread overlock (serger). The closest most home sewists get to factory finish. A 3-thread overlock with a stitch length of 2.5, 3.5 mm handles most knit seaming tasks. It encloses the raw edge and stretches simultaneously.
Some manufacturers design knit patterns based purely on having a serger.
Straight stitch. Avoid for any seam that will bear tension or movement. A straight stitch has zero elasticity and will snap the first time someone raises their arms in a T-shirt. The only acceptable uses are staystitching a neckline before attaching a band, and topstitching where elasticity isn't needed.
Narrow hem on a serger. Not applicable to knits. Narrow hems expose thread straight lines that can break when stretched. Always leave at least 3/8-inch seam allowances on knit garments for durability.
Differential Feed — The Undersung Serger Feature
A serger has two sets of feed dogs: front and rear. Differential feed alters the ratio between them, either stretching the fabric slightly as it passes under the needle (ratio below 1.0, which causes easing) or compressing it (ratio above 1.0, which prevents stretching out).
Preventing wavy seams on lightweight knits is exactly where a slightly tightened differential feed shines. Set the dial to 1.2 or 1.3 and feed the fabric with gentle forward guidance. Because setting it too high stretches the fabric, which creates distortion under the foot, a loosened feed on heavier knits gives the fabric room and stops the edge from pulling tight.
Differential feed isn't a substitute for correct handling, but it's a powerful companion that many home serger owners never explore despite its usefulness.
Presser Foot Pressure and Walking Feet
On a domestic sewing machine, lower the presser foot pressure if your machine allows it. Too much pressure compresses the knit fibers under the foot and causes uneven feeding. Most Brother and Janome machines have a dial or setting for this.
A walking foot (also called an even-feed foot) has its own set of feed dogs on top that move in sync with the machine's lower feed dogs. This prevents the top layer from shifting ahead of the bottom layer, which happens constantly with smooth knits. You'll notice this feature mostly when matching seams on stripes or prints, and when hemming multiple layers at neckbands and cuffs.
A walking foot is not a replacement for a serger. Think of it as a seam alignment tool. Use it when sewing two layers together at a seamline, not for finishing raw edges.
Step-by-Step: Sewing a Knit Seam from Cutting to Pressing
Cutting Without Distorting
Lay your knit fabric on a large, flat surface. Use pattern weights instead of pins whenever possible. Pins push fibers aside and create permanent dimples that don't press out.
Cut with sharp shears using a single, confident motion. Avoid short scissor strokes that shift the fabric layers against each other.
If your jersey curls aggressively, lightly mist the cut edges with water and smooth them flat before stacking pieces. Let them dry completely before sewing.
Sewing the Seam (Machine and Serger Methods)
On a domestic machine: Pin the right sides together every 3 to 4 inches. Don't skimp on pins, they keep layers aligned before the feed dogs take over. Sew at a moderate speed, around half throttle.
Fast feeding stretches the fabric unpredictably under the foot.
Start with a fabric tail, a few inches of already-sewn fabric behind the needle, so the feed dogs have material to grip from the first stitch. This prevents the needle from chewing up the edge when you begin a new seam.
On a serger: Check that the knife is sharp. A dull knife on a serger doesn't trim cleanly, it pulls. Align the raw edge with the cutting line on the needle plate, not the seam allowance guide.
The knife cuts off the excess, so position determines your final seam width.
Finishing Edges and Pressing Without Scorching
Serged edges are already finished. For machine-sewn seams, run a zigzag stitch along the raw edge or trim with pinking shears to reduce fraying. Leave the edge unfinished if you'll be enclosing it in a waistband or binding later.
Press seams to the side, not open. Pressing open a knit seam stresses the threads and can leave the join looking popped. Use a low iron setting, typically the "synthetics" or "silk" range.
Press a dry pressing cloth over the fabric for no more than two seconds at a time. Synthetic knits like polyester and spandex melt quickly under a hot iron. Keep the iron moving and don't let it sit flat.
Hemming Knits: Twin Needle, Coverstitch, and Fallback Methods
Twin Needle Hem on a Regular Machine
Image source: Bing (Web (fair-use with source credit))
The twin needle hem gives you the closest look to ready-to-wear without a coverstitch machine. You'll get two parallel rows of straight stitching on top and a zigzag on the underside that stretches with the fabric.
Use a pressing motion rather than sliding the iron. Fold the hem up once or twice, depending on your pattern. Sew slowly and keep the raw edge aligned with the guide on your presser foot.
The twin needle creates bulk under the foot, so go easy near seam intersections.
Coverstitch Machine Hem
A coverstitch machine loops top thread from the needle while a looper threads from below. The result is a professional multi-thread chain on the underside that stretches and secures simultaneously. Coverstitch machines don't trim, so you fold and press the hem before sewing.
Equipment in this category typically requires two needles and at least one looper, producing a seam that garment factories use. They are the industry standard for hemming knit garments, but the investment only makes sense if you sew knits regularly.
What to Do If You Have Neither
A zigzag stitch folded closely under the hem is a reliable third option. Set width to 4.0 mm and length to 2.5 mm. Stitch from the wrong side so the zigzag goes over the raw edge, then trim close to the stitching.
It's not as neat, but it's durable and stretches.
You can also use a simple turned-under hem with a single fold and straight stitch. This is too rigid for thin jersey but works okay on stable double knits where stretch isn't critical. Add a line of elastic thread in the bobbin for extra give.
Common Problems and How to Fix Them at the Machine
Image source: Bing (Web (fair-use with source credit))
Skipped Stitches
Skipped stitches happen when the bobbin hook and needle eye don't align at the precise moment the fabric is stretched. Try changing to a stretch needle first. Check that your needle is fully seated in the bar and isn't loose.
Slow down your sewing speed so the timing stays reliable. A drop of oil on the hook assembly often resolves mistiming on sergers that haven't been serviced recently.
Puckering
Puckering along seamlines is usually caused by loose upper tension. Tighten the dial slightly, or use a finer thread. Try a shorter stitch length so the thread sits flatter.
In extreme cases, switch to woolly nylon in the loopers, it fills gaps without adding stiffness.
Wavy or Stretched-Out Edges
You were likely pulling the fabric. Adjust your foot pressure or switch to a walking foot. Use differential feed to feed the fabric evenly.
Pressing with steam can often reshape stretched edges, but it won't fix severely deformed seams. For future reference, cut pieces slightly longer and trim after sewing to preserve the correct shape.
Thread Breakage and Loops on the Underside
Loops on the back of the fabric mean the upper tension is too loose. Thread breakage points to the opposite problem. When adjusting small increments, a quarter-turn of the dial is usually enough, then test on a scrap.
Badly worn thread cones cause excessive friction and mimicking tension problems. Fresh quality thread solves many breakage mysteries.
Needle Runs or Holes in the Fabric
Switch to a ballpoint or stretch needle immediately if you see needle perforations. Look out for sink marks, tiny crescent shapes that suggest the needle is denting the fabric. Reserve fine "microtex" or sharp needles only for tightly woven woven fabrics; they are not designed for loops.
If holes persist and you are already using a brand-name stretch needle, the fabric content may deserve closer examination; some brands labeled "knit" have a tight weave structure from recycled fibers that resists push-through.
Tool and Thread Recommendations with Real-World Ranges
Needle Size Quick Reference
| Size | Common Use |
|---|---|
| 70/10 | Slips, specialty lightweight jersey, lace attachment |
| 75/11 | Stretch needle for Lycra swimsuits, tight swim elastane |
| 80/12 | Universal ballpoint for T-shirts, cotton jersey, quilting cotton-spandex blends |
| 90/14 | Heavy fleece, French terry, double-knit coats |
Thread Choices for Knit Seams
| Thread Type | Notes |
|---|---|
| All-purpose polyester | Acceptable for most knits on a machine; avoid cotton thread |
| Poly-wrapped corespierced poly | Smooth feed, strengthened for high-speed serging; excellent for seaming |
| Woolly nylon | Soft, stretchy thread for loopers and coverstitch looper sides; ideal for bulky seams |
| 100% polyester elastic thread | Used in bobbin for shirring and stretch hems; do not thread needles |
Budget Ranges for Sergers, Coverstitch Machines, and Accessories
| Equipment | Typical Price Range |
|---|---|
| Entry-level serger (3/4-thread) | $200 to $350 |
| Higher-end serger (5-thread with coverstitch) | $400 to $800 |
| Dedicated coverstitch machine | $500 to $1,400 |
| Even-feed foot for walking use | $15 to $45 |
| Ballpoint needle variety pack | $8 to $15 per pack |
Expert Tips Most Tutorials Leave Out
Sergers revolutionize the workflow because they trim, stitch, and finish raw edges simultaneously. Project assembly becomes faster with these machines. Edges stay intact along paths for professional quality.
Aggregate reviews from serger owners highlight reliability shifts as features accumulate, but long-term preventive maintenance like routine cleaning and ultrasonic oiling prolongs machine life according to manufacturer service intervals.
Fabric tube flipping is a tiresome task that gets done quickly with simple suction methods. Working with knits involves many neckbands and cuffs cut as folded loops, where a chopstick or knitting needle gives fine-tip gentle control without damaging the seams.
Frequently Asked Questions
Can I use a straight stitch on knit fabric at all?
A straight stitch is acceptable only on seams that won't face stress during wear, such as vertical side panels. Any seam that moves with the body (armholes, shoulder joins, side seams on fitted garments) needs a stretch stitch like zigzag or overlock. A straight stitch will break immediately once the fabric stretches during movement.
Why does my knit fabric curl at the edges after cutting?
Edge curling is caused by internal tension in the knit structure. Jersey curls toward the right side, while rib knits curl toward the middle. The fibers release stored energy from the manufacturing process when cut.
A light mist of water, a quick press with a low iron, or placement under pattern weights overnight usually solves it.
How many strands of thread should a serger have for knitting tasks?
For seams that see daily wear (jeans, T-shirts, leggings), a 3-thread or 4-thread overlock holds up well. A 2-thread finish is too light for high-stress areas, while a 5-thread chainstitch is overkill for home sewers and uses extra thread without noticeable benefit. Serger manuals contain detailed setup diagrams.
Should I wash knit fabric before sewing?
Pre-washing stabilizes the fabric so the finished garment won't shrink unevenly later. Polyester-spandex blends don't shrink dramatically but can soften, making them easier to handle at the machine. Pre-wash according to the bolt instructions or use a gentle cool cycle for delicate fabrics.