How to Get Burrs Off Clothing 2026
If you've ever pulled your favorite fleece jacket off after a fall hike and found it covered in spiky little seed pods, you already know the frustration. Learning how to get burrs off clothing isn't just a chore, it's a skill that saves your gear and your patience. The good news is that with the right approach, most burrs come off cleanly without damaging the fabric.
Burrs are the seed dispersal structures of several common weed species, and they've evolved to cling to anything that moves. Their tiny hooks and barbs grip fabric fibers mechanically, which is why shaking or brushing alone rarely does the trick. The best removal method depends on the burr type, the fabric you're dealing with, and how deeply those barbs have embedded.
Let's walk through everything you need to know.
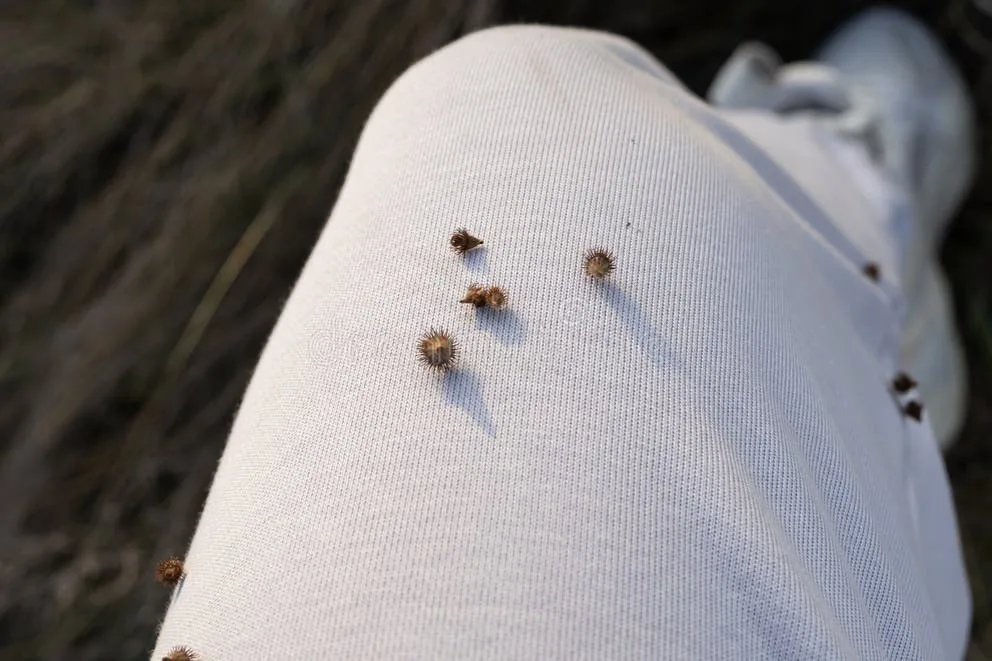
Image source: Bing (Web (fair-use with source credit))
Quick Answer
The fastest way to remove burrs from clothing is to freeze the garment for one to two hours, then snap the brittle burrs off by hand. For lighter infestations, press duct tape or a lint roller onto the fabric and peel away. On sturdy fabrics like denim, a wide-tooth comb or rubber gloves work well.
Always remove burrs before washing to prevent them from spreading to other clothes.
What Burrs Actually Are and Why They're So Hard to Remove
Burrs are dry, hardened seed pods produced by plants like cocklebur (Xanthium strumarium), burdock (Arctium species), and foxtail grasses (Hordeum and Setaria species). They evolved specifically to hitch rides on passing animals, and their surface is covered in tiny hooked barbs that latch onto fur and fabric fibers at a microscopic level.
That hook structure is what makes them so stubborn. Each barb acts like a tiny fishhook, catching individual threads in the fabric weave. The more you tug or rub, the deeper those barbs can work their way in, especially on loose knits and fleece.
Pulling a burr straight off a cotton t-shirt is one thing. Pulling one off a polyester fleece pullover is a completely different problem.
There are a few common types you'll encounter:
- Cockleburrs: Oval, covered in stiff hooked spines. Common in fields and disturbed soil across North America.
- Burdock burrs: Round, with dense hooked bracts. The original inspiration for Velcro.
- Foxtail seed heads: Barbed, spear-shaped clusters from certain grasses. These can actually work into fabric and even skin.
- Stick-tight (Desmodium): Flat, triangular pods with fine hooks that cling aggressively to socks and pant cuffs.
Understanding which type you're dealing with helps you pick the right removal method. Cockleburrs and burdock burrs tend to sit on the surface and can be grabbed or rolled off. Foxtails and stick-tights embed more deeply and often need to be loosened first.

Image source: Bing (Web (fair-use with source credit))
How Different Burr Types Grip Different Fabrics
Not all fabrics hold burrs equally. The weave structure, fiber type, and surface texture all determine how tightly a burr grips and how hard it is to remove.
Tight-weave fabrics like denim, canvas, and tightly woven cotton are the easiest to deal with. The burr barbs can only catch the surface fibers, so they don't embed deeply. A comb or tape usually
They don't grab as aggressively. A quick pass with a lint roller or a comb usually clears them.
Loose-weave and knit fabrics like fleece, wool sweaters, and jersey knits are the worst offenders. The open loops in the knit structure give burr barbs plenty to hook into. Once embedded, burrs can be nearly impossible to pull out without damaging the fabric.
These materials need a gentler, pre-treatment approach.
Synthetic fabrics like nylon and polyester blends fall somewhere in between. The smooth fibers resist initial attachment, but once a barb catches, it holds tight. Fleece is the notable exception, its textured surface is basically a burr magnet.
Delicate fabrics like silk and fine merino wool require the most care. Aggressive pulling or scraping can snag threads or distort the weave. For these, the freezer method or a careful tweezers approach is your safest bet.
Here's a quick reference:
| Fabric Type | Burr Grip Level | Best Removal Method |
|---|---|---|
| Denim, canvas | Low to moderate | Comb, tape, rubber gloves |
| Cotton twill, chambray | Moderate | Tape, lint roller, comb |
| Fleece, polyester knit | High | Freezer method, then gentle picking |
| Wool, merino knit | High | Freezer method, tweezers for leftovers |
| Silk, fine weaves | Moderate but fragile | Freezer method, tweezers only |
What You'll Need: Tools and Supplies for Burr Removal
You don't need anything fancy. Most of what works for burr removal is already in your home. Here's a practical checklist organized by method.
Freezer method supplies:
- A large zip-top bag or access to your freezer
- A hard, flat surface for snapping burrs off
- Tweezers for any fragments that remain
Tape and adhesive method supplies:
- Duct tape or wide packing tape
- A standard lint roller (the sticky-sheet kind)
- Optional: a Velcro hair roller, which picks up burrs surprisingly well
Mechanical removal supplies:
- A wide-tooth comb or pet comb
- Rubber household gloves (the textured kind)
- Needle-nose tweezers or small pliers
Soak and pretreatment supplies:
- White distilled vinegar (5% acidity)
- A basin or sink for soaking
- A soft-bristle brush or old toothbrush
- A mesh laundry bag for the wash
For heavy-duty situations:
- A pumice stone (only for tough fabrics like canvas or denim)
- Fabric-safe adhesive remover for sticky residue
One thing worth noting: avoid using your regular lint roller sheets on heavily infested garments. You'll burn through a whole roll in seconds. Save those for light touch-ups.
For serious burr problems, duct tape wrapped around your hand sticky-side-out is far more economical and effective.
Step-by-Step: The Freezer Method for Delicate and Knit Fabrics
This is the go-to method for fleece, wool, and any fabric where pulling burrs out by hand would damage the fibers. Freezing makes the burr pods brittle so they snap off cleanly.
Step 1: Bag the garment. Place the burr-covered clothing in a large zip-top bag. This keeps any loose burrs from scattering in your freezer.
Step 2: Freeze for one to two hours. Set your freezer to its normal temperature, around 0°F (-18°C). You want the burrs fully frozen through, not just surface-cold. For thick or heavily infested items, give it the full two hours.
Step 3: Remove and work quickly. Take the garment out and lay it flat on a hard surface. Work in sections. The burrs will start to thaw and soften within a few minutes, so don't dawdle.
Step 4: Snap or flick the burrs off. Press a fingernail or the edge of a credit card against the base of each burr and snap it away from the fabric. Frozen burrs should pop off with minimal resistance. If one doesn't release easily, it may not be frozen through.
Pop the garment back in for another 30 minutes.
Step 5: Pick remaining fragments with tweezers. A few barbs or broken pieces usually stay behind. Go over the fabric carefully with tweezers and pluck them out one at a time.
Step 6: Inspect before washing. Hold the garment up to a light and check for any remaining burrs. Then launder separately or in a mesh bag.
This method works especially well on fleece jackets, wool socks, and knit hats. It's also the safest option for anything you're worried about snagging or pilling.
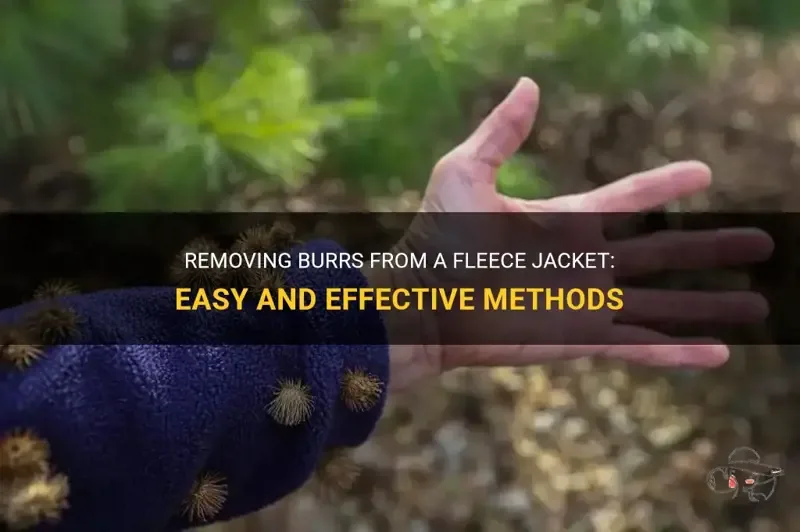
Image source: Bing (Web (fair-use with source credit))
Step-by-Step: The Tape and Lint Roller Method for Light Infestations
When burrs are sitting on the surface and haven't embedded deeply, adhesive removal is the fastest approach. It works best on smooth, tightly woven fabrics like cotton twill, nylon shells, and polyester blends.
Step 1: Lay the garment flat. Spread it out on a table or counter with the burr-covered area facing up. Smooth the fabric so there are no wrinkles or folds.
Step 2: Press and peel with tape. Tear off a strip of duct tape, about six to eight inches long. Press it firmly onto the burr-covered area, then peel it straight up. The burrs should lift off with the tape.
Use a fresh strip as the adhesive gets loaded up.
Step 3: Follow up with a lint roller. Once the bulk of the burrs are gone, go over the area with a lint roller to catch any small fragments or stray barbs.
Step 4: Check seams and pockets. Burrs love to collect in seam folds, pocket openings, and cuff edges. Press tape into these areas carefully.
Step 5: Wash the garment. Even after tape removal, tiny fragments can remain. Wash the item separately or in a mesh laundry bag to catch anything that comes loose.
A few tips from experience: wrap duct tape around your fingers sticky-side-out for more control on curved areas like sleeves. Velcro hair rollers also work well as a reusable alternative, just roll them across the fabric surface and pick the burrs off the roller as they accumulate.
This method is quick, requires no special tools, and is gentle enough for most fabrics. It's not ideal for fleece or heavy knits where burrs are deeply embedded, but for surface-level infestations, it's hard to beat.
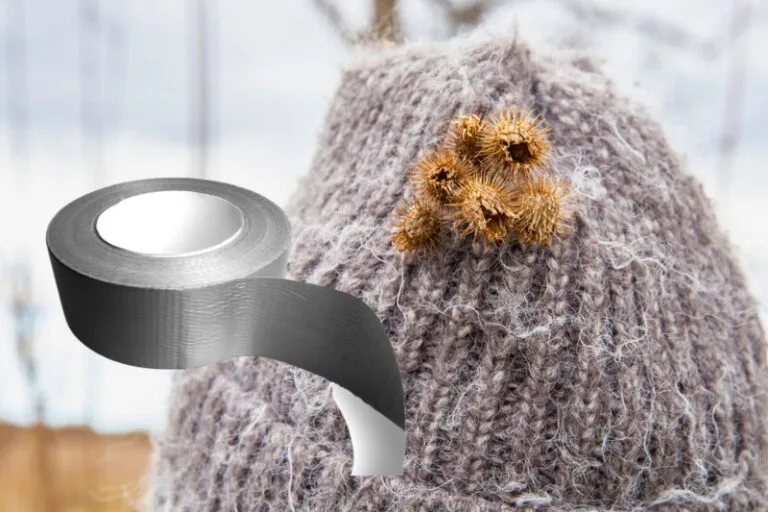
Image source: Bing (Web (fair-use with source credit))
Step-by-Step: The Comb and Rubber Glove Method for Sturdy Fabrics
Got a pair of jeans or a canvas jacket covered in burrs? This is your method. It's fast, physical, and works great on tight-weave fabrics that can handle a little friction.
Step 1: Lay the garment on a hard surface. A table or countertop works best. You want something solid behind the fabric so the comb can catch.
Step 2: Drag a wide-tooth comb across the surface. Start at one edge and work in straight lines, pulling the comb through the fabric in the direction the burrs are pointing. The teeth catch the burr bodies and pull them free. A pet comb with medium-spaced teeth works just as well.
Step 3: Switch to rubber gloves for clusters. Put on a pair of rubber household gloves. Rub the burr-covered area with firm, circular motions. The friction rolls the burrs into little clumps that you can pinch off.
This trick is especially effective on denim and canvas.
Step 4: Work seams and pockets by hand. Combs can't reach into tight spots. Use your gloved fingers or tweezers to clear burrs from folded edges, button plackets, and pocket flaps.
Step 5: Shake out the garment and inspect. Give it a good shake outdoors. Hold it up to check for stragglers, then toss it in the wash.
This method is rough on delicate fabrics. Don't use a comb on silk, fine wool, or anything loosely knitted. Save it for the tough stuff.
Step-by-Step: Tweezers and Precision Removal for Stubborn Individual Burrs
Sometimes you've cleared the bulk of the infestation and a few burrs remain, deeply embedded and refusing to budge. That's when you switch to precision mode.
Step 1: Use good lighting. Sit near a window or under a bright lamp. You need to see exactly where the burr barbs are gripping the fabric.
Step 2: Grip the burr body, not the barbs. Grab the main pod with needle-nose tweezers or small pliers. Don't try to pull individual barbs out one at a time. You'll just break them off and leave fragments behind.
Step 3: Wiggle, don't yank. Gently work the burr back and forth to loosen the barbs from the fibers. Once it starts to release, pull straight out along the angle it went in. Tugging at a wrong angle can stretch or tear the fabric.
Step 4: Check for leftover barbs. After removing the main burr, run your fingers over the spot. If you feel tiny prickles, there are still barbs embedded. Use the edge of a credit card to flick them out, or go back in with the tweezers.
Step 5: Treat any snags. If the fabric pulled or pilled during removal, gently smooth the area with your fingernail or a soft brush. On knits, you can often coax the fibers back into place with a bit of steam from an iron held a few inches away.
This is slow work, but it's the only reliable way to clear deeply embedded burrs from delicate or expensive garments without causing damage.
How to Soak and Pretreat Sticky or Deeply Embedded Burrs
Some burr species, particularly stick-tight and certain cockleburrs, leave behind a gummy residue or have barbs so fine they've worked deep into the fiber. When mechanical removal isn't cutting it, a soak can help.
Step 1: Mix a vinegar solution. Combine equal parts white distilled vinegar and lukewarm water in a basin. Standard household vinegar at 5% acidity is strong enough to help loosen organic residue without damaging most fabrics.
Step 2: Soak for 30 minutes. Submerge the affected garment completely. The acidity helps break down any sticky plant residue and can slightly soften the burr barbs, making them easier to remove.
Step 3: Gently brush the area. After soaking, use a soft-bristle brush or old toothbrush to lightly scrub the burr-covered areas. Work in the direction of the fabric weave to avoid pushing barbs deeper.
Step 4: Remove loosened burrs by hand or with tweezers. The soak should have weakened the grip significantly. Pick off what you can, then go over the area with tape or a lint roller for the rest.
Step 5: Rinse and launder. Rinse the garment in clean water to remove the vinegar smell, then wash as usual. Use a mesh laundry bag to contain any remaining fragments.
A few caveats: don't use this method on silk or wool unless you're certain the fabric can handle a mild acid soak. Always test on an inconspicuous area first. And never use hot water, heat sets plant-based residues and makes them harder to remove.
The Right Way to Wash Burr-Infested Clothing Without Spreading Them
Washing burr-covered clothes without pre-treating them is one of the most common mistakes people make. The agitation loosens burrs and redistributes them across every other item in the load. Here's how to do it right.
Step 1: Remove as many burrs as possible before washing. Use whichever method fits your fabric type. The goal is to get the garment as burr-free as you can before it hits the machine.
Step 2: Use a mesh laundry bag. Place the pre-treated garment in a zippered mesh laundry bag. This catches any burrs that come loose during the wash cycle and keeps them from migrating to your other clothes.
Step 3: Wash separately if possible. If you don't have a mesh bag, run the burr garment alone. A cold or warm wash on a gentle cycle is fine. Avoid hot water, it can set any remaining plant residue into the fibers.
Step 4: Check the lint trap and drum. After the cycle, inspect your washing machine's lint filter and the drum for any burrs that escaped the bag. Run an empty rinse cycle if needed to clear them out.
Step 5: Air dry and inspect again. Don't put the garment in the dryer until you're sure it's completely burr-free. Heat can set any remaining fragments into the fabric permanently. Hang it up, let it dry, then do a final check.
Step 6: Clean your machine. Wipe down the rubber gasket and drum with a damp cloth. Burrs love to hide in the door seal of front-loading washers.
What to Do When Burrs Have Already Been Through the Dryer
If you've already dried a burr-covered garment, don't panic. It's harder to fix, but not impossible. Heat makes burrs brittle and can fuse plant residue to fibers, but most burrs can still be removed with patience.
Start by re-wetting the garment. Soak it in cool water for 15 to 20 minutes to rehydrate any dried plant material. Then apply the freezer method: once the garment is damp, bag it and freeze it for two hours.
The combination of rehydration and freezing can loosen burrs that heat set into the fabric.
After freezing, work through the garment section by section with tweezers. You'll need to go slower than usual because the barbs may have bent or broken off inside the fibers. A magnifying glass helps for spotting tiny fragments.
For any sticky residue left behind, dab a small amount of fabric-safe adhesive remover or rubbing alcohol on a cotton ball and blot the area. Test on a hidden spot first to make sure it doesn't affect the dye.
Once you've cleared what you can, wash the garment again in a mesh bag and air dry. Inspect one more time before considering it done.