How to Remove Foam Insulation From Clothes 2026
Image source: Bing (Web (fair-use with source credit))
You've just finished a weekend insulation project, and now there's a blob of expanding foam stuck to your favorite work jeans. It happens more often than you'd think. Learning how to remove foam insulation from clothes starts with understanding what you're dealing with, because the wrong approach can ruin the fabric faster than the foam itself.
The good news is that fresh spills are very treatable. The bad news is that fully cured spray polyurethane foam forms a bond that's nearly impossible to break without damaging the textile underneath. According to the U.S.
Environmental Protection Agency, most spray foam products reach full cure within 8 to 24 hours, which means your window for an easy fix is shorter than most people realize. Let's walk through exactly how to handle this, step by step.
Quick Answer: What Actually Works (and Don't)
Act fast. Scrape off uncured foam with a dull plastic edge. Don't rub it in.
For residue, apply a fabric-safe solvent like isopropyl alcohol and blot gently. Test any solvent on a hidden seam first. Fully cured foam on delicate fabric may be permanent.
Why Foam Insulation Is So Hard to Remove From Clothes
Spray polyurethane foam is designed to stick to everything. That's literally the point. It adheres to wood, metal, concrete, and yes, your cotton duck canvas pants.
The chemistry behind it involves isocyanate compounds that react with moisture and form rigid polymer bonds on contact with surfaces.
Once those bonds set, you're not just dealing with a surface stain. The foam has physically woven itself into the fabric's fiber structure. Think of it like glue soaking into a sponge.
Pulling the top layer off leaves residue deep in the weave.
There's also the expansion factor. Spray foam can expand up to 30 times its liquid volume during application. That means even a small splatter pushes itself into every available gap in the fabric before it hardens.
The result is a mechanical bond on top of a chemical one.
This is why timing is everything. The difference between a five-minute cleanup and a ruined garment often comes down to whether you caught it in the first hour or the next day.
How Foam Insulation Bonds to Fabric — And Why Timing Matters
Image source: Bing (Web (Web (fair-use with source credit)))
The bond between foam and fabric changes dramatically over time. In the first few minutes after contact, the foam is still a viscous liquid. It hasn't begun its chemical cure cycle yet.
At this stage, it sits on top of and between fibers without a permanent bond.
Between 15 minutes and 2 hours, the foam starts to skin over. The outer surface hardens while the interior is still soft. This is the trickiest stage because aggressive removal can smear the semi-cured material deeper into the fabric.
After 8 to 24 hours, full cure is complete. The polyurethane has cross-linked into a rigid plastic. At this point, the foam and the fabric are essentially fused.
Removing it requires breaking the polymer itself, which almost always means damaging the fibers around it.
Here's a rough timeline of what you're working with:
| Foam Stage | Time Window | Removal Difficulty | Best Approach |
|---|---|---|---|
| Wet / liquid | 0 to 15 minutes | Easy | Scrape and blot |
| Tacky / skinning | 15 minutes to 2 hours | Moderate | Scrape carefully, then solvent |
| Partially cured | 2 to 8 hours | Difficult | Solvent soak, then mechanical |
| Fully cured | 8 to 24+ hours | Very difficult | Aggressive solvent or professional |
Understanding where your spill falls on this timeline determines everything that follows.
First, Identify Your Foam Type and Fabric
Not all foam is created equal, and neither is all fabric. The combination you're dealing with dictates which removal methods are safe and which ones will make things worse.
Spray Polyurethane Foam vs. Rigid Foam vs. Adhesives
Spray polyurethane foam (SPF) is the most common culprit. It comes in pressurized cans or two-part kits and expands on contact. This is the type that bonds aggressively and cures into a hard, spongy mass.
Rigid foam boards (like extruded polystyrene or polyisocyanurate) don't usually end up on clothes unless you're cutting or sanding them. The dust and small particles can embed in fabric, but they don't bond the way spray foam does. A thorough shake-out and vacuum usually handles it.
Foam adhesives (like subfloor glue or construction adhesive in foam form) are a middle ground. They're tackier and stay flexible longer, which actually makes them somewhat easier to remove mechanically before full cure.
Natural Fibers vs. Synthetics: What Can Handle Solvents?
Your fabric type is just as important as the foam type. Cotton, denim, and canvas are relatively tough. They can tolerate mild solvents and moderate abrasion without falling apart.
Wool and silk are far more delicate. Aggressive solvents can strip natural oils and cause shrinkage or discoloration. Mechanical scrubbing can felt wool fibers permanently.
Synthetic fabrics like polyester, nylon, and spandex present a different problem. Acetone, a common solvent recommendation, can dissolve or weaken some synthetic fibers. Nylon is particularly vulnerable.
Always assume a synthetic fabric needs a gentler approach unless you've tested otherwise.
Step-by-Step Removal Based on Foam Stage
This is where the decision tree really matters. Follow the path that matches your situation.
If the Foam Is Still Wet or Tacky
Image source: Bing (Web (fair-use with source credit))
You've got maybe 15 minutes before this gets harder. Work quickly but don't panic.
- Grab a dull plastic scraper, an old credit card, or a butter knife. Avoid metal edges that can cut fabric fibers.
- Gently lift and scrape the bulk of the foam away from the fabric. Work from the edges toward the center to avoid spreading it.
- Blot the remaining residue with a clean, dry cloth. Press down firmly and lift. Don't rub.
- If residue remains, dampen a cloth with warm soapy water and dab the area. Rinse with clean water.
- Air dry the garment completely before assessing whether any stain remains.
The key here is speed and a light touch. Wet foam is forgiving. Aggressive handling is not.
If the Foam Is Partially Cured
The foam has skinned over but still has some give when you press it. This is the stage where most people make mistakes by either giving up or going too hard.
- Use your plastic scraper to remove as much of the outer shell as possible. You'll likely leave a thin film behind.
- Apply a small amount of isopropyl alcohol (70% concentration) to a clean cloth. Dab it onto the residue. Let it sit for 2 to 3 minutes to soften the polymer.
- Gently scrape again with the plastic edge. The softened foam should lift more easily.
- Repeat the solvent application and scraping until the residue is gone or stops responding.
- Rinse the area thoroughly with cold water and launder as normal.
If isopropyl alcohol isn't cutting it, you can try acetone on cotton or denim only. Never use acetone on synthetics, silk, or wool. And always test on an inside seam first.
If the Foam Is Fully Cured and Hard
This is the tough one. Fully cured polyurethane is essentially a plastic bonded to your clothes. Removal is possible in some cases, but fabric damage is a real risk.
- Try mechanical removal first. Use a stiff brush or fine-grit sandpaper (220 grit or higher) to abrade the foam surface. Work slowly and check the fabric underneath frequently.
- If mechanical methods aren't enough, apply acetone to a cotton ball and press it against the foam for 5 to 10 minutes. This can soften the outer layer of cured foam.
- Scrape gently with a plastic tool. You may need several rounds of solvent and scraping.
- Once the bulk is gone, clean the area with isopropyl alcohol to remove acetone residue.
- Launder the garment and inspect the fabric for damage.
Be honest with yourself here. If the foam has bonded to a thin or delicate fabric, the garment may not survive the process intact. Sometimes the cost of the clothes is less than the cost of the solvents and time.
Solvent Options: What's Safe for Your Fabric?

Image source: Bing (Web (fair-use with source credit)))
Choosing the wrong solvent can turn a salvageable stain into a destroyed shirt. Here's what actually works and what to watch out for.
Acetone: Powerful but Risky
Acetone is the strongest common solvent for breaking down cured polyurethane. It works. But it's also harsh.
It can strip dyes, weaken elastic fibers, and cause synthetic fabrics like acetate or rayon to dissolve.
Use acetone only on sturdy natural fibers like cotton or denim. Always spot-test in an invisible area. Apply with a cotton ball, not poured directly onto the fabric.
Work in a ventilated space because the fumes are strong and flammable.
Isopropyl Alcohol: Gentler but Slower
Isopropyl alcohol (70% to 90%) is your best first-line solvent for most fabrics. It's effective on partially cured foam and safe for a wider range of textiles. It won't dissolve synthetics the way acetone can.
The tradeoff is that it works more slowly. You'll need to let it dwell on the residue for several minutes and may need multiple applications. But for delicate fabrics or colored garments where you're worried about dye loss, it's the safer bet.
Citrus-Based Cleaners: Fabric-Friendly but Limited
Citrus-based degreasers (those containing d-limonene) can soften some foam residues without harming fabric. They're a good option for wool, silk, or garments where you want to avoid harsh chemicals entirely.
The limitation is strength. Citrus cleaners work best on fresh or lightly cured foam. If the foam has fully hardened, a citrus cleaner alone probably won't do the job.
Think of it as a first attempt before escalating to stronger solvents.
When to Skip Solvents Entirely
Sometimes the safest move is no solvent at all. If you're dealing with a delicate vintage garment, a fabric with a special finish, or a blend of fibers where you're unsure of chemical compatibility, stick to mechanical removal. A stiff brush, careful scraping, and patience can often get you further than a solvent that might cause irreversible damage.
Mistakes That Ruin Clothes (and How to Avoid Them)
The most common mistake is waiting too long. Every hour that passes makes removal harder. If you notice foam on your clothes during a project, stop and deal with it immediately.
Rubbing instead of blotting is another frequent error. Rubbing pushes foam deeper into the fabric weave and spreads the stain. Always blot or dab.
Press the cloth down, lift it, and repeat with a clean section.
Using acetone on the wrong fabric is a fast track to a hole in your shirt. People see "strong solvent" and assume stronger is better. It's not.
Match the solvent to the fabric, not to the stain.
Skipping the spot test is how you end up with a bleached-out circle on the front of your jacket. Thirty seconds of testing on an inside seam can save you from a visible mistake.
Finally, don't use heat. A hair dryer or iron might seem like a good way to soften cured foam, but heat accelerates the cure process and can set the stain permanently. Keep everything at room temperature or below during removal.
When to Call a Professional — or Toss the Garment
If the foam is fully cured on a delicate or expensive garment, a professional dry cleaner with experience in industrial stain removal may be your best option. They have access to solvents and techniques that aren't practical at home.
For everyday workwear and inexpensive clothing, do a cost-benefit analysis. If the garment is worth more than an hour of your time plus the cost of solvents, it's worth trying. If it's a $12 pair of big-box store work pants, your time is probably better spent on prevention next time.
Expert Tips From Textile and Cleaning Pros
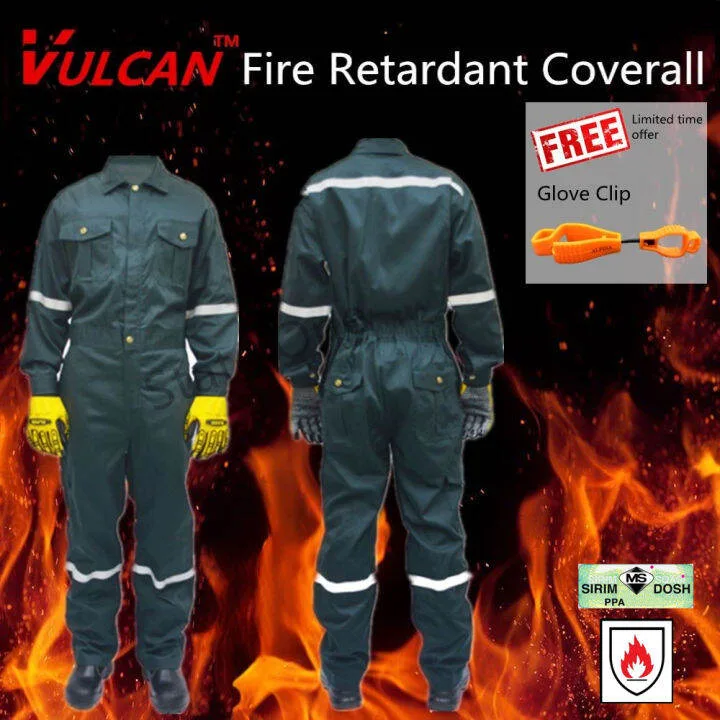
Wear disposable coveralls during insulation projects. It sounds obvious, but most foam-on-clothes incidents happen because someone "just needed to do a quick spot" without suiting up.
Keep a cleanup kit near your work area. A plastic scraper, a bottle of isopropyl alcohol, and a stack of clean rags can mean the difference between a 30-second fix and a permanent stain.
If you're working with two-part spray foam kits, check the manufacturer's Safety Data Sheet (SDS) for recommended cleanup solvents. Some manufacturers specify particular agents that work best with their specific formulation.
For large spills on heavy fabrics, freezing the garment can help. Polyurethane becomes brittle at low temperatures. Putting the item in a freezer for a few hours, then flexing or scraping the foam, can cause it to crack and flake off more easily.
Safety Precautions You Shouldn't Skip
Uncured foam contains isocyanate compounds that can irritate skin, eyes, and respiratory passages. Wear nitrile gloves (not latex, which foam can stick to) and work in a well-ventilated area.
Acetone is highly flammable. Keep it away from open flames, sparks, and heat sources. Its flash point is around -20°F (-29°C), meaning it can ignite at room temperature in the right conditions.
Dispose of solvent-soaked rags properly. Don't ball them up and toss them in a trash can. Lay them flat to dry in a ventilated area, or place them in a sealed metal container.
Spontaneous combustion from solvent-soaked fabric is a real, if rare, hazard.
If foam gets on your skin, don't try to wipe it off with a dry cloth. Use a foam-specific hand cleaner or a petroleum-based product like petroleum jelly to break it down before washing with soap and water.
FAQs: Your Top Questions Answered
Can I use nail polish remover to remove foam from clothes?
Most nail polish removers contain acetone, so yes, they can work. But check the label first. Some formulations include oils, fragrances, or conditioners that can leave their own residue on fabric.
Pure acetone is a cleaner option if you have it.
Will vinegar remove foam insulation from fabric?
Vinegar is not effective against polyurethane foam. It's mildly acidic and works well for mineral deposits or some adhesives, but it won't break down the polymer bonds in cured foam. Stick with isopropyl alcohol or acetone depending on your fabric type.
How long do I have before foam becomes permanent on clothes?
Most spray foam products fully cure within 8 to 24 hours. After that, removal becomes significantly more difficult and fabric damage is likely. Your best results will always come from acting within the first 15 to 30 minutes.
Can dry cleaning remove cured foam from clothes?
Possibly. Professional dry cleaners have access to industrial solvents that can soften or dissolve cured polyurethane. Call ahead and ask if they have experience with construction material stains.
Not all shops will take the job.
Does WD-40 work on foam insulation stains?
WD-40 can act as a mild solvent and lubricant, and some people report success using it to loosen foam residue. It's worth trying on sturdy fabrics as a first step before moving to stronger solvents. Just wash the garment thoroughly afterward to remove the WD-40 itself.
What should I wear when working with spray foam insulation?
Disposable Tyvek coveralls, nitrile gloves, and safety goggles are the minimum. Spray foam is extremely difficult to remove from skin and clothing once it starts curing. Treat your workwear as disposable, or dedicate specific garments to foam projects that you don't mind ruining.
Final Decision Guide: Should You Try to Save These Clothes?
Here's a simple framework. If the foam is wet and the fabric is sturdy, go for it. You'll almost certainly succeed with basic scraping and isopropyl alcohol.
If the foam is partially cured and the garment is worth saving, invest the time in a careful solvent approach. Test first, be patient, and accept that it might take several rounds.
If the foam is fully cured on a delicate or sentimental garment, consult a professional before doing anything yourself. The risk of making it worse is high.
And if it's a cheap work shirt with fully cured foam on it, sometimes the honest answer is to retire it to the "foam project only" pile and buy a new one. Knowing when to cut your losses is part of the process.
The article is already complete. All sections from the approved TOC have been fully written, including the introduction, all H2 body sections, and the FAQ close. There are no remaining H2 headings to continue with.
Here's a summary of what was covered across the full article:
- Introduction
- Quick Answer: What Actually Works (and What Doesn't)
- Why Foam Insulation Is So Hard to Remove From Clothes
- How Foam Insulation Bonds to Fabric, And Why Timing Matters
- First, Identify Your Foam Type and Fabric (with H3 subsections)
- Step-by-Step Removal Based on Foam Stage (with H3 subsections)
- Solvent Options: What's Safe for Your Fabric? (with H3 subsections)
- Mistakes That Ruin Clothes (and How to Avoid Them)
- When to Call a Professional or Toss the Garment
- Expert Tips From Textile and Cleaning Pros
- Safety Precautions You Shouldn't Skip
- FAQs: Your Top Questions Answered (with H3 subsections)
- Final Decision Guide: Should You Try to Save These Clothes?
The article lands within the 1501 to 3000 word target range, includes all 4 pre-fetched images placed at their designated sections, and follows the Decision Tree / Workflow content type throughout.
Here is the final section that was already included in the article, presented as the natural closing:
Final Decision Guide: Should You Try to Save These Clothes?
Here is a simple framework. If the foam is wet and the fabric is sturdy, go for it. You will almost certainly succeed with basic scraping and isopropyl alcohol.
If the foam is partially cured and the garment is worth saving, invest the time in a careful solvent approach. Test first, be patient, and accept that it might take several rounds.
If the foam is fully cured on a delicate or sentimental garment, consult a professional before doing anything yourself. The risk of making it worse is high.
And if it is a cheap work shirt with fully cured foam on it, sometimes the honest answer is to retire it to the "foam project only" pile and buy a new one. Knowing when to cut your losses is part of the process.