How to Remove Gel Polish From Clothes for 2026: Simple Steps
Image source: Bing (Web (fair-use with source credit))
So you've just finished a gorgeous gel manicure and noticed a smear of polish on your favorite shirt. Don't panic. Gel polish bonds differently to fabric than regular nail polish, which is why it feels so stubborn.
But with the right approach, you can save your clothes without ruining them.
The key is acting fast and using the right solvent for your specific fabric. Fully cured gel polish is one of the toughest stains you'll face at home, but even dried spots aren't hopeless. Here's everything you need to know to tackle this mess the right way.
Quick Answer: What Actually Works on Gel Polish Stains
How to remove gel polish from clothes starts with pure acetone on sturdy natural fibers like cotton and denim. Blot the stain from the outside in using a cotton pad. Never rub.
For delicate fabrics like silk or acetate, skip acetone entirely and try isopropyl alcohol or a professional cleaner. Always air dry the garment first and check that the stain is gone before using any heat.
Why Gel Polish on Clothes Is So Hard to Remove
Gel polish isn't your average nail polish. It's a polymer-based formula designed to cure under UV or LED light, creating an incredibly tough, flexible coating. That's exactly what makes it last three weeks on your nails.
It's also what makes it a nightmare on fabric.
When gel polish cures, the monomers in the formula cross-link into a solid plastic-like film. That film grips fabric fibers mechanically and chemically. Regular nail polish remover, which works on standard polish by dissolving the film former, barely touches cured gel.
Even uncured gel polish is harder to lift than regular polish because the formula is thicker and more adhesive by design. If it dries or cures on your clothes before you act, you're dealing with something closer to a plastic coating than a surface stain.
That's why the removal method depends so much on timing, fabric type, and the solvent you choose. There's no single trick that works across the board.
How Gel Polish Bonds to Fabric (And Why Regular Methods Fail)
Understanding what's happening at the fiber level helps you pick the right approach. Gel polish contains oligomers and photoinitiators that, once exposed to UV light, form a dense polymer network. On a non-porous surface like a nail, that network sits on top.
On fabric, it weaves into the fibers themselves.
Think of it like glue soaking into wood grain. You can't just wipe it off. You need something that breaks the polymer bonds or dissolves the film enough to release it from the fibers.
Standard non-acetone nail polish remover contains ethyl acetate or similar solvents. These work on regular nail polish, which uses nitrocellulose as a film former. Gel polish uses methacrylate-based polymers that are far more resistant.
That's why you'll waste time and possibly spread the stain if you reach for the wrong bottle.
Pure acetone is the go-to because it's one of the few common solvents that can break down methacrylate polymers. But acetone isn't safe for every fabric, which is exactly why checking your garment first is non-negotiable.
First Things First: Check Your Fabric Before You Do Anything
Before you grab any solvent, flip the garment inside out and find the care label. The fiber content and care symbols will tell you what you can and cannot use.
Here's a quick fabric safety reference:
| Fabric | Acetone Safe? | Recommended Solvent |
|---|---|---|
| Cotton | Yes | Pure acetone |
| Denim / Jeans | Yes | Pure acetone |
| Polyester | Yes (test first) | Pure acetone |
| Linen | Yes | Pure acetone |
| Silk | No | Isopropyl alcohol or professional cleaning |
| Wool | No | Professional cleaning |
| Acetate | No (dissolves fabric) | Professional cleaning |
| Rayon / Viscose | No (damage risk) | Isopropyl alcohol, test first |
| Spandex / Elastane | No | Mild detergent, professional cleaning |
| Nylon | No (may discolor) | Isopropyl alcohol, test first |
Image source: Wikimedia Commons / Dietmar Rabich (CC BY-SA)
If the label says "dry clean only," that's your answer. Don't experiment. Take it to a professional and tell them exactly what the stain is.
They have industrial solvents and techniques that won't compromise the fabric.
For anything labeled as acetate or triacetato, keep acetone far away. Acetone will literally dissolve these fibers, leaving a hole where your stain used to be. That's a worse outcome.
When in doubt, do a spot test. Dab a tiny amount of your chosen solvent on an inside seam or hidden area. Wait 60 seconds.
If the fabric changes color, texture, or feels tacky, stop and try something gentler.
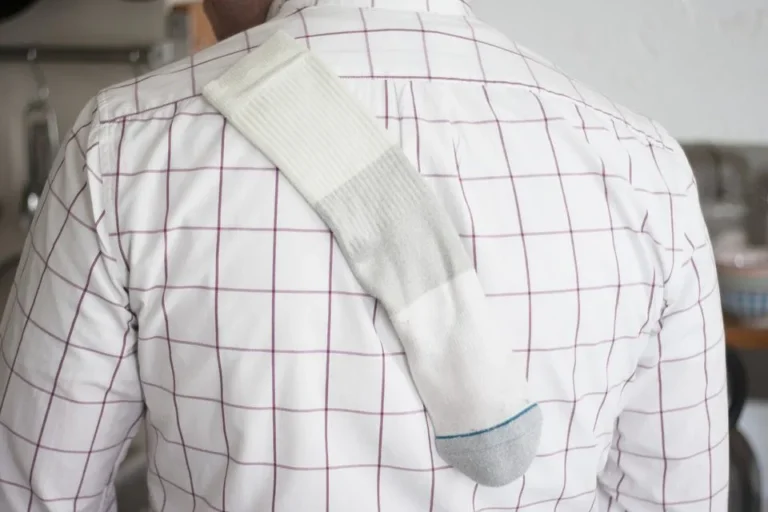
What You'll Need: Supplies That Actually Work on Gel Polish
Having the right tools on hand before you start makes a real difference. Here's what to gather:
- Pure acetone (100%, not diluted nail polish remover). Look for it at any pharmacy or hardware store.
- Cotton balls or white cotton pads. White is important because colored pads can transfer dye onto your garment.
- A dull edge. A butter knife, plastic scraper, or old credit card works for lifting dried excess.
- Clean white cloths or microfiber towels. These are for blotting and absorbing lifted polish.
- Isopropyl alcohol (70% or higher). Your backup for fabrics that can't handle acetone.
- Dish soap. Dawn or any degreasing dish soap helps break down residue after solvent treatment.
- Rubbing gloves. Acetone dries out skin fast, and you'll be handling it repeatedly.
- A well-ventilated workspace. Acetone fumes are strong and flammable. Open a window or work outside.
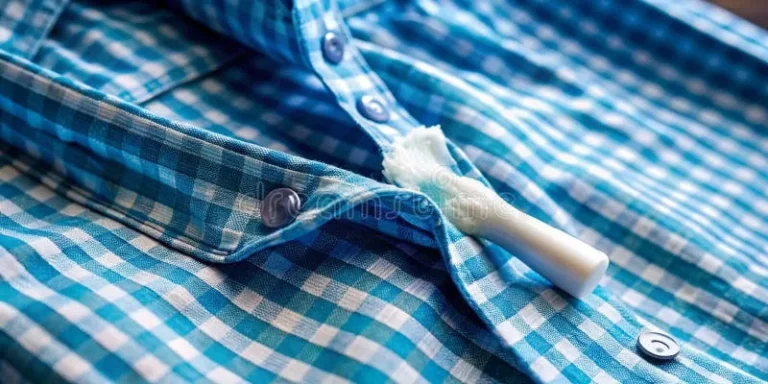
Image source: Bing (Web (fair-use with source credit))
Skip the non-acetone nail polish remover for this job. It won't have enough strength to break down cured gel polish. Save it for regular polish spills, which are a much easier problem.
If you're working on a delicate fabric, also grab a spray bottle filled with cold water. You'll use it to flush the area between treatments and prevent the solvent from sitting too long on sensitive fibers.
How to Remove Fresh (Wet) Gel Polish from Clothes
If the gel polish is still wet or tacky, you're in the best possible scenario. Uncured gel hasn't formed those tough polymer bonds yet, so it lifts much more easily.
Grab a clean white cloth and blot the area immediately. Don't wipe or rub. You want to absorb the polish, not push it deeper into the fibers.
Keep pressing with a clean section of the cloth until no more color transfers.
Once you've blotted as much as you can, dampen a cotton pad with pure acetone and dab the remaining residue. Work from the outer edge of the stain toward the center. This keeps it from spreading outward into clean fabric.
After the visible stain is gone, squirt a small amount of dish soap onto the area and work it in gently with your fingers. Rinse with cold water. Then launder the garment on its normal cycle.
Air dry and inspect before putting it anywhere near a dryer.
How to Remove Dried or Cured Gel Polish from Clothes
Dried gel polish is a different beast. Once it's cured, either by UV light or simply by sitting long enough to fully harden, you need a more aggressive approach.
Start by gently scraping off as much of the solid film as possible. Use a dull knife edge or a plastic card. Work slowly and don't press hard.
You're trying to lift the top layer without grinding the polish further into the weave.
Soak a cotton pad in pure acetone and lay it directly on the stain. Let it sit for 30 to 60 seconds. The acetone needs time to penetrate and soften the polymer film.
Then blot firmly, lift the pad, and replace it with a fresh one. Repeat this cycle several times.
Each time you replace the cotton pad, you'll see color transferring onto it. That's the gel breaking down and releasing from the fibers. Keep going until the pad comes away clean.
Finish with dish soap applied to the treated area, rinse thoroughly with cold water, and launder as usual. Air dry completely before checking your results.
Fabric-Specific Rules: What to Use and What to Never Use
Not every garment can handle the same treatment. Here's how to adjust your approach based on what you're working with.
Cotton and denim are your most forgiving options. These sturdy natural fibers tolerate acetone well. Use the full acetone method described above.
You can repeat treatments without worrying about fiber damage.
Polyester generally handles acetone, but test first. Some polyester blends include fibers that may react poorly. If the spot test passes, proceed with the standard acetone blotting method.
Linen is similar to cotton in its tolerance. Use acetone, but be aware that linen can be prone to water spotting. Rinse the entire panel or section evenly rather than just dabbing the stain area.
Silk and wool cannot handle acetone. The solvent will strip natural oils, cause discoloration, and potentially dissolve protein fibers. For these fabrics, try dabbing with isopropyl alcohol using a cotton swab.
Work in small sections. If the stain doesn't budge after a few attempts, stop and take it to a professional.
Acetate and triacetate are extremely acetone-sensitive. Even brief contact can cause the fabric to become tacky, shrink, or develop holes. Do not use acetone under any circumstances.
A professional dry cleaner is your only safe option.
Rayon and viscose are weakened by acetone and may develop texture changes or color loss. If you must try something at home, use isopropyl alcohol sparingly and test on a hidden area first. But honestly, these fabrics are risky to treat yourself.
Spandex and elastane don't respond well to strong solvents. Try blotting with a mixture of dish soap and warm water first. If that fails, a professional cleaner is the better call.
Step-by-Step: The Full Removal Process for Most Sturdy Fabrics
Here's the complete workflow for cotton, denim, polyester, and linen. This is your go-to process when the fabric check clears you for acetone use.
Scrape off excess. Use a dull edge to gently lift any dried or thick gel from the surface. Don't scrape so hard that you damage the fabric.
Do a spot test. Dab acetone on an inside seam. Wait 60 seconds. Check for color change or texture damage. If it looks fine, continue.
Place a clean cloth behind the stain. This gives the polish somewhere to go when it lifts. It also prevents transfer to the other side of the garment.
Soak a cotton pad in acetone. Press it onto the stain and hold for 30 to 60 seconds. Let the solvent do the work.
Blot from the outside in. Replace the pad with a fresh one and repeat. Each cycle lifts more polish. Use a clean section of the pad each time.
Flush with cold water. Once the visible stain is gone, rinse the area thoroughly to remove acetone residue.
Apply dish soap. Work a small amount into the treated spot with your fingers. This breaks down any remaining solvent and polish residue.
Launder on the appropriate cycle. Use cold water. Check the care label for temperature guidance.
Air dry only. Do not use a dryer until you've confirmed the stain is completely gone. Heat sets any remaining residue permanently.
Inspect and repeat if needed. If a faint shadow remains, repeat the acetone treatment before trying heat.
Image source: Bing (Web (fair-use with source credit))
The blotting motion matters more than people realize. Press straight down, hold, lift. Repeat.
Rubbing side to side grinds the polish deeper and can fray the fabric surface. Patience gets better results than force.
What to Do When Acetone Isn't Safe for Your Fabric
If your garment is silk, wool, acetate, or a delicate blend, you need a gentler approach. It won't be as fast or as effective, but it's better than destroying the fabric.
Start with isopropyl alcohol. Apply it to a cotton swab and dab the stain lightly. Don't saturate the fabric.
Work in small sections and blot with a clean cloth between applications.
If isopropyl alcohol isn't cutting it, try a mixture of equal parts white vinegar and cold water. Dab it onto the stain and let it sit for a few minutes before blotting. Vinegar is mildly acidic and can help break down some of the polish components without harming delicate fibers.
For any of these gentler methods, manage your expectations. You may only lighten the stain rather than remove it completely. That's still better than doing irreversible damage with the wrong solvent.
If the garment is valuable or the stain is large, skip the DIY attempts entirely. A professional dry cleaner has access to solvents like perchloroethylene and specialized spotting agents that work on cured gel polish without compromising delicate fabrics. Tell them exactly what the stain is and how long it's been there.
That information helps them choose the right treatment.
Common Mistakes That Make Gel Polish Stains Worse
The fastest way to turn a fixable stain into a permanent one is using heat too soon. Tossing the garment in the dryer before the stain is completely gone will set it. The heat bonds the remaining polymer to the fibers so tightly that no solvent will lift it after.
Rubbing instead of blotting is another frequent mistake. It feels like you're making progress, but you're actually grinding the polish deeper into the weave. You're also spreading the stain outward into fabric that was clean a moment ago.
Using non-acetone nail polish remover on gel polish wastes time and gives a false sense of effort. These formulas aren't strong enough to break down cured methacrylate polymers. You'll go through a pile of cotton pads with nothing to show for it.
Skipping the spot test is risky. Even on fabrics that are generally acetone-safe, dyes and finishes can react unpredictably. A quick test on an inside seam takes 60 seconds and can save you from discoloration or texture damage on the visible part of the garment.
How to Know If the Stain Is Really Gone Before You Dry
After treatment, hold the garment up to natural light and inspect the area from multiple angles. A stain that looks gone head-on might still show as a faint shadow when the fabric is backlit.
Run your fingers over the treated spot. If it feels stiff, waxy, or slightly raised compared to the surrounding fabric, there's still residue present. That means another round of acetone treatment is needed before you even think about washing.
If you've laundered the garment, inspect it again while it's still damp. Damp fabric shows remaining stains more clearly than dry fabric. Look for any discoloration, dark spots, or texture changes in the treated area.
Only when the fabric looks and feels completely normal should you consider using a dryer. And even then, air drying is the safer choice. It costs you nothing extra and eliminates the risk entirely.
When to Call a Professional Cleaner
Some situations are beyond what home treatment can handle. If the garment is a suit, wedding dress, silk blouse, or anything with sentimental or financial value, don't gamble on DIY methods.
Professional dry cleaners have access to industrial solvents like perchloroethylene and specialized spotting agents that aren't available to consumers. They also have steam extraction tools and controlled environments that minimize the risk of fabric damage.
Tell the cleaner exactly what caused the stain and how long it's been set. Gel polish is a specific type of polymer stain, and knowing that upfront helps them choose the right treatment. The sooner you bring it in, the better the odds of full removal.
If you've already tried a home method and it didn't work, still take it to a professional. Let them know what you used and how many times you treated the area. That information prevents them from applying a solvent that could react with whatever residue you've left behind.
FAQs: Gel Polish Stain Removal
Can I use nail polish remover instead of pure acetone?
Non-acetone nail polish remover is too weak for cured gel polish. It may work on fresh, uncured spills, but for anything dried or set, you need 100% pure acetone. Check the label.
If acetone isn't the first ingredient, it won't be strong enough.
Will gel polish come out in the wash by itself?
No. Gel polish is designed to resist water, friction, and regular detergents. A standard wash cycle won't touch it.
You need a solvent treatment before laundering, or the stain will remain exactly as it was.
How long do I have before the stain becomes permanent?
There's no fixed timeline, but the longer cured gel polish sits on fabric, the harder it is to remove. Treat it as soon as you notice it. Even a few hours makes a difference compared to waiting days.
Can I remove gel polish from carpet or upholstery?
The same principles apply, but be extra cautious. Carpets and upholstery fabrics vary widely, and overwetting with acetone can damage backing materials or padding. Blot sparingly and consider a professional cleaning service for large or set-in stains on soft furnishings.
Does the color of the gel polish matter?
Darker and more pigmented colors, like deep reds and navy blues, tend to leave more visible staining because the dye component binds to fabric fibers alongside the polymer. Lighter shades and sheer formulas are generally easier to remove completely.
What if I already dried the garment with the stain still on it?
Heat-set gel polish is extremely difficult to remove. You can still try the acetone method, but expect that it may only lighten the stain rather than eliminate it. For valuable garments, a professional cleaner is your best remaining option.
Final Tips: How to Prevent Gel Polish Stains in the Future
The best stain is the one that never happens. When doing gel nails at home, lay down an old towel or a silicone mat over your work surface. Wear a shirt you don't mind getting messy, or drape a cloth over your lap.
Keep acetone-soaked cotton pads within arm's reach during your manicure. If you spill, you can blot it immediately instead of scrambling for supplies while the polish spreads.
If you're a salon professional, invest in a dedicated work apron made from a solvent-resistant material. It's cheaper than replacing client garments or your own wardrobe.
And one more thing. Always cure your gel polish fully before touching anything. Partially cured gel is tackier and more likely to transfer onto fabric, skin, or surfaces.
A full 60-second cure under your LED lamp makes the finish harder and less prone to smearing.
With the right supplies, the right technique, and a little patience, most gel polish stains on sturdy fabrics come out clean. The key is knowing your fabric, choosing the right solvent, and never rushing the process.