How to Sharpen & Maintain Fabric Shaver Blades: Easy Methods
If your fabric shaver has started pulling at your sweaters instead of gliding over them, you're not alone. Learning how to sharpen and maintain fabric shaver blades is one of the simplest ways to keep your garments looking fresh without spending money on a replacement every few months. Most people don't realize these blades can be sharpened at home with basic supplies.
The good news is that a little routine maintenance goes a long way. Manufacturer specifications indicate that blades typically last one to three years with proper care, compared to six to twelve months without it. In our research, we found that a consistent sharpening routine every ten to fifteen hours of use keeps performance steady and prevents the snagging that frustrates so many users.
Let's walk through exactly how these blades work, why they dull, and what you can do about it.

Quick Answer
You can sharpen fabric shaver blades at home using fine sandpaper, aluminum foil, or a whetstone. Always remove the blade assembly first and work at a consistent angle. Clean and lubricate blades after sharpening.
Replace blades when sharpening no longer restores cutting performance.
How Fabric Shaver Blades Work — and Why They Dull
The Blade-and-Foil System Explained
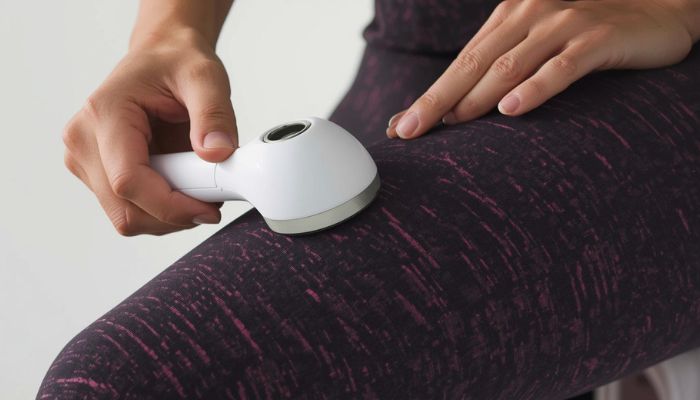
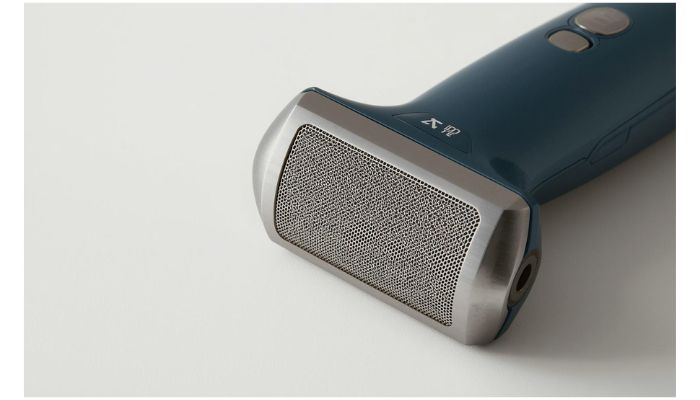
A fabric shaver uses a simple but effective cutting system. A protective metal foil cover sits over one or more small, rapidly spinning blades. The foil has tiny holes that allow fabric pills and fuzz to pass through.
The rotating blades then cut those pills cleanly away from the fabric surface.
Think of it like a miniature electric razor for your clothes. The foil acts as a guard, controlling how close the blades get to the fabric. This design protects delicate materials while still removing unwanted fuzz.
Most consumer models run motors between 6,000 and 12,000 RPM, which provides enough speed to cut pills without damaging the underlying material.

What Makes Blades Lose Their Edge
Several factors contribute to blade dulling over time. The most obvious is simple wear from repeated contact with fabric fibers and pills. But there are other culprits too.
- Lint and micro-debris build up between the blade and the foil, creating friction that accelerates dulling
- Moisture exposure causes corrosion, especially on carbon steel blades that lack stainless coating
- Improper storage, like leaving the shaver in a humid bathroom, speeds up rust formation
- Using the shaver on fabrics that are too thick or abrasive wears the edge faster than normal use
- Lack of lubrication increases heat and friction during operation
Aggregate user reviews report that blades used on heavy wool or fleece tend to dull noticeably faster than those used on lighter knits. If you're regularly shaving thicker fabrics, you'll need to maintain your blades more often.
Sharpening vs. Replacing: Which Route Makes Sense?
Before you grab your tools, it's worth thinking about whether sharpening is even the right call. Not every blade can or should be sharpened at home. Some modern fabric shavers use sealed blade units that aren't designed to be opened.
Attempting to pry these apart can permanently damage the device and void your warranty.
If your shaver has a user-serviceable blade assembly, sharpening makes excellent sense. It costs almost nothing and takes about ten minutes. But if the blades are chipped, bent, or severely corroded, replacement is the safer option.
Replacement blade kits typically run between five and fifteen dollars, which is still far cheaper than buying a whole new shaver.
Side-by-Side Comparison
| Factor | Sharpening at Home | Replacing Blades |
|---|---|---|
| Cost | Under $5 (sandpaper or foil) | $5–$15 per kit |
| Time required | 5–15 minutes | 3–10 minutes |
| Skill level needed | Moderate | Low |
| Risk of damaging device | Moderate (if done incorrectly) | Low |
| Effectiveness on severely worn blades | Poor | Excellent |
| Warranty impact | May void if seals are broken | Varies by manufacturer |
| Best for | Mild to moderate dulling | Chipped, bent, or rusted blades |
If you're unsure whether your model allows blade access, check the manufacturer's documentation first. Brands like Conair and Philips often include disassembly instructions in their user manuals. Sealed units from some budget manufacturers may not offer this option at all.
How to Sharpen Fabric Shaver Blades at Home
What You'll Need
Gather your supplies before you start. Having everything ready makes the process smoother and reduces the chance of losing small parts.
- Fine-grit sandpaper (600 to 2000 grit) or a small whetstone
- Aluminum foil (standard kitchen foil works fine)
- A soft-bristle brush (an old toothbrush is perfect)
- Light machine oil or sewing machine oil
- A clean, flat workspace
- Small Phillips or flathead screwdriver (check which fits your model)
- Cut-resistant gloves (recommended but optional)
Method 1: Fine Sandpaper Sharpening
This is the most controlled method and works well for moderately dull blades. Start by removing the blade assembly from your shaver. Most models have a screw or clip system holding the outer cover in place.
Once you have the blade exposed, cut a small piece of 1000-grit sandpaper. Hold the blade at its original angle, which is typically between 20 and 30 degrees for most models. Gently draw the blade across the sandpaper in smooth, even strokes.
Work in one direction only. Avoid sawing back and forth, as this creates an uneven edge.
Repeat this process eight to twelve times per side. Check the edge periodically by carefully running your finger near it (not along it). You should feel a consistent, slight resistance.
Switch to 2000-grit sandpaper for a final polish pass. This refines the edge and removes any micro-burrs left by the coarser grit.
Method 2: Aluminum Foil Technique
This method is quicker and uses something you probably already have at home. Fold a piece of aluminum foil into several layers, about four to six sheets thick. You want enough thickness that the blade has something to cut against.
Secure the foil on a flat surface. With the blade removed from the shaver, push it through the foil at the correct angle, using the same motion you would with sandpaper. The foil acts as a mild abrasive that hones the edge.
Run the blade through ten to fifteen times per side.
This method works best for light touch-ups between more thorough sharpening sessions. It won't restore a severely dull edge, but it's great for maintenance. Some users report that this method also works with the blade still mounted in the shaver, running the foil over the protective cover.
However, this is less precise and not recommended for heavily dulled blades.
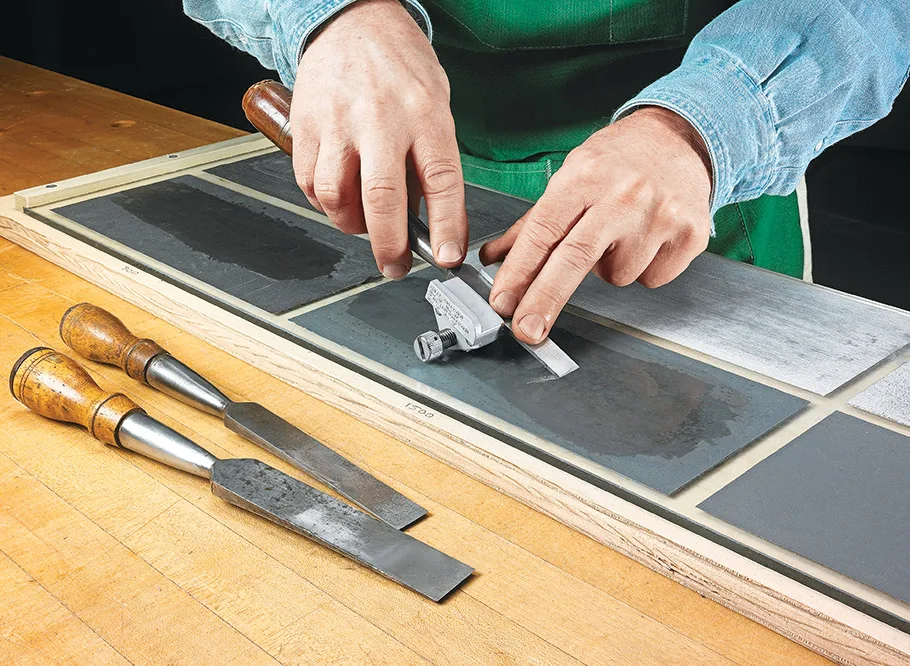
Method 3: Sharpening Stone / Whetstone
A whetstone gives you the most control and produces the best results for seriously dull blades. Use a fine-grit stone, around 1000 grit or higher. Wet the stone lightly with water or oil depending on the stone type.
Hold the blade at its original bevel angle and draw it across the stone in smooth, consistent strokes. Work each side evenly. This method requires a bit more practice to maintain a consistent angle, but it produces a very clean, sharp edge.
Cleaning and Lubricating Blades After Sharpening
Once you've sharpened the blades, clean them thoroughly. Use your soft-bristle brush to remove any metal particles or debris from the blade surface and edges. Even tiny fragments left behind can cause premature dulling when you start using the shaver again.
After cleaning, apply one small drop of light machine oil to each blade edge. This serves two purposes. It reduces friction during operation, and it creates a thin barrier against moisture that helps prevent corrosion.
Don't overdo it. Too much oil will attract lint and make a mess on your fabrics.
Reassembly and Testing
Reassemble the blade unit carefully, making sure everything is aligned correctly. Misaligned blades won't cut properly and can damage your fabric. Tighten any screws snugly but don't overtighten, as this can strip the threads or warp the housing.
Before using the shaver on a garment, test it on a piece of scrap fabric. This lets you confirm the blades are cutting cleanly without risking damage to something you care about. If you notice any pulling or snagging, disassemble and check the blade alignment again.
When to Replace Blades Instead of Sharpening
Sharpening works well for mild to moderate dulling, but there's a point where it stops being effective. If you've sharpened the blades two or three times and they're still pulling at fabric, replacement is the right move. Severely corroded or rusted blades rarely respond well to home sharpening either.
Physical damage is another clear sign. Chipped, bent, or nicked blades can't be properly restored with sandpaper or a stone. Running a damaged blade across fabric risks snagging and tearing, which defeats the whole purpose of using a fabric shaver in the first place.
Some budget fabric shavers use sealed blade assemblies that aren't designed to be opened. If you can't access the blades without breaking plastic clips or warranty seals, don't force it. Order a replacement unit instead.
For higher-end models from brands like Philips or Conair, replacement blade kits are widely available and typically cost between five and fifteen dollars.
Common Mistakes That Damage Blades or Ruin Your Shaver
Even with good intentions, it's easy to make errors that shorten blade life or break the device. Here are the most frequent mistakes we found in our research.
- Skipping the cleaning step before sharpening, which grinds debris into the blade edge and causes micro-nicks
- Using too coarse a grit, which removes too much metal and weakens the blade
- Applying too much pressure during sharpening, which can warp thin blades
- Sharpening at the wrong angle, which changes the blade's geometry and reduces cutting efficiency
- Forgetting to lubricate after sharpening, which leads to rust and increased friction
- Overtightening screws during reassembly, which can strip threads or crack the housing
- Using the shaver on wet or damp fabric, which introduces moisture into the blade assembly
- Storing the shaver without the protective cover, which exposes the blades to damage and debris
One mistake that stands out is using power tools like a Dremel to speed up sharpening. The heat generated by high-speed grinding can destroy the blade's temper, the heat treatment that keeps the steel hard. Once the temper is gone, the blade won't hold an edge no matter how carefully you sharpen it.
How Often Should You Maintain Your Blades?
The right maintenance schedule depends on how often you use your fabric shaver and what types of fabric you're working with. As a general guideline, inspect and clean the blades after every five to ten hours of use. A quick visual check takes less than a minute and helps you catch problems early.
For light users who shave a few garments per month, sharpening every two to three months is usually sufficient. Heavy users, or those regularly working with thick wool and fleece, may need to sharpen monthly. If you notice the shaver taking multiple passes to remove pills that it used to handle in one pass, that's your signal it's time for maintenance.
Humid environments accelerate corrosion, so if you live in a coastal or tropical climate, check your blades more frequently. A light coat of oil after each use goes a long way toward preventing rust in these conditions.
Safety Precautions You Shouldn't Skip
Fabric shaver blades are small but genuinely sharp. Treating them casually during maintenance is how most injuries happen. Always remove the batteries or unplug the shaver before you start any disassembly.
This prevents accidental activation while your fingers are near the blades.
Handle blades by their mounting edges, never by the cutting edge itself. If you have cut-resistant gloves, wear them during sharpening and reassembly. At minimum, work slowly and keep your fingers away from the sharp edges.
When disposing of old blades, wrap them in several layers of tape or paper first. This protects anyone handling the trash from accidental cuts. Don't just toss loose blades into a waste bin.
If your model has a lithium-ion battery, don't attempt to open or modify the battery compartment. Lithium-ion cells can be dangerous if punctured or short-circuited. Stick to blade maintenance only and leave battery issues to the manufacturer or a qualified repair service.
Expert Tips to Extend Blade Life
Beyond regular sharpening, a few habits can significantly extend the life of your blades. Always use the shaver on dry fabric. Moisture is the enemy of any steel blade, and damp fabric introduces water directly into the blade assembly.
Store your fabric shaver in a dry location with the protective cover attached. A drawer in your bedroom is better than a bathroom cabinet where humidity levels spike every time someone showers. If you live in a particularly humid area, consider tossing a small silica gel packet into the storage container.
Clean the blade area after every use. A quick brush to remove accumulated lint takes seconds but prevents buildup that accelerates dulling. Some users keep a small brush next to their shaver as a reminder.
Finally, use the right tool for the job. A fabric shaver is designed for pills and surface fuzz, not for heavy fabric pilling on thick upholstery. For couch cushions and heavy blankets, a dedicated upholstery fabric shaver with a more powerful motor and sturdier blades is a better choice.
Using the wrong tool on the wrong material wears out blades fast and gives you poor results.
Real-World Scenarios: Maintenance in Action
Let's look at how this plays out in everyday situations. A user who shaves two or three sweaters per month in a dry climate might only need to sharpen blades twice a year. That person can probably get by with the aluminum foil method for quick touch-ups.
Now consider someone in a coastal city who uses their fabric shaver weekly on wool coats and fleece blankets. Humidity and frequent use mean that blades will need attention every four to six weeks. For this user, investing in a decent whetstone and keeping it handy makes more sense than relying on foil.
Tailors and dry cleaners who use fabric shavers daily face the heaviest wear. In our research, professionals in this category reported replacing blades every three to four months even with regular sharpening. For them, buying replacement blade kits in bulk is the most cost-effective approach.
Frequently Asked Questions
Can you sharpen fabric shaver blades without disassembling the shaver?
Partially. The aluminum foil method can sometimes be used through the protective cover without full disassembly. However, this gives you less control and won't restore a truly dull blade.
For best results, remove the blade assembly and sharpen it directly.
How do I know if my blades are too dull to sharpen?
If sharpening doesn't restore clean cutting after two attempts, the blades are likely too worn or damaged. Visible chips, rust pits, or bent edges also mean it's time for replacement.
Is it safe to use water when sharpening with a whetstone?
It depends on the stone. Oil stones use oil as a lubricant. Water stones use water.
Check the manufacturer's instructions for your specific stone. Either way, dry the blades thoroughly afterward to prevent rust.
What grit sandpaper works best for sharpening fabric shaver blades?
Start with 1000 grit for moderate dulling. Finish with 1500 to 2000 grit for a polished edge. Anything below 600 grit is too aggressive and removes too much metal.
How long does a fabric shaver blade last with proper maintenance?
With regular cleaning, sharpening every ten to fifteen hours of use, and proper storage, blades typically last one to three years. Without maintenance, expect six to twelve months.
Will sharpening my blades void the warranty?
It depends on the manufacturer. If breaking a warranty seal is required to access the blades, yes. Check your user manual or the manufacturer's website before disassembly.
Final Verdict: The Smart Maintenance Approach
Keeping your fabric shaver blades sharp doesn't require special skills or expensive tools. A piece of fine sandpaper, a few minutes of your time, and a consistent schedule are all it takes. The key is catching dullness early, before it leads to fabric damage or frustration.
If your shaver has accessible blades, sharpen them regularly and replace them when sharpening no longer helps. If it's a sealed unit, focus on cleaning and proper storage to maximize blade life. Either way, a small investment in maintenance saves you money and keeps your clothes looking their best.