How to Stop Fabric From Fraying in 2026 (Pro Tips & Tricks)
There's nothing more frustrating than spending hours on a sewing project only to watch the edges unravel after the first wash. If you've ever wondered how to stop fabric from fraying, you're not alone. It's one of the most common problems sewers deal with, whether you're hemming pants, finishing a quilt, or making a simple tote bag.
The good news is that the right fix depends on a few key factors: your fabric type, your tools, and how permanent you need the finish to be. In our research, we found that most fraying issues come down to using the wrong method for the wrong fabric. For example, the standard ⅝-inch seam allowance used in commercial patterns exists specifically to give you enough room to finish edges properly.
Let's break down exactly how to match the right technique to your project.
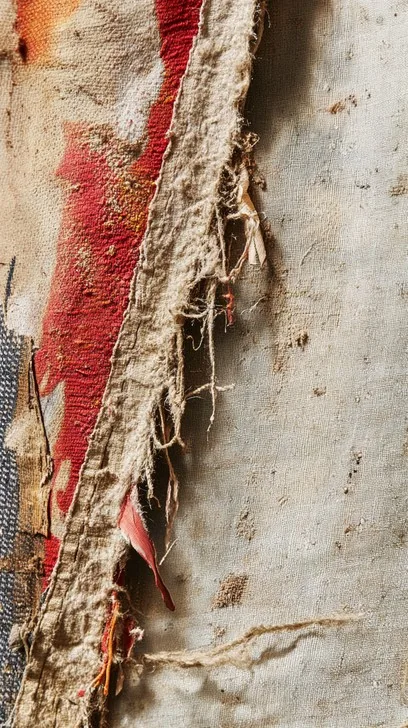
Image source: Bing (Web (fair-use with source credit))
Quick Answer: The Best Ways to Stop Fabric from Fraying
The fastest way to stop fraying is to match your method to your fabric. Use pinking shears or a zigzag stitch on woven fabrics. Use a serger or stretch stitch on knits.
Apply fabric glue or seam sealant for no-sew fixes. For synthetics, a hot knife or lighter can seal edges instantly. Always test your chosen method on a scrap piece first.
How Fabric Fraying Actually Works
Fraying happens when individual threads at a cut edge work loose from the fabric structure. Once one thread pulls free, it takes neighboring threads with it. The edge slowly unravels, sometimes within a single wash cycle.
Woven fabrics fray the most because their threads run in straight, perpendicular lines. Cut across those lines and nothing holds the cross-threads in place. The looser the weave, the faster it frays.
A loosely woven muslin will fall apart quicker than a tight twill denim.
Knit fabrics behave differently. They don't fray in the traditional sense, but they do curl at cut edges and can run (like a ladder in stockings). So when we talk about stopping fraying on knits, we're really talking about stabilizing and securing those edges.
Non-woven fabrics like felt and interfacing don't fray at all. Their fibers are bonded together, not woven or knitted. That's why felt is a popular choice for kids' crafts and no-sew projects.
Synthetic fabrics like polyester and nylon can be heat-sealed. The fibers melt slightly and fuse together when exposed to high heat. Natural fibers like cotton and linen can't be melted, so they need mechanical or adhesive solutions.
Understanding your fabric's construction is the single most important step. Everything else flows from there.
What Type of Fabric Are You Working With?
Before you reach for any tool or product, identify what you're dealing with. The wrong method can damage delicate fabric or simply not hold up.
Woven fabrics have a grid-like structure. Think cotton shirting, linen, denim, canvas, and quilting cotton. These fray significantly and need a solid edge finish.
If you can see individual threads running horizontally and vertically, it's woven.
Knit fabrics have interlocking loops. Jersey, interlock, rib knit, and sweatshirt fleece all fall here. They stretch and curl rather than fray.
You need a method that moves with the fabric, not one that locks it rigid.
Synthetic fabrics include polyester, nylon, rayon, and acetate. Many of these can be heat-sealed. But be careful, too much heat will scorch or warp them.
Always test on a scrap first.
Delicate fabrics like chiffon, organza, and silk charmeuse need lightweight solutions. Heavy glue or thick stitching can weigh them down or leave visible marks.
Here's a quick reference:
| Fabric Type | Fraying Risk | Best Methods |
|---|---|---|
| Tight weave (denim, twill) | Moderate | Pinking, zigzag, serger |
| Loose weave (muslin, linen) | High | Serger, bias binding, turned hem |
| Knit (jersey, interlock) | Low (curls instead) | Serger, stretch stitch, stabilizer |
| Synthetic (polyester, nylon) | Moderate | Heat seal, serger, seam sealant |
| Delicate (chiffon, silk) | High | French seam, rolled hem, lightweight glue |
| Non-woven (felt, interfacing) | None | No edge finish needed |
If you're unsure how to identify your fabric's grain and weave, our guide on how to find grainline on fabric walks you through it step by step. Knowing the grain helps you understand which direction will fray the most.
Stopping Fraying on Woven Fabrics
Woven fabrics are where fraying is the biggest headache. The threads are literally waiting to come loose once you cut them. Here are the most effective methods, ranked from quickest to most durable.
Pinking shears are the simplest option. These scissors cut a zigzag edge that shortens the individual thread lengths, making it harder for them to pull free. They work best on tightly woven fabrics that only fray moderately.
On loose weaves, pinking alone won't hold up through repeated washing.
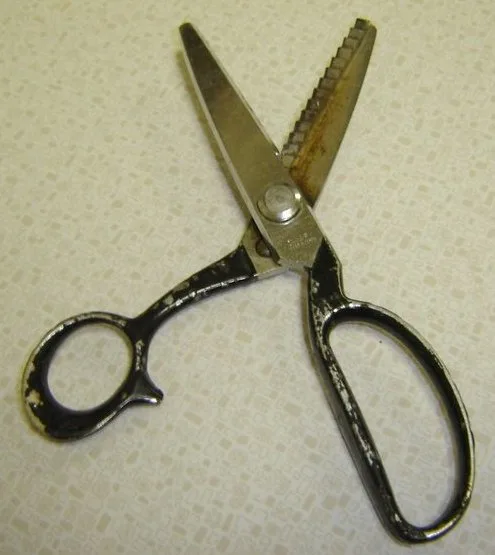
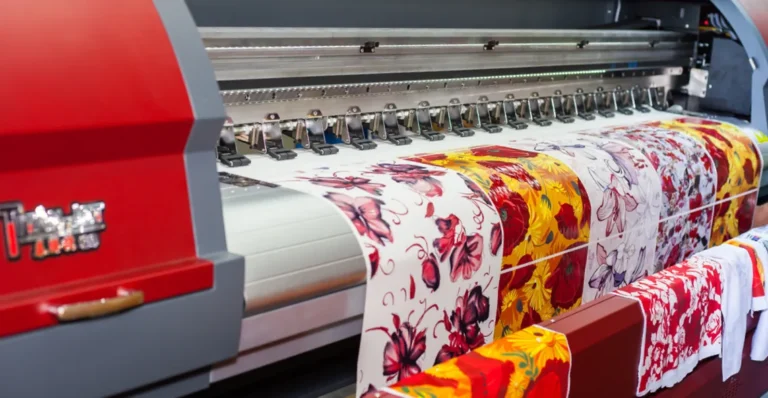
Image source: Wikimedia Commons / No machine-readable author provided. Jomegat assumed (based on copyright claims). (CC BY-SA)
Zigzag stitch on a sewing machine is a step up. Set your machine to a medium-width zigzag and stitch along the raw edge. This locks the threads in place with thread, which is far more secure than pinking alone.
It's a great option if you don't own a serger.
A serger (overlock machine) is the gold standard for woven fabrics. It wraps the edge with thread while trimming it clean, all in one pass. If you sew regularly, a serger is worth the investment.
It finishes edges faster and more neatly than any other method.
Bias binding encases the raw edge in a strip of fabric cut on the bias (diagonal). It's fully enclosing the edge, so there's nothing left to fray. This works beautifully on quilt edges, unlined jackets, and any project where you want a decorative finish.
A turned hem is the classic approach. Fold the edge over twice (usually ¼ inch each fold) and stitch it down. The raw edge is completely hidden inside the fold.
It's simple, clean, and works on almost any woven fabric.
French seams are ideal for lightweight and sheer fabrics. You sew the wrong sides together first, trim the seam, flip it, and sew again. The raw edge is completely enclosed inside the seam.
It looks polished on both sides and never frays.
For most woven fabrics, we recommend either a serger or a turned hem. Both are durable, wash well, and look professional. Pinking is fine for projects that won't be washed often, like decorative items or crafts.
Stopping Fraying on Knit Fabrics
Knits don't fray the way wovens do, but they've got their own set of problems. Cut edges curl inward, and some knits will run if a thread gets snagged. The goal here is to stabilize the edge without adding stiffness.
A serger is the best tool for knits. It stitches and finishes in one step, and the looped stitch structure stretches with the fabric. If you're sewing with knits regularly, this is the machine to own.
A zigzag stitch works well on a standard sewing machine. Use a medium width and a slightly longer stitch length. The zigzag gives the thread room to stretch along with the fabric.
A straight stitch on a knit will pop the first time the fabric stretches.
Ballpoint needles are essential when sewing knits. They slide between the fibers instead of piercing them, which prevents runs and holes. Using a sharp needle on a knit is a common mistake that causes more damage than the fraying you're trying to prevent.
Stabilizer is your friend on tricky knits. Tear-away stabilizer placed under the edge while you sew prevents stretching and distortion. Once the stitching is done, you tear the excess away.
It's especially helpful for lightweight or slippery knits.
Clear elastic or knit stay tape can be stitched into hems and seams to prevent curling. It's a narrow strip of elastic that you sew directly into the seam line. It holds the fabric flat without adding bulk.
Steam pressing can help relax curled edges. Hold the iron just above the fabric and blast it with steam, then gently uncurl the edge with your fingers. It's not a permanent fix, but it helps during construction.
One thing to avoid: fabric glue on most knits. It creates a stiff spot that doesn't stretch with the fabric, and it often cracks after washing. Stick with stitching methods for the best results on knits.
If you're working on a project that involves fabric maintenance beyond fraying, you might also find our guide on how to get the fuzz balls off of sweaters helpful. Pilling and fraying are different problems, but they both affect how your finished project holds up over time.
Stopping Fraying on Synthetic and Delhetic Fabrics
Synthetic fabrics open up a whole different set of options because their fibers can actually melt and fuse. But delicate fabrics, whether synthetic or natural, demand a lighter hand.
Heat sealing is the standout method for synthetics like polyester, nylon, and acetate. A hot knife cutter melts through the edge and seals it in one motion. You can also use a wood-burning tool with a fine tip, or even the edge of a soldering iron.
The key is a quick, steady pass. Move too slowly and you'll melt a notch into the edge.
A lighter works in a pinch for thin synthetics. Pass the flame quickly along the cut edge, just close enough to melt the fibers. Don't hold it in one spot.
Practice on a scrap first to get the distance and speed right. Synthetic fabrics like polyester respond well to this. Cotton and linen will just singe.
Image source: Bing (Web (fair-use with source credit))
For delicate fabrics like chiffon and silk, heat sealing is off the table. These materials scorch and warp easily. Instead, use a rolled hem on your sewing machine, or hand-roll the edge and secure it with tiny slip stitches.
A French seam is another excellent choice since it fully encloses the raw edge with no exposed threads at all.
Lightweight seam sealant works on delicates when applied sparingly. Use a toothpick or the fine tip of the applicator to place a tiny bead along the edge. Too much will soak through and leave a visible stain.
Products like Dritz Fray Check dry clear and stay flexible, which is exactly what you need on sheer or lightweight fabrics.
Clear nail polish is a common DIY hack for small areas on delicate fabric. It works, but it dries stiff and can yellow over time. We'd only recommend it for emergency fixes on hidden edges, not for anything visible or washable.
One important warning: always test heat methods on a scrap. Some synthetic blends contain natural fibers that won't melt, and pure synthetics can melt too aggressively if your heat source is too hot. Once you've burned a hole in your project fabric, there's no going back.
No-Sew Methods: Glue, Sealants, and Quick Fixes
Not everyone owns a sewing machine, and not every project calls for stitching. No-sew fray prevention is fast, accessible, and surprisingly durable when you use the right product.
Seam sealant (like Dritz Fray Check or Aleene's Stop Fraying) is the most reliable no-sew option. You apply a thin bead along the cut edge, let it dry, and the flexible adhesive holds the threads in place. It dries clear, stays soft, and survives machine washing.
Drying time is typically 10 to 15 minutes.
Fabric glue is a broader category. Products like Aleene's Original Tacky Glue work for light-duty applications, but they're not as wash-resistant as dedicated seam sealant. Use fabric glue when you're bonding edges together, not just sealing a raw edge.
Clear nail polish is the household shortcut. It stops minor fraying on small areas like buttonholes or ribbon ends. The downside is stiffness and potential yellowing.
It also doesn't hold up well in the wash. Think of it as a temporary fix, not a permanent one.
Fusible hem tape is iron-on tape that bonds two layers of fabric together. Fold your hem, slip the tape inside, press with a hot iron, and the heat activates the adhesive. It works well on straight edges of medium-weight fabrics.
It's less reliable on curves or heavyweight materials because the adhesive can't always bond evenly.
Here's a quick comparison of no-sew methods:
| Method | Washable | Drying Time | Best For |
|---|---|---|---|
| Seam sealant | Yes | 10 to 15 min | Most fabrics, raw edges |
| Fabric glue | Light wash only | 1 to 24 hours | Bonding, crafts |
| Clear nail polish | No | 2 to 5 min | Buttonholes, ribbons, emergency |
| Fusible hem tape | Yes | Iron-on, instant | Hems on straight edges |
No-sew methods are great for quick fixes, craft projects, and situations where you can't bring a sewing machine. For garments that will be washed frequently, stitching methods still win on longevity. But a good seam sealant comes close, and the convenience is hard to beat.
Machine Methods: Sergers, Zigzag, and Overcast Stitches
If you've got access to a sewing machine or serger, machine finishing is the fastest and most durable way to stop fraying. Each method has its strengths depending on your fabric and project.
A serger (overlock machine) wraps the raw edge with multiple threads in one pass while trimming it clean. It's the fastest method and produces a professional finish that holds up to years of washing. Sergers use 3, 4, or 5 threads.
A 3-thread overlock is lightweight and good for most fabrics. A 4-thread setup adds a chain stitch for extra strength on seams that get stress.
Image source: Wikimedia Commons / Jeremy Mikesell (CC BY-SA)
Zigzag stitch on a standard sewing machine is the most accessible alternative. Set your stitch width to 3 to 4 mm and your length to 2 to 2.5 mm. Stitch along the raw edge, letting the needle catch the fabric on each swing.
It's not as neat as a serger, but it's effective and works on any machine.
Overcast stitch is a built-in stitch on many modern machines that mimics a serger finish. It loops over the raw edge to encase it. Check your machine's stitch menu.
If you have it, use it. It's purpose-built for edge finishing.
Coverstitch machines are a specialty option for hemming knits. They create a professional-looking hem with stretch built in. They're common in garment factories but less common in home sewing rooms.
If you're hemming a lot of t-shirts or knit garments, it's worth considering.
Straight stitch close to the edge is the simplest option, but it's also the least effective at preventing fraying. It can actually make things worse by cutting the edge with the needle and creating more loose threads. We'd skip this method unless you're combining it with another finish.
For most home sewers, a zigzag stitch is the minimum you should use on raw edges. If you're ready to invest in a serger, it'll change the speed and quality of your finishing work dramatically.
Hand-Sewn Edge Finishes That Actually Hold Up
Hand sewing isn't as fast as machine methods, but it gives you control that machines can't match. It's essential for delicate fabrics, invisible finishes, and situations where a machine would be overkill.
Whipstitch is the simplest hand-sewn edge finish. You stitch over the raw edge in a spiral pattern, wrapping the thread around the cut edge to encase it. It's quick, it works on any fabric, and it's easy to learn.
Use it on the inside of garments where the stitches won't show.
Slip stitch is nearly invisible from the right side. You fold the hem, then pick up just a thread or two of the outer fabric with each stitch. The thread travels inside the fold between stitches.
It's the go-to for blind hems on pants, skirts, and curtains.
Blanket stitch is both functional and decorative. It loops over the raw edge in evenly spaced stitches, creating a visible border. It's traditionally used on wool blankets and felt edges, but it works on any fabric where you want a visible finish.
Rolled hem by hand is the finest edge finish you can do. You roll the fabric edge between your fingers and secure it with tiny slip stitches. It takes practice, but the result is a narrow, elegant hem that's perfect for silk scarves, handkerchiefs, and lightweight fabrics.
Overcast stitch by hand is the manual version of the machine overcast. You make diagonal stitches over the raw edge at regular intervals. It's slower than a machine but gives you precise control on curves and tricky areas.
Hand finishing is slower, no question. But for couture-level results, delicate fabrics, and repairs where you can't fit the fabric under a machine needle, nothing beats it. A good hand-sewn edge finish can outlast a machine finish because you're not perforating the fabric with a needle in the same repetitive pattern.
Matching the Right Method to Your Project
With all these options, how do you pick the right one? It comes down to three questions: what's the fabric, how will the item be used, and what tools do you have?
For garments that get washed often, go with a serger, zigzag stitch, or turned hem. These hold up to repeated laundering. Seam sealant is a close second for no-sew situations.
For quilts and blankets, bias binding or a serger finish on the edges is standard. Quilt edges take a lot of handling, so you need a durable finish. A turned-and-stitched edge with a ¼-inch double fold also works well.
For crafts and decorative items that won't be washed, pinking shears or fabric glue are perfectly adequate. There's no need to over-engineer a project that lives on a shelf.
For curtains and home décor, a turned hem is the most common choice. It's clean, it adds weight to help the fabric hang properly, and it's easy to do on long straight edges.
For costumes and cosplay, you'll often work with synthetics and unusual materials. Heat sealing is your friend here. So is seam sealant for quick fixes during conventions.
For repairs on existing garments, seam sealant and fusible hem tape are the most practical. You don't always want to (or can) take apart an existing seam to re-finish it.
Here's a decision framework:
- Woven fabric, machine available, washable project: serger or zigzag
- Woven fabric, no machine, washable project: seam sealant or hand whipstitch
- Knit fabric, machine available: serger or zigzag with ballpoint needle
- Knit fabric, no machine: stabilizer plus seam sealant
- Synthetic fabric, any project: heat seal (test first)
- Delicate fabric, any project: French seam, rolled hem, or lightweight sealant
- No tools at all: clear nail polish for tiny areas, pinking shears for edges
The method that looks best isn't always the most durable. And the fastest method isn't always the right one for your fabric. Take thirty seconds to match your approach to your material before you start cutting.
Common Mistakes That Make Fraying Worse
Even with the right tools, a few habits can sabotage your edge finishes. Here are the ones we see most often.
Using a straight stitch on raw edges is the number one mistake. It doesn't encase the edge at all, and the needle perforations actually create more weak points for threads to pull loose. Always use a zigzag, overcast, or serger finish instead.
Applying too much seam sealant causes stiff spots that crack after washing. A thin bead is all you need. If you can see a raised line of dried product along the edge, you've used too much.
Heat sealing natural fibers doesn't work. Cotton, linen, silk, and wool won't melt. They'll char and burn.
Save the lighter and hot knife for synthetics only.
Cutting with dull scissors or blades jagged cuts fray more than clean ones. Sharp tools give you a clean edge that's easier to finish. If your scissors are squishing the fibers instead of slicing them, it's time to sharpen or replace them.
Skipping the scrap test. Every method should be tested on a scrap of the same fabric before you touch your project. Glue might stain, heat might warp, and stitches might pucker.
Five minutes of testing saves a ruined project.
Expert Tips for a Long-Lasting Edge Finish
A few pro habits that make a real difference.
Finish edges before you sew seams. It's much easier to work with flat pieces. Trying to finish edges after a garment is assembled means wrestling with tight spaces and curves.
Finish all cut edges, not just the ones you can see. Interior seam allowances fray too, and that unraveling weakens the whole seam over time.
Wash and dry your fabric before you cut. Pre-shrinking prevents the fabric from shifting after you've finished the edges. Cotton can shrink up to 5% on the first wash, which distorts your finished edges.
Use the selvage edge when you can. The selvage (the factory-finished edge on both sides of a bolt of fabric) never frays. If your pattern layout allows it, use it as a finished edge and save yourself the step.
Press your finished edges. A quick pass with the iron after stitching or gluing sets the finish and gives it a crisp, professional look. Heat and pressure help activate fusible products and flatten stitched edges.
Seam sealants used in this process include products like Dritz Fray Check, which is widely used in the sewing industry for edge finishing.
FAQs About Stopping Fabric from Fraying
Can I use pinking shears on all fabrics?
They work best on tightly woven fabrics like quilting cotton and denim. On loose weaves like linen or muslin, pinking alone won't hold up through washing. Pair it with a seam sealant for better results.
Does fabric glue survive machine washing?
Dedicated seam sealants like Dritz Fray Check are designed for washability. General craft fabric glues are less reliable in the wash. Check the label for wash resistance before relying on any adhesive.
What's the best way to stop fraying on a knit?
Use a serger with a ballpoint needle, or a zigzag stitch on a standard machine. Avoid fabric glue on knits, since it creates a stiff spot that cracks when the fabric stretches.
Can I use a lighter to stop fraying on cotton?
No. Cotton is a natural fiber and won't melt. It will burn.
Lighters and heat tools only work on synthetic fabrics like polyester and nylon.
Is a serger worth it for a beginner sewer?
If you sew regularly, yes. A serger finishes edges faster and more neatly than any other method. Basic models start around $200 and handle most home sewing needs.
How long does seam sealant take to dry?
Most products dry in 10 to 15 minutes. Full cure time can be up to 24 hours. Don't wash or stress the edge until the sealant is fully cured.