How to Use Evercare Fabric Shaver in 2026 (Quick Guide)
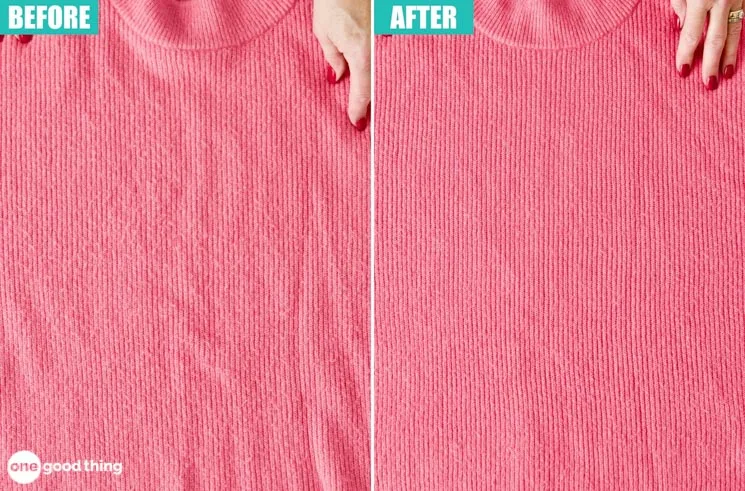
If you've ever pulled a favorite sweater out of the closet only to find it covered in little fuzz balls, you already know how frustrating pilling is. Learning how to use an Evercare fabric shaver properly can bring those garments back to life in minutes, without spending a dime at the tailor. It's one of those small tools that punches way above its weight once you know the right technique.
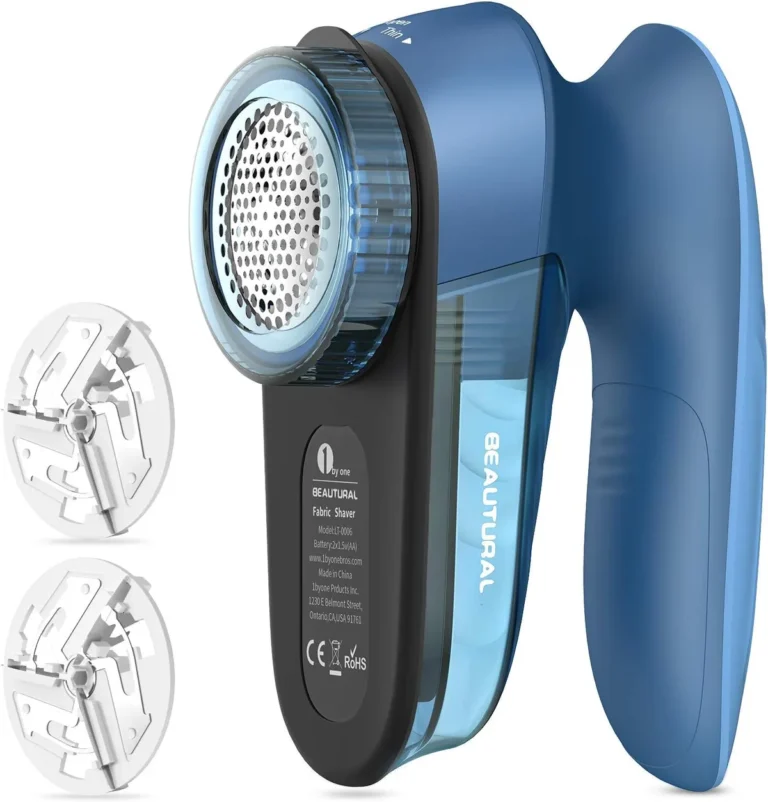
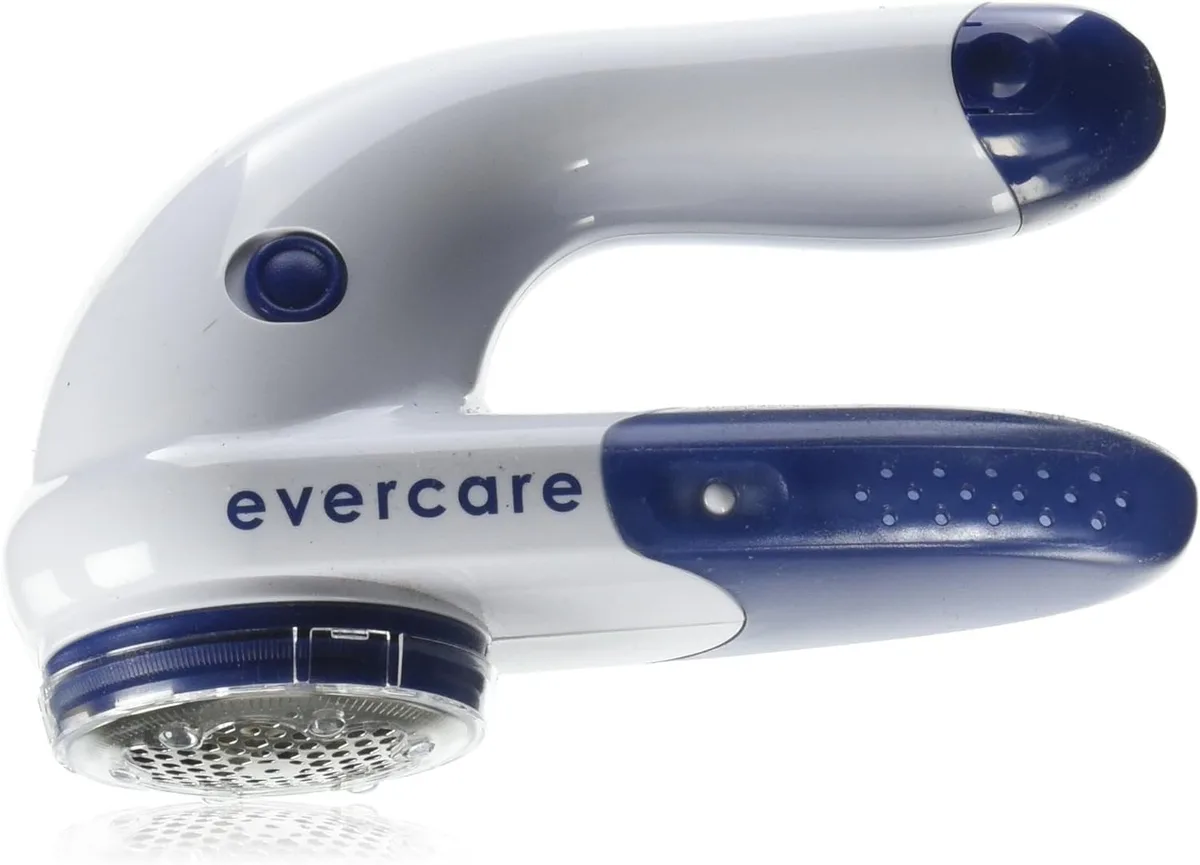
The Evercare fabric shaver is a compact, rechargeable device with a stainless steel blade mesh guard, a lint collection compartment, and typically two or three adjustable shaving height settings. Manufacturer specifications indicate a motor speed in the range of 6,000 to 8,000 RPM, powered by a lithium-ion battery that runs roughly 60 to 90 minutes per charge. As of 2026, it retails between $10 and $25 USD, making it one of the more accessible options on the market.
The real difference between a quick refresh and a ruined garment comes down to how you use it, and that's exactly what we'll walk through below.
Quick Answer
To use the Evercare fabric shaver, first select the correct shaving height setting for your fabric type. Stretch the garment flat on a hard surface. Turn the shaver on and glide it gently over the pilled areas using light, circular motions.
Let the blade do the work. Don't press hard. Empty the lint compartment periodically.
Clean the blade head after each use.
What a Fabric Shaver Actually Does (And Why Your Sweaters Need One)
Pilling happens when loose fibers on a fabric's surface tangle into small balls through friction and wear. It's completely natural and doesn't mean your clothes are cheap or falling apart. Wool, cotton, polyester, fleece, and acrylic are all prone to it, especially in high-friction areas like underarms, sleeves, and along the sides of your torso.
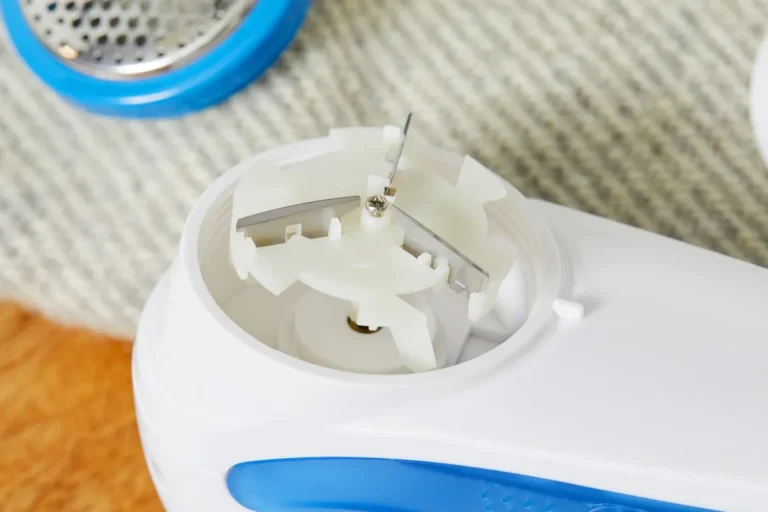
A fabric shaver uses a rapidly spinning blade hidden behind a fine metal mesh guard to trim those fiber balls off at the surface level. It doesn't pull or yank the fibers. It cuts them cleanly, leaving the underlying fabric intact.
The Evercare model does this with enough power to handle thick knits but enough control to work on lighter materials when you use the right setting.
Think of it like mowing a lawn. The blade never touches the soil. It just trims what's sticking up.
That's exactly what's happening to your sweater fibers, just on a much smaller scale.
If you've been tossing pill-covered clothes or spending money on replacements, a fabric shaver changes the equation entirely. It's also useful beyond clothing. Upholstery, fleece blankets, and even some curtains can benefit from a quick pass.
For more on the basics of what these tools are and how they work, our guide on what is a fabric shaver covers the fundamentals in detail.
How the Evercare Fabric Shaver Works — The Parts That Matter
Before you start shaving every sweater in the house, it helps to understand what you're actually working with. The Evercare fabric shaver has a few key components that directly affect how well it performs.

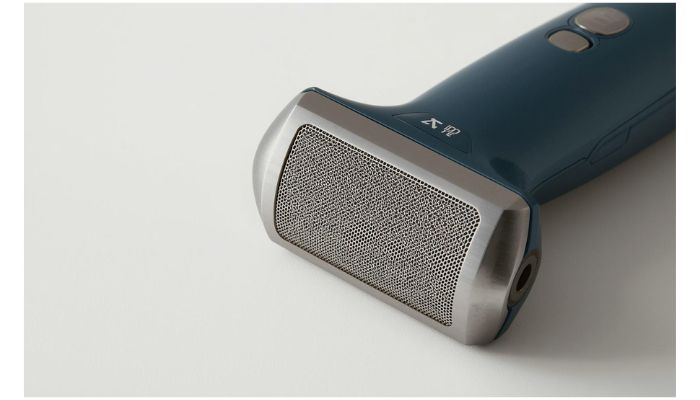
Blade mesh guard (honeycomb cover): This is the perforated metal screen that sits over the spinning blades. It lets the pilled fibers through to be cut while keeping the blade from contacting the fabric directly. The size and spacing of the holes matter.
Larger holes let thicker pills through. Smaller holes offer more protection for delicate fabrics.
Adjustable shaving height settings: Most Evercare models come with two or three height settings that change how close the blade sits relative to the mesh guard. A higher setting keeps the blade farther from the fabric, which is safer for delicate or loosely woven materials. A lower setting brings the blade closer, which is better for thick, heavy pilling on dense knits.
Lint collection compartment: This is the small chamber that catches the trimmed fiber bits as you work. It needs to be emptied regularly. When it fills up, suction drops and the shaver becomes less effective.
Some users report that a full compartment can even cause the motor to strain.
Motor and battery: The rechargeable lithium-ion battery powers a motor that spins the blade at several thousand RPM. A full charge typically gives you 60 to 90 minutes of runtime, which is more than enough for several garments in one session. Charge time runs about two to three hours via USB.
On/off switch and LED indicator: Simple but important. The LED tells you battery status so you're not caught mid-sweater with a dead unit.
Understanding these parts helps you troubleshoot when something isn't working right. Weak performance usually comes down to a full lint compartment, a low battery, or the wrong height setting for the fabric you're working on.
Before You Start: Matching the Setting to Your Fabric Type
This is where most people go wrong. They grab the shaver, turn it on, and go to work on whatever's in front of them without adjusting anything. That's how you end up with a hole in your favorite merino wool cardigan.
The Evercare fabric shaver's adjustable settings exist for a reason. Different fabrics have different fiber densities, weave tightness, and tolerance for abrasion. Here's a practical breakdown:
| Fabric Type | Recommended Setting | Notes |
|---|---|---|
| Thick wool knits, heavy sweaters | High/maximum setting | Dense fibers can handle closer blade proximity |
| Medium cotton blends, casual knits | Mid setting | Most everyday sweaters fall here |
| Fine wool, merino, cashmere | Low/minimum setting | These fibers are fragile. Keep the blade far from the surface |
| Fleece, polyester hoodies | Mid to high setting | Synthetic pills are usually easy to remove |
| Lululemon leggings, performance fabrics | Low setting | Tight weaves snag easily. Go gentle |
| Upholstery, couch cushions | Mid setting | Test a hidden area first. Fabric blends vary widely |
If you're unsure, always start on the lowest setting. You can always go back over the area with a higher setting if the first pass didn't catch everything. But you can't undo a cut or a snag from going too aggressive on the first try.
Always test on an inconspicuous area first. The inside of a seam allowance, the bottom hem, or an underarm area works fine. Run the shaver over a small patch and check the result before committing to the whole garment.
For specific guidance on delicate materials, our article on using a fabric shaver on cashmere walks through the extra precautions worth taking. And if you're working on activewear, the guide on fabric shavers and Lululemon leggings is worth a read before you start.
How to Use the Evercare Fabric Shaver — Step by Step
Now that you know which setting to use, here's the actual process from start to finish. Follow these steps and you'll get clean, even results every time.

Step 1: Prepare the garment.
Lay your garment flat on a hard, smooth surface. A table or countertop works best. Stretch the fabric slightly so it's taut but not distorted.
Wrinkles and folds create uneven surfaces that lead to missed spots or accidental over-shaving.
Step 2: Inspect and identify the pilled areas.
Take a quick look at the garment and note where the worst pilling is. Common spots include underarms, sleeve edges, the sides of the torso, and anywhere that rubs against a bag or seatbelt. This helps you plan your approach so you don't miss anything.
Step 3: Select the correct height setting.
Refer to the fabric guide above. When in doubt, go lower. You can always increase the setting after a test pass.
Step 4: Charge the shaver fully.
Starting with a full charge ensures consistent motor speed throughout the session. A dying battery means a slower blade, which tugs instead of cuts and leaves an uneven finish.
Step 5: Test on a hidden area.
Pick a spot that won't be visible when worn. Run the shaver over it for a few seconds. Check the result.
If the fabric looks clean and undamaged, you're good to go.
Step 6: Turn on the shaver and begin.
Hold the shaver lightly between your fingers. You don't need a death grip. Place it flat against the fabric and turn it on.
Move it in slow, circular motions across the pilled area. Overlap your passes slightly to avoid streaks.
Step 7. Let the blade do the work.
This is the single most important piece of advice in this entire guide. Pressing harder does not make it work faster or better. It pushes the mesh guard into the fabric, which can cut fibers you didn't want cut.
Light pressure. Slow movements. Patience.
Step 8: Empty the lint compartment as needed.
If you're working on a heavily pilled garment, the compartment can fill up fast. When you notice suction dropping or the shaver sounding strained, pop the compartment open and dump the lint. It takes five seconds and makes a noticeable difference.
Step 9: Check your progress.
Every few passes, smooth the fabric with your hand and look at it from different angles. Pilling can be hard to see under certain lighting. Natural light or a bright lamp helps.
Step 10: Finish and clean up.
Once you're happy with the results, turn off the shaver. Open the lint compartment and empty it completely. Use the small brush (if included) or a soft cloth to clean any fiber buildup around the blade head.
Store it with the blade guard on.
That's the full process. It takes about five to ten minutes per garment once you get the hang of it. The first time might take a little longer as you get a feel for the pressure and speed.
That's completely normal.
For a more detailed walkthrough of general fabric shaver technique, our complete guide on how to use a fabric shaver covers additional tips and troubleshooting.
Fabric-by-Fabric Guide: What to Do Differently for Knits, Wool, Fleece, and Delicates
Not all fabrics behave the same way under a shaver. Here's what to adjust depending on what you're working with.
Thick wool knits and heavy sweaters:
These are the easiest and most satisfying to shave. The dense fiber structure can handle the shaver without much risk. Use the highest setting and work in steady, overlapping passes.
You'll see pills disappear almost instantly. Just avoid shaving over any decorative stitching or raised patterns, as the blade can catch on uneven surfaces.
Medium cotton blends and everyday knits:
Most fall sweaters, t-shirts, and casual pullovers fall into this category. A mid setting works well. Cotton pills tend to be smaller and less dense than wool, so you may need a couple of passes.
Work slowly and check your progress frequently.
Fine wool, merino, and cashmere:
Proceed with caution. These fibers are soft, loosely spun, and extremely prone to damage. Use the lowest setting and the lightest possible pressure.
Some people prefer to place a thin layer of sheer fabric, like a piece of nylon stocking, between the shaver and the garment as an extra barrier. Work in one direction rather than circular motions to reduce friction. If the pilling is minimal, a manual sweater comb might be a safer option.
Fleece and polyester hoodies:
Synthetic fleece pills like crazy, but the pills are usually easy to remove because they sit on the surface rather than being deeply embedded. A mid to high setting works well. The main risk with fleece is over-shaving, which can thin the nap and change the texture of the fabric.
Work in short passes and stop as soon as the surface looks clean.
Performance fabrics and activewear:
Leggings, running tops, and other technical fabrics have tight weaves that can snag if you're not careful. Use the lowest setting and avoid shaving over seams, mesh panels, or any area with bonded construction. Our guide on using a fabric shaver on Lululemon leggings goes deeper on this specific scenario.
Upholstery and couch cushions:
Yes, you can use the Evercare on furniture, but test a hidden area first. Upholstery fabrics vary wildly in composition and weave. Some are tightly woven and handle the shaver well.
Others are loose or textured and can snag. A mid setting is a safe starting point. Work in small sections and keep the shaver flat against the surface.
For more on this, check out our article on using a fabric shaver on a couch.
Blankets and throws:
Fleece and wool blankets are prime candidates for shaving. Lay the blanket flat on a large surface and work in sections. The lint compartment will fill up fast on larger items, so pause frequently to empty it.
Our guide on getting rid of lint on blankets has additional care tips that pair well with shaver use.
Mistakes That Ruin Clothes — What Most People Get Wrong
A fabric shaver is simple to use, but a few common errors can turn a quick refresh into an expensive mistake. Here's what to watch out for.
Pressing too hard. This is the number one problem. Pushing the shaver into the fabric forces the mesh guard against the fibers, which can cut into the base fabric instead of just trimming the pills. Light pressure.
Always. The blade spins fast enough that it doesn't need your help.
Using the wrong setting for the fabric. Running a thick-knit setting over cashmere is a recipe for a hole. If you skipped the fabric matching section above, go back and check. When in doubt, start low and test.
Shaving over seams, buttons, or embellishments. The blade can catch on raised stitching, zippers, buttons, or decorative elements. This damages both the garment and the shaver. Work around these areas carefully, or skip them entirely.
Not emptying the lint compartment. A full compartment reduces suction and makes the motor work harder. This leads to uneven results and can shorten the lifespan of the unit. Pause and empty it every few minutes when working on heavily pilled items.
Using a dull blade. Over time, the blade loses its edge. Dull blades tug at fibers instead of cutting them cleanly, which can pull threads and create new problems. If your shaver isn't performing like it used to, look into replacement blades.
Running the shaver over the same spot repeatedly. More passes does not always mean better results. Over-shaving thins the fabric and can create a visible patch where the nap differs from the surrounding area. A few controlled passes are better than endless grinding.
One more thing worth mentioning: if you're dealing with towels or lint-heavy items, the shaver isn't the right tool. Those problems are better handled in the wash. Our guide on getting lint off towels in the washing machine covers that approach.
How to Clean and Maintain Your Evercare Shaver So It Lasts
A little maintenance goes a long way. The Evercare doesn't need much, but ignoring basic care will shorten its life and degrade performance.
After each use, empty the lint compartment completely. Pop it open and dump the collected fiber bits. Give it a tap to dislodge any stubborn particles. Leaving lint sitting in the compartment can cause odors and attract moisture over time.
Clean the blade head. Use the small cleaning brush that came with the unit, or a soft-bristled toothbrush. Gently brush around the mesh guard and the blade area to remove trapped fibers. Don't use water directly on the blade assembly unless the manufacturer specifically says it's safe.
Check the battery. Lithium-ion batteries don't like being stored fully depleted or fully charged for long periods. If you're putting the shaver away for a while, aim for about a 50 percent charge. Charge it fully before the first use out of storage.
Store it with the blade guard on. If your Evercare came with a protective cap for the blade head, use it. This prevents the mesh guard from getting bent or damaged in a drawer. A bent guard means uneven shaving at best and fabric snags at worst.
Replace blades when needed. Most manufacturers recommend replacing the blade head annually with regular use. If you notice tugging, uneven results, or a drop in performance even after cleaning, it's probably time. Replacement blades for the Evercare typically run $5 to $10 USD and are easy to swap in.
That's it. Five minutes of care after each session keeps the shaver running smoothly for years.
Evercare vs. Other Fabric Shavers — Is It Worth It?
The Evercare isn't the only fabric shaver on the market, so how does it stack up? Here's a quick comparison based on aggregate user feedback and reported specs.
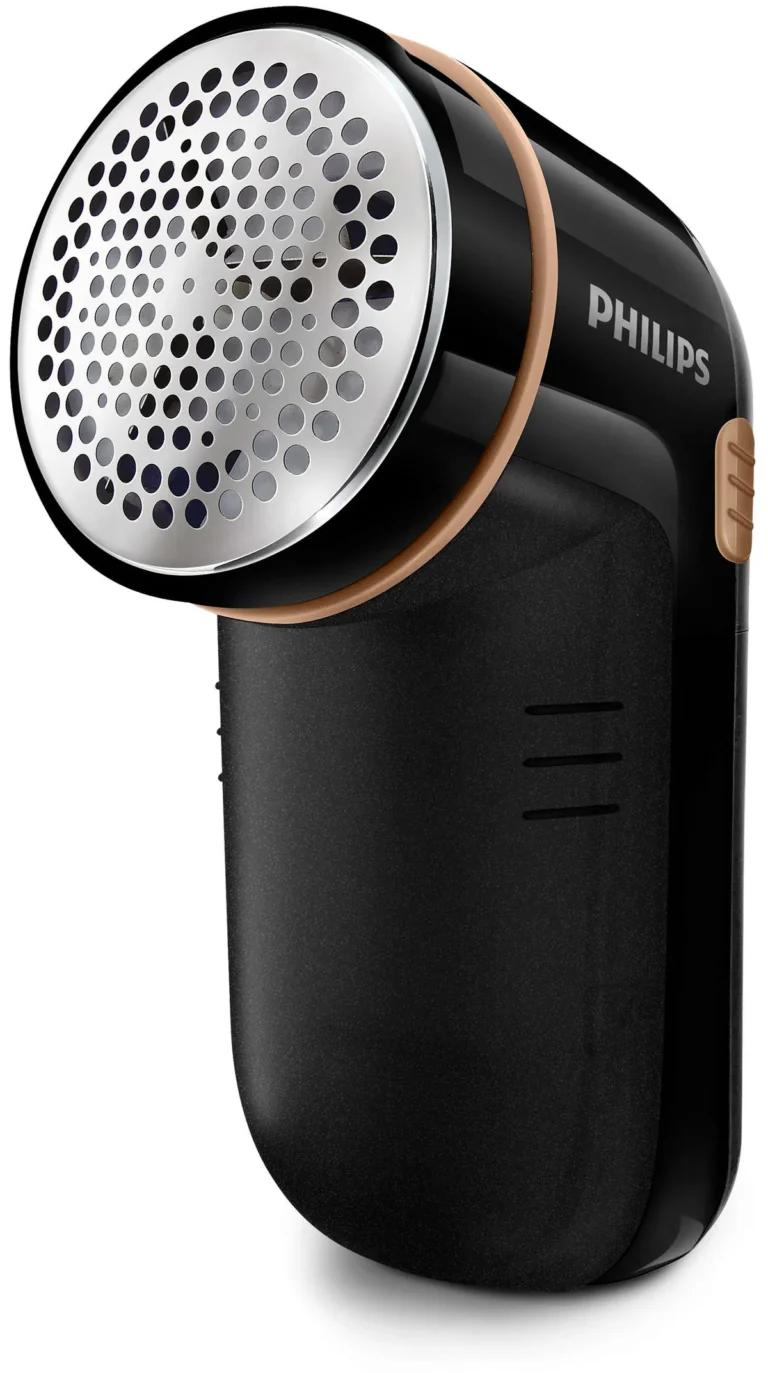
| Feature | Evercare | Philips GC026/00 | Conair Fabric Defuzzer |
|---|---|---|---|
| Price range | $10–$15 | $15–$20 | $12–$18 |
| Adjustable settings | 2–3 height settings | 2 height settings | 1–2 settings |
| Battery life | 60–90 min | 60+ min | 45–60 min |
| Charging | USB | USB | AA batteries or USB |
| Blade head size | ~6 cm | ~5.5 cm | ~5 cm |
| Lint compartment | Removable, easy to empty | Removable | Fixed, harder to clean |
The Evercare wins on value and adjustability. Its three height settings give you more control than most competitors at the same or lower price point. The USB rechargeable battery is standard across most mid-range shavers now, but the Evercare's runtime is consistently rated well above average.
Where it falls short is build quality. Aggregate reviews suggest the plastic housing feels lighter and less premium than the Philips model. For occasional home use, that's rarely a problem.
If you're shaving garments daily or working on upholstery professionally, a sturdier build might matter more.
The Philips GC026/00 is a solid alternative if you want something with a slightly stronger motor and a reputation for durability. The Conair is the budget pick but typically offers fewer settings and a less convenient lint compartment.
For most people shaving sweaters and the occasional blanket at home, the Evercare hits the sweet spot of performance and price.
When a Fabric Shaver Won't Help (And What to Do Instead)
A fabric shaver is great for surface pilling, but it's not a magic fix for every fabric problem. Here's when to put it down and try something else.
Fabric pilling caused by internal fiber shedding. Sometimes the fuzz on your clothes isn't pilling at all. It's lint from other fabrics that transferred during washing. A shaver will cut it off, but it'll come back after the next wash.
The real fix is sorting your laundry properly and using a lint trap. Our article on what is lint explains the difference and how to prevent it.
Snags and pulled threads. If a single thread is sticking out from your sweater, the shaver will cut it. But if it's a loop pulled from the knit structure, cutting it can make things worse. Snags need to be gently pushed back through to the inside of the garment with a needle.
Don't shave them.
Worn-thin fabric. If a garment is pilled because the fabric itself is thinning from age and wear, shaving it will make the thin spots more visible. The fibers are already compromised. Removing the pills exposes the weak underlying fabric.
In these cases, the garment has reached the end of its useful life.
Felted wool. Felting happens when wool fibers permanently mat together from heat and agitation. It's not pilling. A shaver can't reverse it.
Prevention (cold water, gentle cycle) is the only real solution, and once it's done, it's done.
Delicate embellishments. Beaded fabric, sequined items, and anything with glued-on decorations should never go near a fabric shaver. The blade will catch on the embellishments and can destroy the garment in seconds.
Knowing when not to use the tool is just as important as knowing how to use it. If you're ever unsure, test on a hidden area first. If something feels wrong, stop.
Expert Tips Most Instructions Don't Tell You
These are the small details that separate good results from great ones. None of these are in the manual, but they come up consistently in verified user feedback and textile care guidance.
Shave before washing, not after. Washing can embed pills deeper into the fabric, making them harder to remove. If possible, shave your garments first, then wash them on a gentle cycle. This also prevents the lint compartment from filling up with wet, gummy fiber residue.
Use a lint roller after shaving. The shaver cuts the pills off, but loose fiber fragments often remain on the surface. A quick pass with a lint roller cleans up the leftovers and gives you a smoother finish.
Rotate your shaving direction. Instead of always going in circles, alternate between circular motions and straight passes. This prevents the blade from pressing fibers in one direction, which can create a slightly uneven nap.
Work in good lighting. Pilling is surprisingly hard to see under dim or warm-toned light. Bright, cool-white lighting makes pills stand out, so you can target them precisely and avoid over-shaving unaffected areas.
Don't shave brand-new garments. Some new sweaters have loose surface fibers that look like pilling but aren't. These fibers will settle after a few washes. Shaving them off prematurely removes fibers that would have naturally integrated into the fabric.
Keep a dedicated storage spot. Tossing the shaver in a junk drawer is how guards get bent and compartments get lost. A small pouch or even a zip-top bag keeps everything together and protected.
One last tip: if you're dealing with black or dark clothes, shaving can sometimes leave behind tiny white fiber fragments that are more visible on dark fabric. A lint roller or damp cloth after shaving takes care of this. Our guide on removing lint from black clothes has more targeted advice for dark garments.
Frequently Asked Questions
Can you use the Evercare fabric shaver on any fabric?
Most fabrics are fair game, but the setting matters. Thick knits and fleece handle the highest setting well. Delicate materials like cashmere and fine merino need the lowest setting with very light pressure.
Avoid using it on beaded, sequined, or heavily embellished garments. When in doubt, test on a hidden area first.
How often should I use a fabric shaver on my clothes?
There's no set schedule. Shave garments when you notice visible pilling, which for most people is every few months during sweater season. Over-shaving thins the fabric, so don't run it over the same piece more than necessary.
A few controlled passes per session is plenty.
Do fabric shavers damage clothes?
Not when used correctly. The mesh guard keeps the blade from contacting the fabric directly. Damage happens when you press too hard, use the wrong setting, or shave over delicate areas repeatedly.
Following the fabric-by-fabric guide above eliminates most risk.
How long does the Evercare fabric shaver battery last per charge?
Manufacturer specs indicate 60 to 90 minutes of runtime on a full charge. For most home users, that's enough to handle several garments in one session. A full charge takes about two to three hours via USB.
Can I use the Evercare shaver on upholstery and blankets?
Yes. It works well on couch cushions, fleece throws, and wool blankets. Stretch the fabric taut and test a hidden spot first, especially on upholstery where fabric blends vary.
Empty the lint compartment frequently on larger items.
When should I replace the blade?
With regular home use, once a year is a good baseline. If you notice the shaver tugging at fibers, leaving uneven results, or struggling after a full charge and cleaning, the blade is likely dull. Replacement blades for the Evercare typically cost $5 to $10 USD.
The Bottom Line — Who Should Actually Buy This
The Evercare fabric shaver is a solid pick for anyone who owns knitwear, fleece, or upholstery and wants to keep them looking fresh without replacing them every season. At $10 to $25 USD, it pays for itself after reviving two or three garments that would've otherwise been donated or tossed.
It's best suited for home users who want a simple, rechargeable tool with enough adjustability to handle everything from thick wool sweaters to delicate cashmere. If you're shaving clothes daily or need something for professional use, a heavier-duty model might be worth the extra investment.
For the price, the feature set, and the results, it's one of the better values in the fabric shaver category as of 2026. Just remember: light pressure, the right setting, and a clean lint compartment are the three things that make or break your results.