How to Sew With Satin/chiffon/sheer Fabric: Complete Guide
Learning how to sew with satin, chiffon, and sheer fabric is less about raw skill and more about understanding how these materials behave under tension, heat, and a needle. The moment you place satin under a presser foot, you notice it: the fabric slides, the grain shifts, and a single wrong setting leaves permanent marks. Chiffon and other sheers add another layer of difficulty because they're so lightweight that the feed dogs can push them out of alignment before the needle even hits the thread.
The good news is that most of the frustration comes from a handful of fixable issues, things like needle choice, stabilizer use, tension settings, and cutting method. Once you've got the right setup, these fabrics sew more predictably than you'd expect. Manufacturer specifications for Microtex needles, for example, indicate that a 60/8 size works reliably on silk-weight satin and polyester chiffon without snagging or skipping stitches.
Let's walk through what actually makes the difference.
Image source: Bing (Web (fair-use with source credit))
Quick Answer
Satin, chiffon, and sheer fabrics need fine needles, light tension, and stabilizer support. Use a 60/8 or 65/9 Microtex sharp needle and polyester or silk thread. Place tissue paper between the fabric and feed dogs to prevent slippage.
Lower presser foot pressure and reduce stitch length to 1.5, 2.0 mm. French seams and rolled hems give the cleanest finish on sheers.
Quick-Reference Cheat Sheet: Satin vs. Chiffon vs. Sheer
Before diving into technique, it helps to know which fabric you're actually working with. Satin, chiffon, and "sheer" are often lumped together, but they behave quite differently under the needle. Satin has a smooth, slippery face and moderate weight.
Chiffon is ultra-lightweight, loosely woven, and prone to stretching on the bias. "Sheer" is a broad category that includes organza, tulle, voile, and georgette, each with its own stiffness and transparency level.
| Fabric | Weight | Texture | Main Challenge | Best Needle Size |
|---|---|---|---|---|
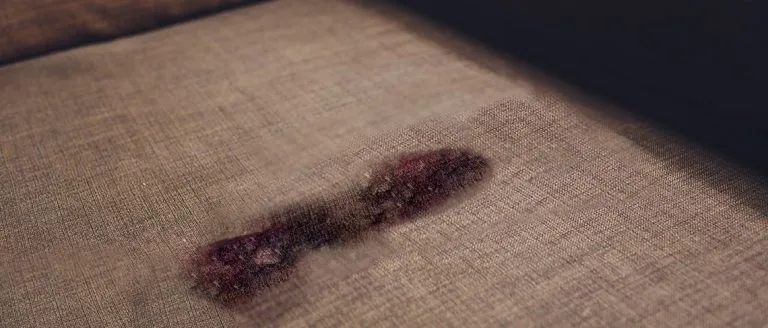
| Satin (polyester) | Medium | Smooth, slippery | Slippage, water spots | 70/10 Microtex |
| Satin (silk charmeuse) | Light-medium | Fluid, cool hand | Snagging, permanent pin holes | 60/8 Microtex |
| Chiffon (polyester) | Ultra-light | Soft, floaty | Shifting, fraying | 60/8 or 65/9 Microtex |
| Chiffon (silk) | Ultra-light | Crisp, airy | Stretching on bias | 60/8 Microtex |
| Organza | Light | Crisp, stiff | Fraying, stiffness | 65/9 Microtex |
| Tulle (fine) | Ultra-light | Net-like, fragile | Tearing, snagging | 60/8 Microtex |
| Voile | Light | Soft, semi-sheer | Shifting | 65/9 or 70/10 Universal |
If you're unsure what you've got, check the fiber content label and do a burn test on a scrap if the label is missing. Polyester melts into a hard bead, silk burns with a hair-like smell and crumbles to ash. This matters because silk satin can handle a slightly higher iron temperature than polyester satin, which will scorch or melt under a hot iron.
What Makes Slippery, Delicate Fabrics Behave Differently Under the Needle
The core issue with satin, chiffon, and sheers comes down to three things: surface friction, weave density, and heat sensitivity. Satin's satin weave creates long floats on the surface, which means the yarn can snag easily and the fabric slides against itself and the metal throat plate. Chiffon's plain weave is so open that the threads can shift out of alignment when the feed dogs grab it.
Sheers like organza fray aggressively because the fibers are fine and the weave is tight but lightweight.
Tension is the next big factor. Standard sewing machine tension, usually set around 4 to 5 on a 1 to 9 scale, is too heavy for these fabrics. It pulls the thread faster than the fabric can feed, causing puckering.
You'll want to dial the upper tension down to 2 or 3 and use a fine thread in the bobbin as well. If your machine has adjustable presser foot pressure, reduce it. Heavy presser foot pressure compresses satin and leaves permanent impressions, and it can stretch chiffon out of shape.
Heat is the silent killer here. Polyester satin and nylon tulle will melt or glaze under a high-temperature iron. Always test your iron setting on a scrap piece first.
Use a pressing cloth, a piece of silk organza or cotton muslin works well, between the iron and the fabric. For silk fabrics, you can use a slightly higher temperature but still keep it moderate and use steam sparingly to avoid water spots.
The Tools That Actually Make a Difference
You don't need a $2,000 machine to sew satin and chiffon well. But you do need the right needle, the right foot, and a few low-cost accessories that solve most of the common problems.
Needles, Pins, and Thread: What to Reach For
The single most important upgrade you can make is the needle. Standard universal needles have a slightly rounded point that can push fibers aside rather than piercing them cleanly, which leads to skipped stitches and snags on delicate fabrics. Microtex sharp needles have a thinner, sharper point that cuts through the fibers cleanly.
For satin and chiffon, start with a 60/8 or 65/9 Microtex sharp. For heavier satin like duchesse, step up to a 70/10.
Image source: Bing (Web (fair-use with source credit))
Pins matter just as much. Standard dressmaker pins can leave permanent holes in silk satin and polyester chiffon. Use extra-fine silk pins or glass-head pins with a diameter of 0.5 mm or less.
Place pins within the seam allowance only, and avoid pinning in areas that will be visible on the finished garment. Some sewers prefer pattern weights and a rotary cutter over pins entirely for these fabrics, which eliminates pin holes altogether.
For thread, match the fiber content when possible. Silk thread on silk satin gives the most seamless result because it has the same sheen and give as the fabric. Polyester thread on polyester satin or chiffon works well and is more widely available.
Use a fine thread weight, 50wt or 60wt, to reduce bulk in seams. Avoid cotton thread on synthetic fabrics because the fiber properties don't match and the seam can pucker.
Machine Feet and Attachments That Solve the Slipper Problem
A walking foot, also called an even-feed foot, is the most useful attachment for sewing satin and slippery fabrics. It has its own set of feed dogs on top of the fabric that move in sync with the machine's bottom feed dogs. This prevents the top layer from shifting ahead of the bottom layer, which is the main cause of misaligned seams on satin.
Image source: Bing (Web (fair-use with source credit))
A rolled hem foot is the next most valuable tool, especially for chiffon and sheer fabrics. It folds the fabric edge into a narrow hem as you sew, creating a clean 2 mm or 4 mm rolled hem without any pre-pressing. This is the standard finish for chiffon scarves, lightweight curtains, and sheer garment hems.
Practice on scraps first because the learning curve is real, once you get the hang of feeding the fabric into the scroll, it's incredibly fast.
A narrow hem foot and a straight stitch presser foot are also worth having. The straight stitch foot has a smaller hole than the standard zigzag foot, which gives the fabric more support right around the needle and reduces the chance of the needle pushing the fabric down into the needle plate hole. If your machine has a needle plate with a smaller hole, swap it in for delicate fabric work.
Stabilizers, Tissue Paper, and Other Secret Weapons
Tissue paper is the old-school stabilizer that still works brilliantly. Place a sheet of standard tissue paper under the fabric and over the feed dogs before sewing. It prevents the feed dogs from grabbing and stretching the fabric, and it also stops the needle from catching on the feed dogs.
After sewing, tear the tissue paper away gently. It's cheap, disposable, and effective.
Wash-away stabilizer and tear-away stabilizer are more modern options. Wash-away stabilizer dissolves completely in water, which makes it ideal for sheer fabrics where you don't want any visible stabilizer left behind. Tear-away stabilizer provides more support during sewing and is removed by tearing after the stitching is complete.
For chiffon and voile, wash-away is usually the better choice.
Spray starch is another trick worth knowing. Lightly spray the fabric with spray starch and press it before cutting. This adds temporary stiffness that makes the fabric easier to cut and handle.
The starch washes out in the first laundering. It's particularly helpful for silk chiffon, which is almost impossible to cut accurately in its natural state.
How to Prepare Satin, Chiffon, and Sheer Fabric Before You Cut
Preparation is where most sewing projects succeed or fail, and that's especially true for these fabrics. Start by pre-washing or pre-treating the fabric according to the fiber content. Silk should be hand-washed in cool water with a gentle detergent or dry-cleaned.
Polyester satin and chiffon can usually be machine-washed on a delicate cycle in a mesh laundry bag. Always check the care label first.
After washing, press the fabric on the appropriate heat setting with a pressing cloth. Don't skip this step. Wrinkles in the fabric will throw off your cutting and cause pieces to be the wrong size.
For polyester fabrics, use a low heat setting and no steam to avoid water spots. For silk, use a medium heat setting and light steam.
Lay the fabric on a large, flat surface. If you're working with satin, lay it right side up so you can see the sheen and check for any flaws before cutting. For chiffon and sheers, a single-layer layout is almost always better than folding the fabric because the layers can shift against each other.
Use pattern weights instead of pins to hold the pattern in place. A rotary cutter with a sharp blade gives cleaner edges than scissors on these fabrics.
Mark the grainline carefully. Satin and chiffon can look straight even when they're off-grain, which means the finished garment will twist on the body. Pull a thread along the cross grain to find the true grainline if you're unsure.
Mark it with tailor's chalk or a water-soluble fabric marker. Avoid using a tracing wheel on satin because it can leave permanent marks on the surface.
If you're working with a pattern, consider making a test garment in muslin first. This is especially important for bias-cut satin garments because the fabric will stretch and drape differently than woven fabrics. A muslin fitting lets you adjust the pattern without risking your good fabric.
Our research shows that sewers who test-fit in muslin report significantly fewer fitting issues on the final garment.
One more thing worth noting: if you're dealing with persistent lint or fuzz on your fabric before sewing, running a fabric shaver over the surface can clean it up without damaging the fibers. This is particularly useful on polyester satin that's been stored in a drawer and picked up static cling and lint. Just use a light touch and test on a scrap first.
Step-by-Step: Sewing Satin Without the Slippage, Snags, and Tears
Satin is the most forgiving of the three fabric types if your setup is right. The key differences from sewing standard woven fabric are in how you cut, how you pin, and how you manage tension at the machine. Once you've got those dialed in, satin sews smoothly and produces beautiful results.
Cutting Single-Layer and Double-Layer Satin
Lay satin right side up on your cutting surface. The sheen makes it easy to spot flaws, wrinkles, or snags before you commit to cutting. If you're folding the fabric for a double-layer cut, make sure both layers are smooth and aligned.
Pattern weights work better than pins here because pins can leave visible holes in the surface.
Use a rotary cutter with a sharp 45 mm blade for the cleanest edges. Dull blades pull the fibers instead of cutting them, which creates fraying before you even start sewing. Cut slowly and steadily.
Rushing causes the fabric to shift and gives you uneven edges. If you must use scissors, use sharp dressmaker shears with long blades and make smooth, continuous cuts rather than short chopping motions.
Pinning and Marking Without Leaving Marks
Place pins only within the seam allowance. For visible areas like hems and necklines, use pattern weights or clips instead. When you do pin, insert the pins parallel to the selvage rather than perpendicular, this distributes the stress more evenly and reduces the chance of the fabric shifting.
For marking, use tailor's chalk or a water-soluble fabric marker. Test the marker on a scrap first because some water-soluble inks can leave a faint residue on polyester satin.
If you need to mark darts or notches, make small snips with embroidery scissors at the edge of the fabric. Use the smallest snips you can manage. On satin, any mark you make is potentially permanent, so err on the side of less.
A sewing guide on fabric tools notes that rotary cutters with ergonomic handles give you better control on slippery surfaces, which makes a real difference on satin.
Stitching Seams That Hold Without Puckering
Set your stitch length to 2.0 to 2.5 mm for seaming satin. Longer stitches look more refined and are less likely to cause puckering. Reduce the upper thread tension to 2 or 3.
Test on a folded scrap before sewing your actual seam. The scrap should lie flat with no visible puckering and the stitches should not break when you stretch the seam gently.
Place a sheet of tissue paper under the fabric before you start sewing. This prevents the feed dogs from grabbing and distorting the fabric. It also stops the needle from punching the fabric down into the needle plate hole.
After you've sewn the seam, tear away the tissue paper from both sides. It comes off easily and won't damage the fabric.
Backstitch at the beginning and end of each seam to lock the stitches. If your machine has a thread cutter, use it. If not, pull the threads to the wrong side and tie them by hand.
Trimming threads close to the surface on satin can cause pulls, so leave 1/4-inch thread tails.
Finishing Edges: French Seams, Hong Kong Finishes, and Rolled Hems
For satin garments that will be seen from the inside, like unlined jackets or visible seam finishes, use a French seam or a Hong Kong finish rather than a serged edge. French seams enclose the raw edge completely inside a folded seam. Sew the seam wrong sides together first with a 3/8-inch seam allowance.
Trim it to 1/8 inch. Press the seam open. Fold the fabric right sides together, enclosing the raw edge.
Press again and sew a 1/4-inch seam. The result is a clean, enclosed seam with no raw edges showing.
Image source: Bing (Web (fair-use with source credit))
Hong Kong finishes use bias-cut seam binding to enclose each raw edge. Cut 3/4-inch wide bias strips from silk charmeuse, polyester satin, or lightweight lining fabric. Sew the binding to the raw edge right sides together.
Wrap the binding around the raw edge and stitch in the ditch from the right side. This gives a polished, couture-quality finish that's narrow enough for facings and hems on lightweight garments.
If you're using a serger, set the differential feed to 1.0 or slightly below. This prevents the serger from stretching the fabric as it feeds through. Use a 3-thread narrow overlock stitch rather than a 4-thread stitch to reduce bulk.
Test on scraps first and adjust the knife depth so it trims cleanly without cutting into the seam.
Step-by-Step: Sewing Chiffon and Lightweight Sheers
Chiffon is the most challenging of the three because it's so lightweight and so prone to shifting. The techniques that work for satin need to be adjusted for chiffon's open weave and extreme drape. The good news is that once you've practiced on a few scraps, the process becomes intuitive.
Keeping Chiffon From Shifting and Stretching
The biggest enemy of chiffon is the feed dogs. They grab the fabric and push it forward faster than the top layer moves, causing the two layers to misalign. A walking foot solves most of this problem.
If you don't have a walking foot, try lowering the presser foot pressure to its lightest setting and sewing slowly.
Place tissue paper under and over the chiffon. Yes, both sides. The top layer of tissue paper prevents the presser foot from catching on the fabric and dragging it.
The bottom layer prevents the feed dogs from grabbing. After sewing, tear away all the tissue paper gently. Any small pieces left behind can be removed with a pair of fine-pointed tweezers.
Cut chiffon with a rotary cutter on a self-healing mat. Hold the fabric down with pattern weights, not pins. If you must pin, use the finest silk pins you can find and place them only in the seam allowance.
Chiffon shifts so easily that even the weight of a pin can distort the fabric around it.
Narrow Seams, Baby Hems, and Invisible Finishes
For chiffon, narrow seams are your best friend. A 1/4-inch seam allowance is standard for chiffon garments. Sew the seam with a 1/4-inch allowance, trim it to 1/8 inch, and press it to one side.
This narrow seam is less visible through the sheer fabric and creates less bulk.
Baby hems and rolled hems are the standard finishes for chiffon edges. A baby hem is a narrow double-fold hem. Fold the edge under 1/8 inch and press.
Fold it under again 1/8 inch and press. Stitch close to the inner fold. This creates a clean 1/8-inch hem.
A rolled hem foot does the same thing faster and more consistently. Use the 2 mm scroll for chiffon and lightweight sheers.
For an invisible hem, try a blind hem by hand. Fold the hem up and take tiny stitches that catch only a few threads of the main fabric. This creates a hem that's nearly invisible from the right side.
It takes longer than machine hems, but the result is worth it for formal garments and special occasion pieces.
Dealing with Transparency: Layering, Lining, and Underlining
Chiffon is transparent, which means you need to plan for opacity. The simplest solution is to line the garment with a lightweight lining fabric like silk habotai, cotton batiste, or polyester bemberg. Cut the lining from the same pattern pieces as the outer fabric.
Sew the chiffon and lining together at the neckline, armholes, and hem, treating them as one layer. This is called "bagging" the lining.
Underlining is another option. Instead of a separate lining, you sew a lightweight fabric to the wrong side of each chiffon piece before construction. This gives the chiffon more body and opacity while maintaining the drape.
Silk organza, cotton voile, and polyester georgette all work as underlinings. Baste the underlining to the chiffon around the edges and along the seam lines before sewing the garment together.
For a double-layer chiffon design, simply cut two layers of chiffon for each pattern piece and sew them together as one. This is the easiest way to add opacity without a separate lining. The two layers move together naturally and the garment still looks sheer, just less transparent.
Step-by-Step: Sewing Tulle, Organza, and Structured Sheers
Tulle and organza behave differently from chiffon because they have more body and stiffness. Tulle is a net-like fabric that can be fine and soft or stiff and scratchy. Organza is crisp and holds its shape.
Both require some adjustments to standard sewing techniques.
Handling Stiff Sheers and Netting
Organza frays aggressively, so seam finishes matter more here than with any other sheer fabric. French seams are the cleanest option. You can also use a narrow zigzag stitch, 1.5 mm wide and 2.0 mm long, along the raw edge before seaming.
This locks the fibers and reduces fraying during construction.
Tulle doesn't fray at all, which is one of its advantages. You can cut it with scissors or a rotary cutter. The challenge with tulle is that it's lightweight and can be hard to control under the presser foot.
Use a longer stitch length, 3.0 to 3.5 mm, and a slightly higher tension to keep the stitches from pulling through the net.
For both organza and tulle, a straight stitch presser foot and a straight stitch needle plate give the best results. The smaller hole in the needle plate supports the fabric right around the needle and prevents the fabric from being pushed down into the machine.
Gathering and Ruffling Tulle Without Tearing
Tulle gathers beautifully, which is why it's so popular for skirts, sleeves, and decorative elements. To gather tulle, sew two parallel rows of basting stitches along the edge you want to gather. Use the longest stitch length on your machine and don't backstitch.
Pull the bobbin threads from one end to create the gathers.
For heavy gathers, like a tulle skirt, consider using a gathering foot. It gathers the fabric as you sew and distributes the fullness evenly. If you're gathering multiple layers of tulle, sew each layer separately and then join them.
Trying to gather five layers of tulle at once will overwhelm your machine and produce uneven results.
When attaching gathered tulle to another fabric, pin the gathered edge to the base fabric right sides together. Distribute the gathers evenly before pinning. Sew with the gathered side up so you can see the gathers and adjust them as you sew.
Use a slightly longer stitch length to avoid catching and tearing the tulle.
Common Mistakes and How to Fix Them
The most common mistake with satin and sheers is using the wrong needle. A universal needle that's too large will leave visible holes and cause snags. Switch to a Microtex sharp in 60/8 or 65/9 and the problem usually disappears.
Replace the needle every eight hours of sewing time or at the start of each new project. A dull needle causes skipped stitches and pulls the fabric.
Puckering is the next most common issue. It's almost always caused by too much tension. Reduce the upper thread tension and make sure you're using a fine thread in both the needle and the bobbin.
If puckering persists, check that the bobbin is wound evenly and inserted correctly. An unevenly wound bobbin creates inconsistent tension that shows up as puckering on the right side.
Fabric shifting during sewing is usually a feed dog problem. Use a walking foot or place tissue paper under the fabric. If the top layer is still shifting ahead of the bottom layer, try holding the fabric gently in front of and behind the presser foot as you sew.
Don't pull the fabric, just guide it. Let the feed dogs do the work.
Permanent pin holes and needle marks are a fact of life with satin and sheers. The best fix is prevention: use pattern weights instead of pins, and handle the fabric as little as possible. If you do end up with pin holes on silk, gently rub the area with a fingertip or a soft cloth.
The warmth and oils from your skin can sometimes close the fibers enough to make the holes less visible. On polyester, there's no reliable fix, so prevention is everything.
Skipped stitches are usually a needle-and-thread mismatch. Make sure the needle size matches the thread weight. A 60/8 needle with 60wt thread works well.
If you're still getting skipped stitches, try a new needle. Sometimes a needle has a tiny burr that's invisible to the eye but catches the thread.
Pressing and Heat Settings for Delicate Fabrics
Pressing is not optional with satin and sheers. It's the difference between a garment that looks homemade and one that looks professional. Always use a pressing cloth between the iron and the fabric.
Silk organza makes an excellent pressing cloth for silk fabrics because it can handle the same heat levels. Cotton muslin works well for polyester fabrics.
For polyester satin and chiffon, set your iron to the lowest heat setting, usually labeled "synthetic" or "polyester." Use no steam. Steam can cause water spots on polyester satin that won't come out. If you need to remove wrinkles, use a spray bottle with distilled water and press dry.
For silk fabrics, use the "silk" or "wool" setting on your iron. Steam is fine in moderation. Press on the wrong side whenever possible to avoid creating shine on the right side.
If you do get shine marks from the iron, try steaming the area and letting it dry without pressing. Sometimes the fibers will relax and the shine will fade.
Use a tailor's ham for curved seams and darts. The ham supports the curve so you can press it without flattening the shape. A seam roll works for straight seams.
Press seams open on satin and sheers whenever possible. Pressing to one side creates a ridge that shows through on sheer fabrics.
Let the fabric cool completely before moving it. Satin and chiffon hold their shape better when they're pressed and then left to cool in place. Moving the fabric while it's still warm can distort the pressed shape and create new wrinkles.
Care, Storage, and Long-Term Maintenance for Satin and Sheer Garments
Satin and sheer fabrics need more careful storage than standard woven fabrics. Store satin garments on padded hangers to prevent shoulder bumps. Wire hangers create permanent creases in the fabric.
For chiffon and organza, hanging is also the best option, but make sure the garment isn't too heavy for the fabric. Heavy beaded chiffon gowns should be stored flat to prevent stretching.
Use breathable garment bags, not plastic. Plastic traps moisture and can cause mildew on natural fibers like silk. Cotton or muslin garment bags let the fabric breathe while keeping dust off.
Add a lavender sachet or cedar block to deter moths, especially for silk garments. Keep satin and sheers out of direct sunlight, which can fade colors and weaken fibers over time.
For cleaning, always follow the care label. Most silk satin and silk chiffon should be dry-cleaned. Polyester satin and chiffon can often be hand-washed in cool water with a gentle detergent.
Never wring or twist these fabrics. Roll them in a clean towel to remove excess water and lay flat to dry. Iron while still slightly damp on the wrong side with a pressing cloth.
Frequently Asked Questions
Can I use a regular sewing machine needle for satin?
You can, but you shouldn't. Universal needles have a slightly rounded point that can snag satin fibers and cause skipped stitches. A Microtex sharp needle in 60/8 or 65/9 pierces the fabric cleanly and produces much better results.
The difference is noticeable immediately.
What thread weight works best for chiffon?
Use a fine thread, 50wt or 60wt polyester or silk thread. Heavier thread creates visible bulk in seams on lightweight chiffon. Match the thread weight to the fabric weight for the best drape and seam appearance.
How do I stop satin from slipping while sewing?
Use a walking foot and place tissue paper under the fabric. Lower the presser foot pressure if your machine allows it. Hold the fabric gently in front of and behind the presser foot to guide it without pulling.
Is a serger good for sheer fabrics?
A serger works well for seam finishing on sheers, but use a 3-thread narrow overlock stitch to reduce bulk. Set the differential feed to 1.0 or below to prevent stretching. Test on scraps first because sergers can be aggressive on lightweight fabrics.
How do I remove water spots from silk satin?
Gently steam the area and let it dry without pressing. The steam can relax the fibers enough to minimize the spot. For stubborn spots, take the garment to a professional dry cleaner.
Don't try to rub or scrub the spot, which can damage the satin finish.
Can I press chiffon with a regular iron?
Yes, but use the lowest heat setting and a pressing cloth. Test on a scrap first. Polyester chiffon can melt under a hot iron, so always start with the lowest setting and increase only if needed.
Use no steam on polyester chiffon to avoid water spots.